
Jun
So you wanna make a strawberry cow
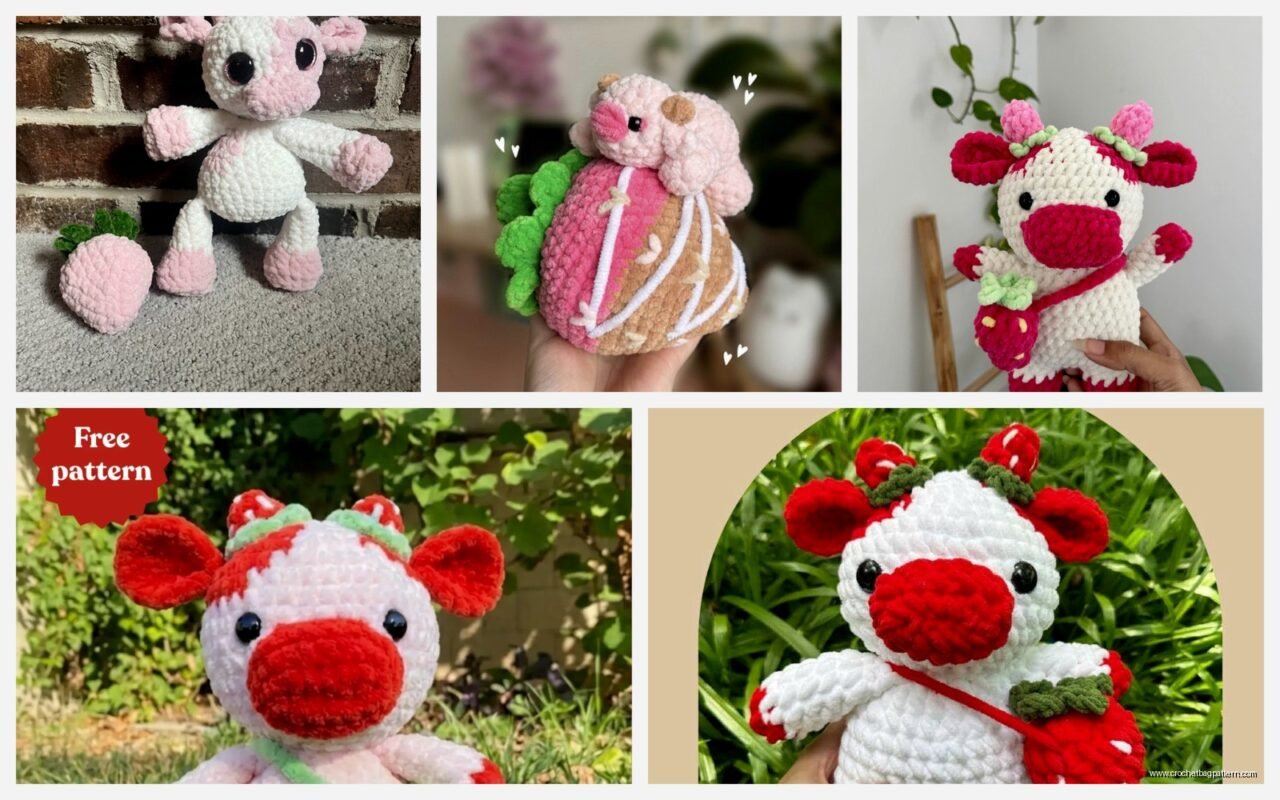
Okay so the strawberry cow thing – I made my first one back in spring 2022 when I was basically living on my couch watching The Great British Bake Off for like the third time, and honestly it turned out way cuter than I expected. The whole strawberry cow aesthetic is basically a regular cow but pink and white instead of the traditional black and white, with little strawberry details, and people go absolutely nuts for them.
First thing you gotta know is that you’re making an amigurumi which just means a stuffed crochet thing. The basic shape is gonna be similar to any cow pattern but the color work is where it gets specific.
Yarn and materials
I used Red Heart Super Saver in Pink and White for mine because that’s what I had in my stash and honestly it worked fine. Some people get really particular about using fancy yarn for amigurumi but like… it’s a stuffed animal. The Red Heart has good stitch definition which matters more than you’d think when you’re trying to make clean color changes. For the strawberry spots I used some random red I had, might’ve been Caron Simply Soft? The green for the little leaf crown thing was definitely some leftover Lily Sugar n Cream because I remember it being way stiffer than the body yarn which was actually annoying.
You’ll need polyfil stuffing, safety eyes (I used 12mm but you can go smaller or bigger depending on how you want the face to look), and a 4mm or 4.5mm hook. I always use a smaller hook than the yarn recommends because you don’t want gaps where the stuffing shows through.
The basic body structure
Start with a magic ring. If you don’t know how to do a magic ring just YouTube it real quick, it’s way better than chaining and joining for amigurumi. You’re gonna work in continuous rounds, not joining each round – this was something that confused me forever when I first started because some patterns join and some don’t.
The body is basically a sphere that you’re gonna stuff. Start with 6 sc in your magic ring, then increase every stitch (12), then increase every other stitch (18), then every third stitch (24), and keep going until you get to like 48 or 54 stitches depending on how big you want your cow. I usually go to 48 because I like them kinda small and squishy.
Work even (no increases or decreases) for like 15-20 rounds to create the body height. Then you decrease in the reverse pattern – every 8th and 9th stitch together, then every 7th and 8th, etc. When you get down to about 12 stitches left, stuff it REALLY firmly. Like more than you think. Trust me on this because my first one was too squishy and the head wobbled weird.
The head construction
The head is basically the same process as the body but slightly smaller. I do mine up to 42 stitches instead of 48. The thing that’s important here is where you place the safety eyes and when you add the pink patches.
For the strawberry cow look you want pink patches around the eyes kind of like a reverse panda situation. What I do is crochet the head in white up to round 8 or so, then switch to pink for a few rounds in specific sections. This is where it gets fiddly and honestly kind of annoying – you’re basically doing intarsia crochet which means you’re carrying multiple colors and it creates a mess on the inside of your work.
The way I handle it is I don’t actually carry the yarn, I just crochet over the old color and pick up the new one. You end up with a bunch of ends to weave in later which was the ONE thing that really annoyed me about this whole project, like I spent almost as much time weaving in ends as I did actually crocheting the thing.
Eye placement
Put the safety eyes in around round 10-12, between the pink patches. Space them about 6-8 stitches apart. I put mine in before I finish the head so I can see how they look and adjust if needed. Once those safety eyes are in they’re IN, so don’t rush this part.
The strawberry spots
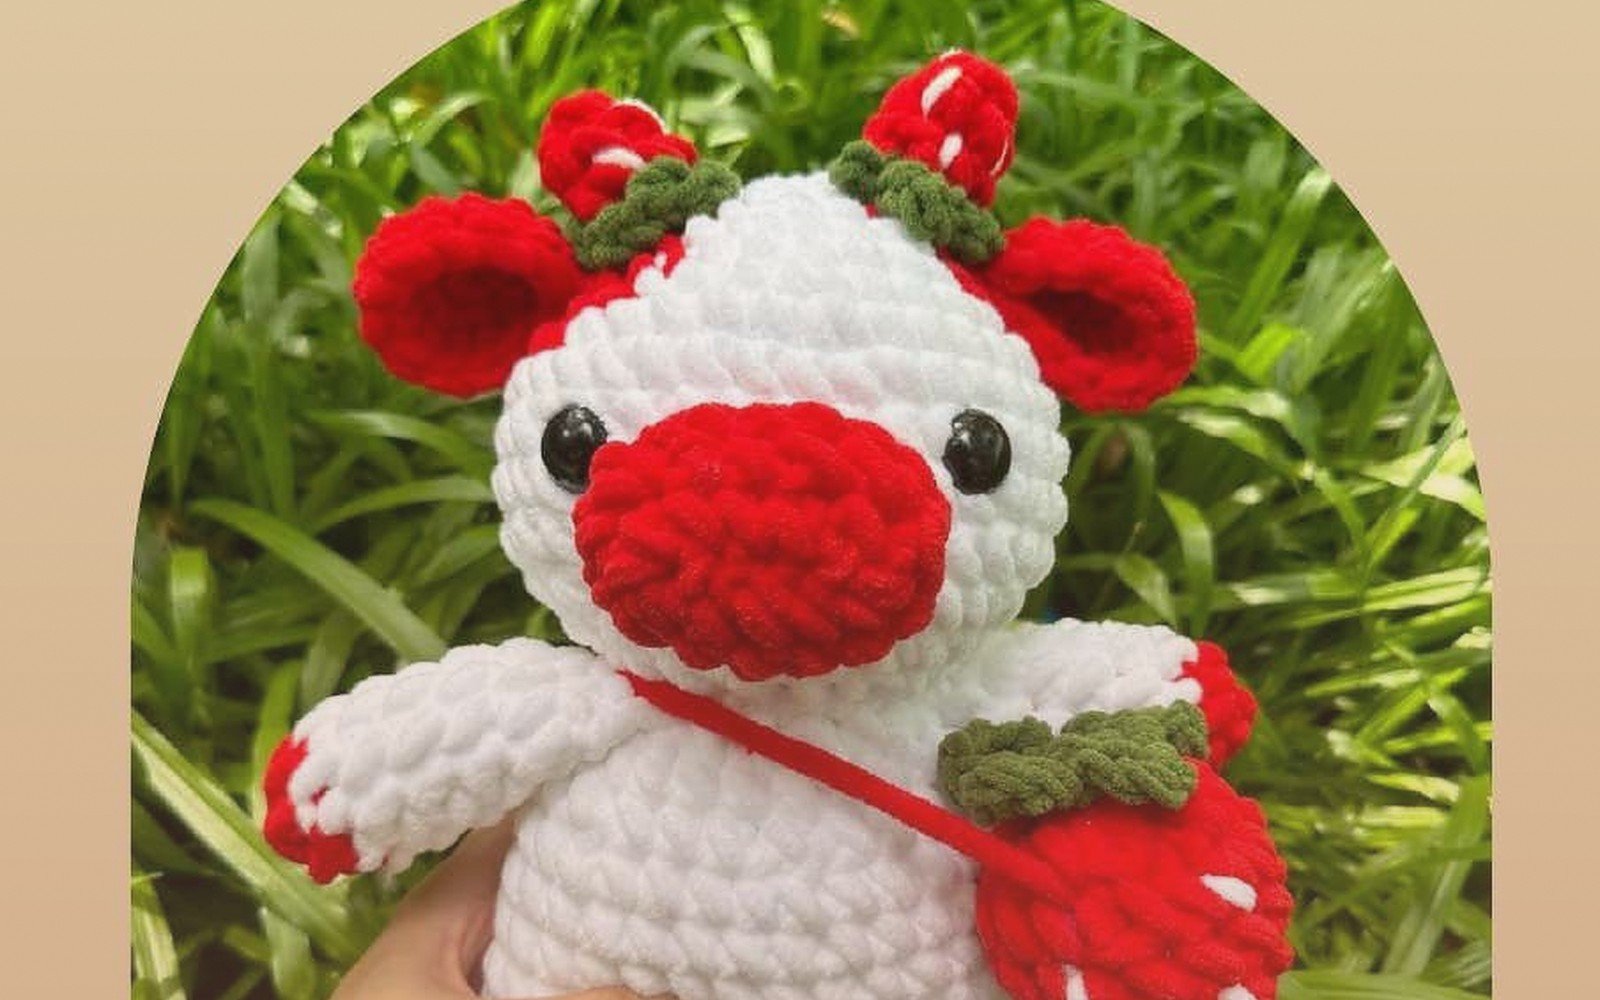
This is what makes it a strawberry cow and not just a pink cow. You’re gonna make little red heart-shaped or irregular blob-shaped patches and sew them onto the body. I made like 5 or 6 spots in different sizes.
For each spot, chain about 4-6 depending on size, then sc back down the chain, and kind of work around the edges to create a rounded shape. It doesn’t have to be perfect – actually the irregular shapes look more organic and cow-spot-like. Some people do perfect hearts with actual heart patterns but honestly the blob method is faster and looks just as good.
The little seeds on the strawberry spots are just French knots or little stitches in yellow embroidery floss. I used regular sewing thread the first time and you literally couldn’t see them so go with embroidery floss or thin yarn.
Ears and horns
The ears are basically teardrop shapes. Start with a magic ring, 6 sc, increase to 12, work even for a few rounds, then fold flat and sc across to close. Make them in pink with white edges or all pink, whatever you want. Sew them on the sides of the head angled slightly outward.
Horns are tiny cones. Magic ring with 4 or 5 sc, work even for like 4 rounds, stuff lightly with a tiny bit of polyfil. Make them in white or beige or even gold if you want that magical cow vibe. My cat tried to eat one while I was working on this which – anyway they’re small so keep them away from pets.
The leaf crown
This is optional but it’s what really sells the strawberry theme. You’re making little leaves to sit on top of the head like a strawberry top. Each leaf is basically chain 6, sl st in 2nd chain from hook, sc, hdc, dc, then sl st back down into the base. Make like 5-6 leaves and sew them in a circle on top of the head.
I used that Lily Sugar n Cream in sage green but any green works. The stiffer yarn actually helps here because the leaves stand up better instead of flopping over.
Legs and assembly
The legs are cylinders. Magic ring with 6 sc, increase to 12 for the hoof part, then decrease back to 8 or 9 for the leg width. Work even for however long you want the legs. I make mine kinda stubby because I think it’s cuter. Make them in white with pink hooves or pink with white hooves.
You can either sew them on or use the continuous leg method where you crochet two legs and then join them to start the body. The continuous method is stronger but harder to stuff evenly. I usually make them separate and sew them on because I’m gonna be weaving in a million ends anyway so what’s four more.
Arms or no arms
Some people put little arms on their cows, some don’t. I’ve done both and honestly I like the no-arm version better for strawberry cows because it keeps that rounded strawberry silhouette. But if you want arms they’re just smaller versions of the legs, worked in pink usually.
The tail situation
Chain like 12-15, sc back down the chain, leave a long tail for sewing. At the end of the tail attach some white or pink yarn strands for the fluffy part. I just cut 6-8 pieces of yarn about 3 inches long, fold them in half, and pull through the end of the tail piece, then trim to shape.
Color change tips that actually matter
When you’re switching from pink to white or adding those strawberry spots, the cleanest way is to complete your last stitch with the old color up until you have two loops on your hook, then pull through with the new color. This hides the color change better than just starting fresh with a new color.
For the patches on the body and head, you can either crochet them in as you go (hard, messy inside, but no sewing) or appliqué them on after (easier, cleaner, more control). I always do appliqué because I can position things exactly where I want them and redo it if it looks weird.
Facial details
Besides the safety eyes you’re gonna want to embroider a little snout/nose area. I do two lines in pink or brown that curve down from between the eyes and then meet in a Y shape. The mouth is optional – some people do a little smile, some skip it entirely. I usually skip it because I can never get it to look right and honestly the cow looks cuter with just eyes and nose.
Some patterns add rosy cheeks with pink embroidery or actual blush makeup. I tried the makeup thing once and it looked kinda weird on the yarn texture but embroidered circles work okay if you want that extra cute factor.
Sizing and proportion stuff
The head should be roughly the same size as the body or slightly smaller. If your head is way bigger it tips over and looks bobblehead-ish which might be what you want but probably not. The legs should be proportional to body height – too short and it looks like a blob with sticks, too long and it looks like a deer or something.
I’ve made these in different sizes using different weight yarns. Worsted weight with a 4mm hook gets you a cow that’s maybe 6-7 inches tall. Bulky yarn with a 6mm hook gets you closer to 10 inches. Sport weight would make a tiny one but I haven’t tried that because the stitches would be so small and fiddly.
Common problems I ran into
The strawberry spots sliding around while you’re trying to sew them – pin them first with regular sewing pins before you commit to sewing. I didn’t do this the first time and had to redo like three spots because they shifted while I was stitching.
Uneven stuffing making lumpy areas – you gotta really poke and distribute the polyfil as you go, not just shove it all in at the end. I use the back of my crochet hook or a chopstick to push stuffing into the far corners.
The color changes on the head creating a weird ridge – this happens if you pull too tight when switching colors. Keep consistent tension and don’t yank the new color through.
Running out of pink yarn halfway through – measure before you start or just buy two skeins of the main color because there’s nothing worse than having to stop and wait for more yarn to arrive, and the dye lots might not match perfectly.
Variations you can do
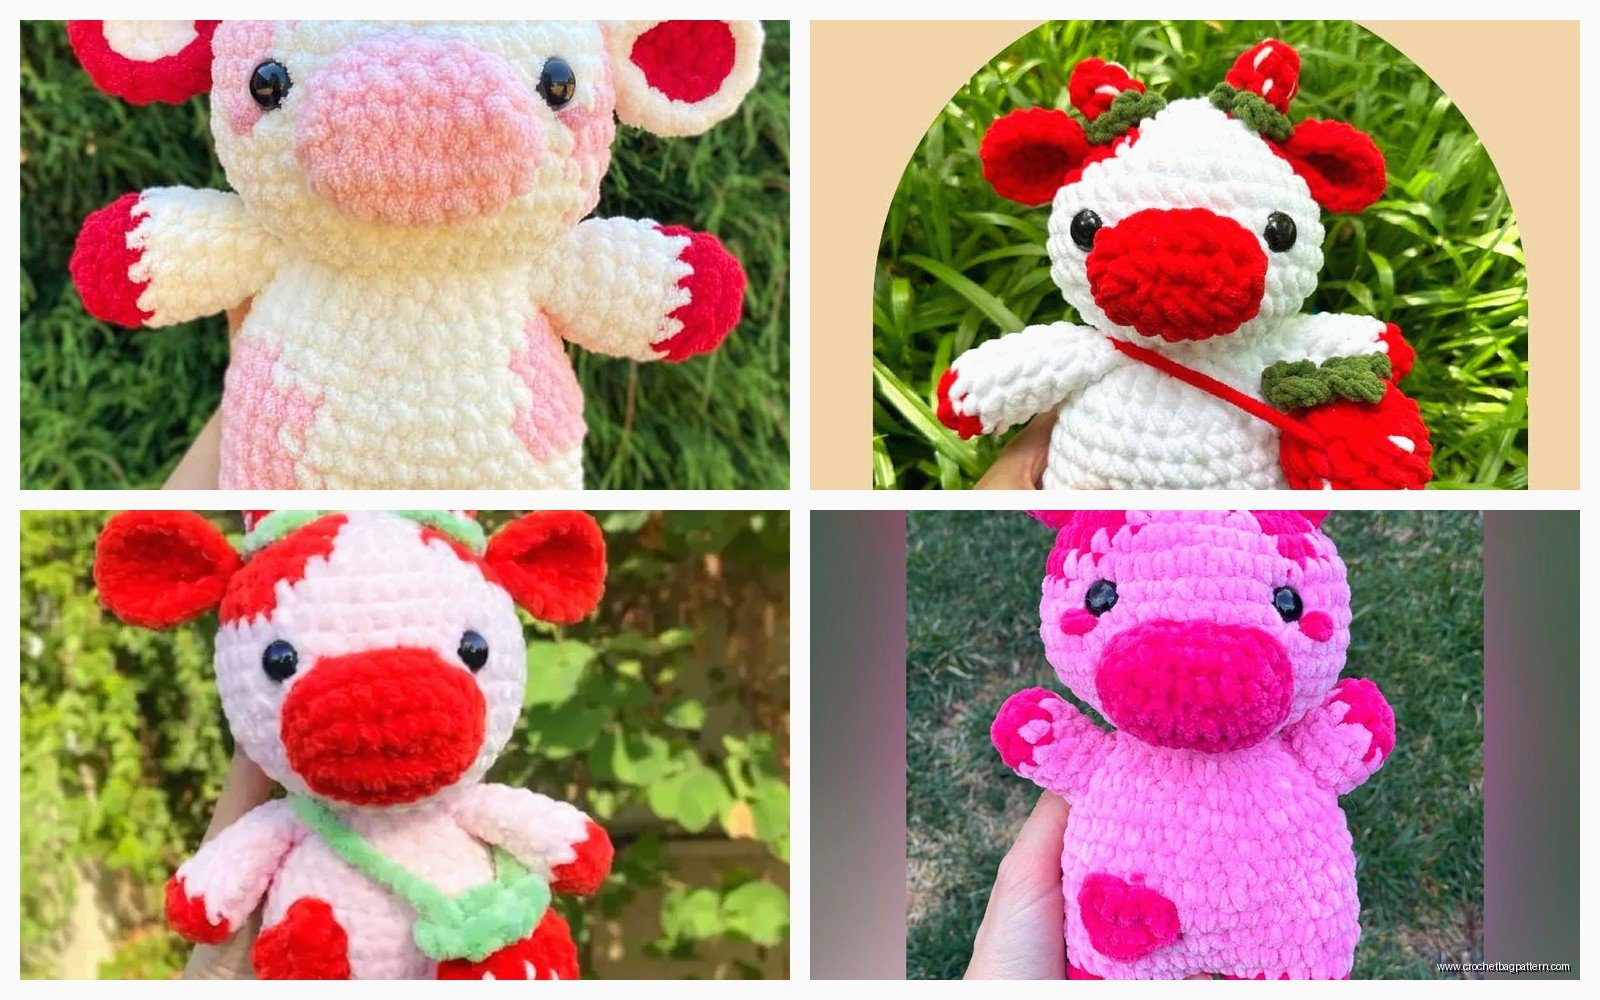
Chocolate strawberry cow with brown spots instead of red, blue strawberry cow which doesn’t make botanical sense but looks cool, strawberry cow with a little embroidered strawberry on its tummy instead of spots all over. I’ve seen people add little felt overalls or a bow tie or flower crown accessories.
You could also make it holding a tiny crocheted strawberry which would be adorable but also more work. The strawberry would just be a red cone shape with green leaves on top and yellow seed details.
Final assembly order that works
Make body, make head, attach head to body, sew on ears, add horns, sew on leaf crown, attach legs, add tail, sew on strawberry spots and seeds, embroider face details, weave in all those ends while questioning your life choices. That’s the order that makes the most sense so you’re not trying to weave in ends through already-assembled parts.
The whole thing takes maybe 4-6 hours if you’re working steadily, longer if you’re watching TV or keep getting distracted. Mine took forever because I kept pausing to look at my phone and also I was trying to perfect those stupid strawberry spots.
Anyway that’s basically the whole process for making a strawberry cow. They’re really popular right now so people lose their minds when they see them, and they’re not actually that hard once you get the basic amigurumi sphere shape down. The color work looks complicated but it’s just patience and weaving in ends, which is tedious but not difficult.
