
Mar
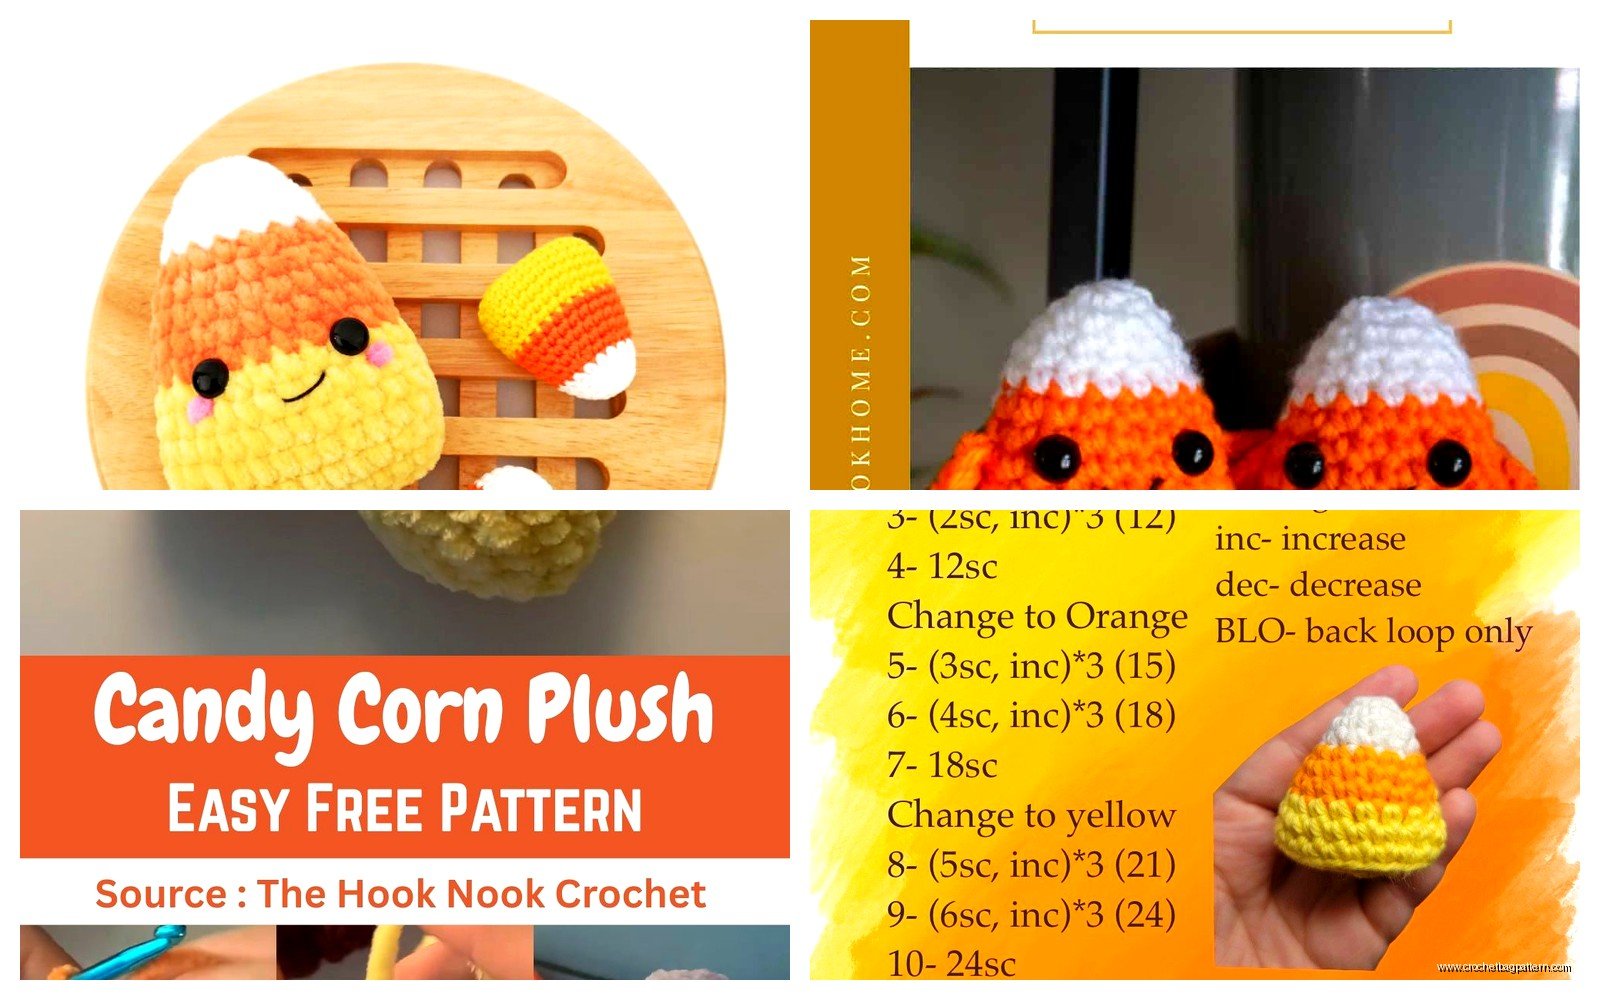
okay so candy corn amigurumi
I made like five of these last October 2023 while binging some true crime thing on Netflix, can’t remember which one but it was really distracting which actually helped because making tiny candy corns is kinda tedious? anyway you’re gonna want worsted weight yarn in white, orange, and yellow. I used Red Heart Super Saver because it’s cheap and honestly for something this small that people are just gonna look at on a shelf, who cares about fancy yarn.
The thing about candy corn amigurumi is they’re actually way easier than they look but everyone acts like they’re so impressive. They’re basically just a cone shape with color changes. That’s it. But people lose their minds over them at craft fairs which is… whatever, I’ll take the compliment.
what you actually need
So grab a size G hook, that’s 4.0mm if your hooks have the metric thing on them. You need white, orange, yellow yarn – I’ve used Red Heart Super Saver, Caron Simply Soft works too but it’s a little softer so your stitches might not be as tight. You want tight stitches for amigurumi or the stuffing shows through and it looks weird. Also polyfil stuffing, a yarn needle for weaving in ends, and stitch markers because you WILL lose track of where your rounds start.
Oh and scissors obviously but like, you already knew that.
the actual pattern part
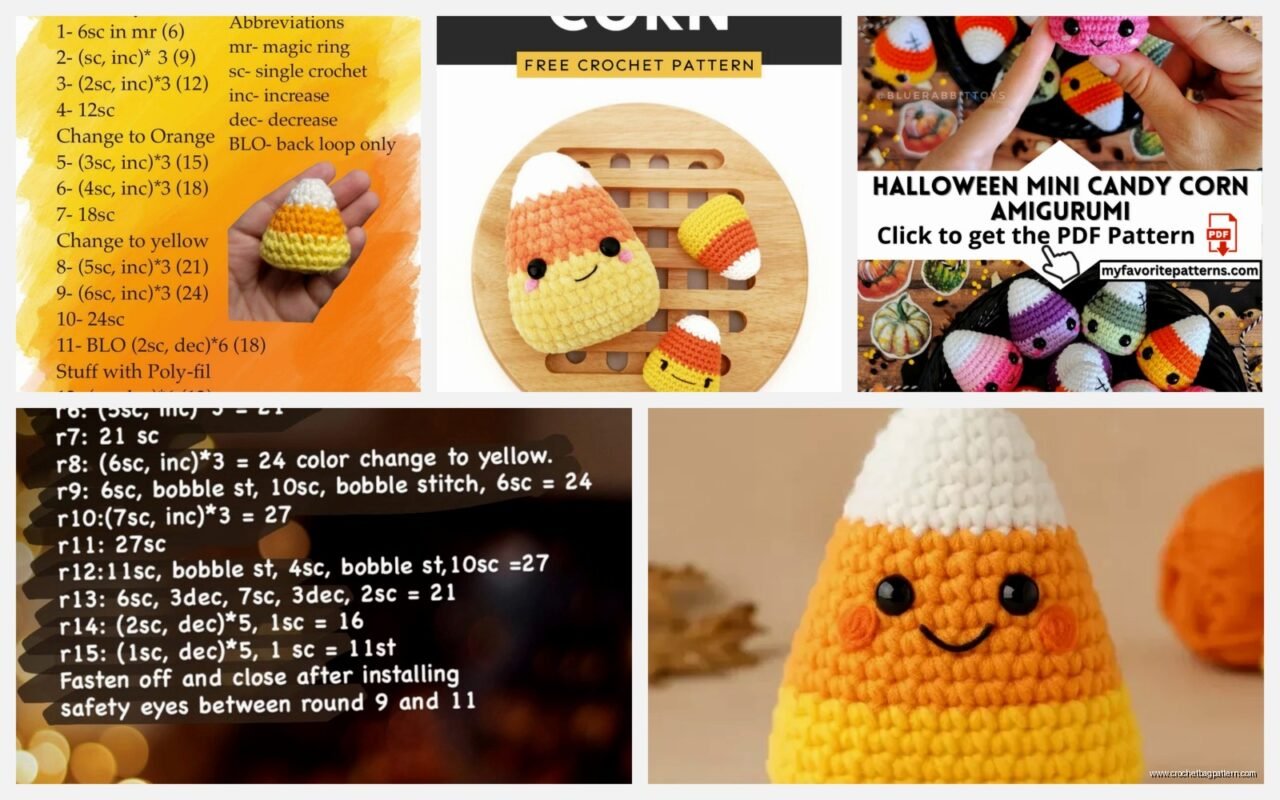
Start with yellow at the bottom tip. Make a magic ring with 6 single crochets. If you don’t know magic ring just chain 2 and do 6 sc in the first chain, it’s fine, no one will see the bottom anyway.
Round 2: increase in every stitch so you’ve got 12 stitches total. Round 3: sc, inc around – that’s 18 stitches. Round 4: sc in next 2, inc around – 24 stitches. You’re basically making a flat circle right now.
Then rounds 5-7 you just sc in each stitch, no increases. This is where it starts curving up into a cone shape because of how the stitches naturally want to sit. Switch to orange yarn at the end of round 7.
the color change thing that annoyed me
Okay so switching colors in amigurumi is annoying because if you just tie off and start the new color it leaves this gap and looks messy. What you’re supposed to do is work the last stitch of the old color until you have two loops on your hook, then pull through with the new color. This “completes” the stitch in the new color so the change looks cleaner.
But here’s what drove me nuts – the yarn ends. You’ve got like six ends to weave in on something that’s maybe 3 inches tall. It takes longer to weave in the ends than to actually crochet the stupid thing. I tried just crocheting over the ends as I went but then you can see them through the stitches if you’re using different colors, so that doesn’t really work. Just gotta suck it up and weave them in properly I guess.
continuing with orange section
With orange you’re gonna do rounds 8-14, still just single crocheting in every stitch. No increases, no decreases. The cone gets taller. This is the boring part where you’re just going around and around and my dog kept trying to steal the yarn ball which didn’t help.
Make sure you’re stuffing as you go because if you wait until the end you can’t get the stuffing down into the yellow tip properly. Like stuff it about halfway through the orange section.
Round 15 switch to white. Same deal with the color change technique – last stitch of orange, pull through with white.
white section and closing it up
Rounds 15-20 are white, still just single crochet in every stitch. Keep stuffing. You want it pretty firm but not like, rock hard. Somewhere in between.
Round 21 is where you start decreasing. Do sc, dec around so you’re going from 24 down to 16 stitches. Round 22: dec around – down to 8 stitches. Stuff any last bits in there.
Round 23: dec around until you’ve got like 4 stitches left, then fasten off leaving a long tail. Thread that tail through your yarn needle and weave it through the remaining stitches, pull tight to close the hole at the top. Weave in that end plus all the other color change ends.
variations I’ve tried
You can make them different sizes by starting with more or fewer stitches in the magic ring. I made one with 8 stitches to start and it came out bigger, good for like a bowl filler decoration thing. Did one with only 4 stitches once and it was tiny, maybe 2 inches tall, cute but almost not worth the effort of weaving in all those ends.
Some people add more rounds in each color to make them taller and skinnier, more like actual candy corn proportions. The pattern I just described makes them a little fatter and cuter which I actually prefer for the amigurumi look.
I tried making one with sparkly yarn once, like that Red Heart With Love Metallic stuff? Don’t do that. It’s splitty and annoying to work with and you can’t even really see the sparkle once it’s all stitched up.
what to actually do with them
I mean they’re decorations right. You can scatter them in a bowl with real candy corn which is kinda funny. Hot glue a pin back on them and make brooches – I did that with two of mine and wore them to work in October, got compliments. String them together for a garner but you’d need to make like 20 of them and honestly who has that kind of time.
They’re good for using up yarn scraps if you have small amounts of those colors left over from other projects. Each candy corn uses maybe 10 yards of each color? Not much at all.
People also like them as gift toppers instead of bows. Tie them onto a wrapped present with some raffia or whatever. It’s different at least.
the gauge thing nobody talks about
Gauge matters more than you’d think for something this small. If you crochet really loosely you’re gonna need to go down a hook size or the stuffing will show through. I usually crochet pretty tight so a G hook works for me but I’ve seen people use an E or F hook (3.5mm or 3.75mm) to get tighter stitches.
Test it by making the first few rounds and seeing if you can see the stuffing through the stitches when you hold it up to light. If you can, go down a hook size.
yarn substitutions that actually work
Like I said I mostly use Red Heart Super Saver because it’s everywhere and cheap. The white is actually white, not cream, which matters for candy corn. The “Bright Yellow” color is good, not the “Yellow” which is too pale.
Caron Simply Soft in “White,” “Mango,” and “Sunshine” works but it’s softer so your stitches might be looser. Lily Sugar’n Cream would probably work too since it’s cotton and has no stretch, gives you tight stitches automatically, but it might be too stiff? Never actually tried it.
I wouldn’t use anything fuzzy or textured. You want smooth yarn where you can see the stitches clearly. That’s the whole point of amigurumi, seeing the stitch definition.
the actual order of colors debate
Real candy corn is yellow tip, orange middle, white top. Some people make them upside down with white at the bottom which… I don’t get it but whatever. I’ve seen patterns that do white-orange-yellow from bottom to top and call them “reverse candy corn” which seems unnecessarily complicated just flip it over??
There’s also Indian corn which would be brown, orange, yellow if you want to make those instead. Same pattern, different colors. Or you could do all one color and make them into little generic cone shapes, add them to a play food collection or something.
problems I ran into
Besides the ends thing I already complained about, sometimes the white section wants to flare out instead of staying straight. This happens if you’re accidentally increasing stitches without meaning to. Count your stitches every few rounds to make sure you still have 24.
The yellow tip can look wonky if your magic ring is too loose. Pull that starting tail TIGHT before you start round 2. Like really tight. The tip should be completely closed.
If your candy corn is leaning or curved instead of straight, you probably stuffed it unevenly. Try to distribute the stuffing evenly as you go, poke it down into the tip with the back of your hook or a chopstick or something.
how long does it take
Maybe 30 minutes if you’re not rushing and you know what you’re doing? First one took me longer because I kept second-guessing the pattern and counting stitches. By the fifth one I could do it while watching TV without really looking at it much.
The weaving in ends adds another 10 minutes probably. That’s the part I always want to skip but you can’t really, it looks unfinished if you don’t do it.
making them more interesting or whatever
You could embroider little faces on them with black embroidery floss. I tried this once and it looked kinda cute but also kinda weird? Candy corn doesn’t have faces in real life so it’s odd. But if you’re into that kawaii style thing it works.
Add a loop at the top and make them ornaments. Just chain 10 or so before you close up the white section, join back to the top, then continue closing. Instant loop for hanging.
Make a really big one with bulky yarn and a bigger hook as a door stop. Would probably need to weight it with something heavier than polyfil though, like poly pellets or dried beans in a plastic bag inside.
I saw someone who made a whole bowl of them in different sizes and it looked really good as a centerpiece type thing. But again that’s a lot of weaving in ends, just saying.
the actual skill level needed
If you can single crochet in the round and do basic increases and decreases you can make these. That’s really all it is. The magic ring is the trickiest part but even that you can skip if you use the chain 2 method instead.
Color changes look complicated but they’re not once you do it a couple times. Just takes practice. Your first one might look a little rough but by the third or fourth you’ll have it down.
I wouldn’t call this a beginner project exactly because working in the round can be confusing at first, but it’s definitely beginner-adjacent. Like if you’ve made a couple flat things and want to try amigurumi, this is a good starter project because it’s small and quick.
storage and care
They’re acrylic yarn so they’re basically indestructible. Toss them in a box with your other Halloween decorations, they’ll be fine. If they get dusty just wipe them with a damp cloth or throw them in a lingerie bag and wash on gentle cycle, air dry.
Don’t leave them in direct sunlight for like months at a time because the colors might fade but honestly I’ve never had that happen. The orange might fade to peachy-orange eventually but that takes years.
If you’re selling them at craft fairs or whatever price them around $5-8 each depending on your area. They’re small and quick to make but people don’t know that so they think they’re more impressive than they are – wait that sounds bad but you know what I mean.