
May
okay so granny squares
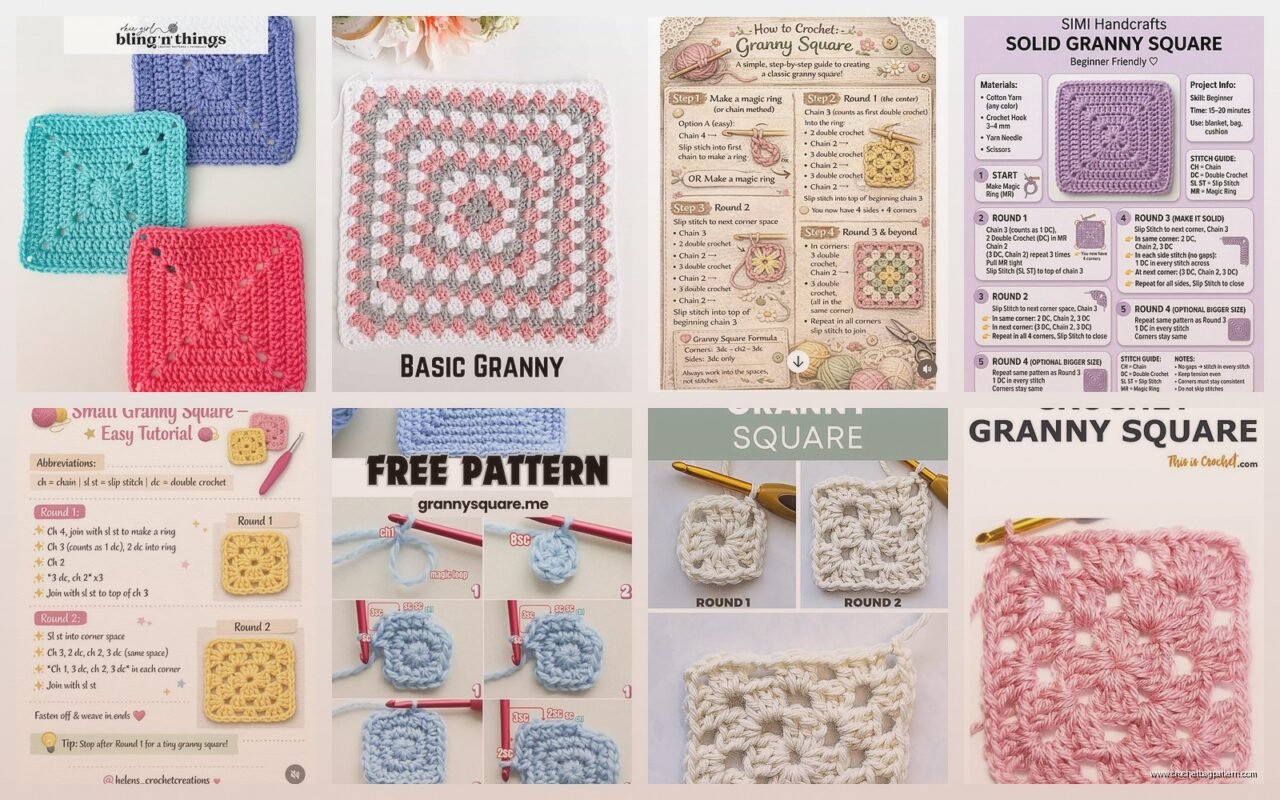
Right so you chain 4 and slip stitch to make a ring. That’s your starting circle. I remember making my first actual granny square in spring 2022 when I was supposed to be working from home but honestly just kept picking up my hook instead. The whole slip stitch thing used to confuse me because I’d forget which loop to go into but you literally just insert the hook into that first chain you made and pull through everything.
Chain 3 now. This counts as your first double crochet which is gonna be important later when you’re trying to figure out where the round ends.
the first round is honestly the weirdest part
So after that chain 3, you’re gonna work into the ring. Not around the chain stitches but into the actual center hole. Make 2 double crochets into the ring. Then chain 2 – this is your corner space. Then 3 more double crochets into the ring. Chain 2 again. You’re making corners basically.
Do this whole thing 2 more times so you have 3 dc, chain 2, 3 dc, chain 2, 3 dc, chain 2. Then for the last corner you do 3 dc and chain 1, then slip stitch into the top of that beginning chain 3. The reason you only chain 1 on this last corner is because you’re gonna slip stitch and that kind of completes the chain 2 space if that makes sense.
One thing that really annoyed me was how the starting chain always looked different from the other stitches. Like you can SEE where the round started and it drove me crazy for months until I just accepted that’s how it is. Some people do a standing double crochet instead but I never learned that properly.
round two is where it actually starts looking like something
Slip stitch into the next 2 stitches and into that corner space. This is called “joining” to the corner and you gotta do it to position yourself correctly. Now chain 3 again (counts as first dc remember), then 2 dc in that same corner space. Chain 2, then 3 dc in the same space. You just made a corner.
Now chain 1. This is your side space. Go to the next corner space (the chain 2 from the previous round) and do 3 dc, chain 2, 3 dc. Chain 1. Keep doing this around – corner has 3dc, ch2, 3dc and sides have chain 1 between corners.
I used Red Heart Super Saver for my first ones because it was cheap and I didn’t know what I was doing. The Carrot color was actually pretty nice? But the yarn can be kinda squeaky which my cat absolutely hated, she’d leave the room when I was working with it lol.
round three and beyond
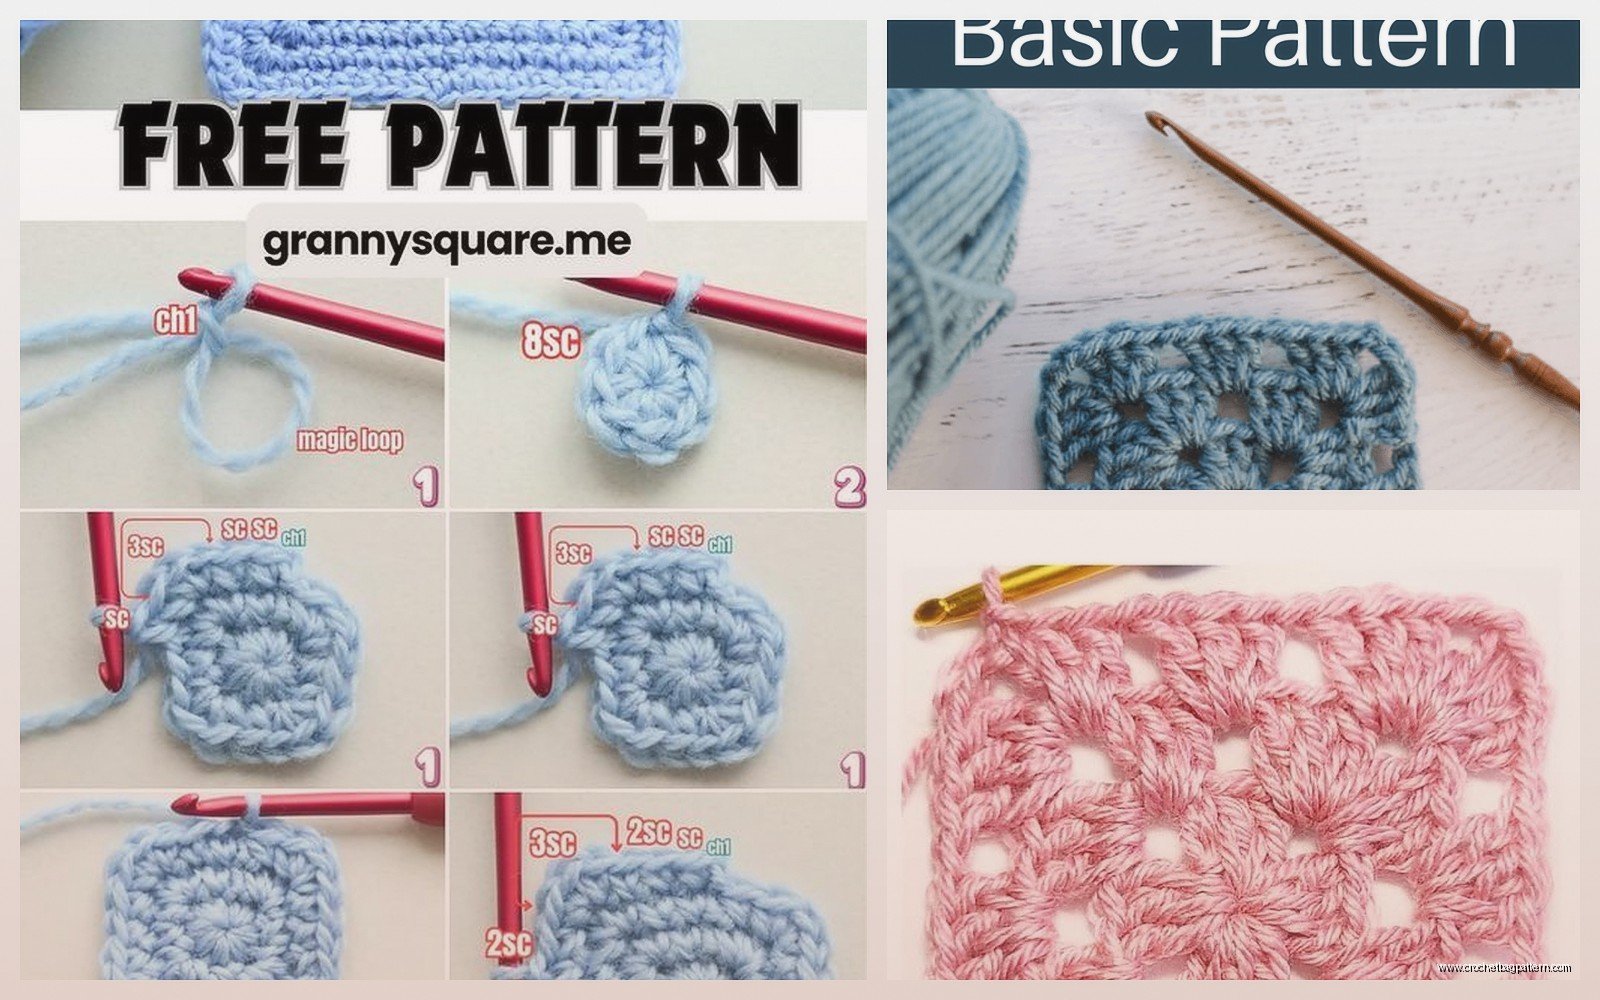
This is where the pattern really clicks because it’s literally the same thing forever. Join to corner space with slip stitches. Chain 3, make 2 dc in corner. Chain 2, 3 dc in same corner. Now you have TWO side spaces to work across – the chain 1 space from the previous round.
Chain 1, then 3 dc in that chain 1 space from below. Chain 1 again, then work your corner (3 dc, ch 2, 3 dc). Keep going around. Each round you’ll have one more cluster of 3 dc on each side.
So like round 3 has 1 cluster between corners. Round 4 has 2 clusters between corners. Round 5 has 3 clusters. You’re basically building outward in a square shape and the chain 2 corners keep it from becoming a circle.
the actual written pattern breakdown
If you see a written pattern it usually looks something like this:
Round 1: Ch 4, sl st to form ring. Ch 3 (counts as dc), 2 dc in ring, ch 2, [3 dc in ring, ch 2] 3 times, join with sl st to top of beginning ch 3.
Round 2: Sl st to corner space, ch 3, 2 dc in same space, ch 2, 3 dc in same space, ch 1, [(3 dc, ch 2, 3 dc) in next corner space, ch 1] 3 times, join with sl st to top of beginning ch.
Round 3: Sl st to corner space, ch 3, 2 dc in same space, ch 2, 3 dc in same space, [ch 1, 3 dc in next ch-1 space] across to next corner, ch 1, [(3 dc, ch 2, 3 dc) in corner space, [ch 1, 3 dc in next ch-1 space] across to next corner, ch 1] 3 times, join.
The brackets mean repeat that section. The thing in parentheses like (3 dc, ch 2, 3 dc) means that whole thing goes in one space.
changing colors because solid squares are boring
When I want to change colors I usually do it at the end of a round. So you’d work your last slip stitch with the new color. Like when you’re about to pull through for that slip stitch, drop the old color and pull through with the new one. Then just start your chain 3 with the new color.
You can weave in ends as you go or save them all for later. I’m terrible about this and usually have like 47 ends to weave in at the end of a project which is my own fault. I was watching The Bear while making squares last summer 2024 and got so distracted by the finale that I didn’t even notice I’d changed colors wrong and had this weird jog in the pattern.
Some people cut the old color and some people carry it up the side. Carrying it only really works if you’re doing stripes every round though otherwise you have these long floats of yarn.
tension problems I had
My corners used to be really tight and the whole square would cup upward like a bowl. This is because I was working the corner chain 2 too tight. You need to keep that loose enough that 6 dc can fit around it comfortably. If your square is cupping, your corners are too tight. If it’s ruffling and wavy, your corners are too loose or you’re adding too many stitches somewhere.
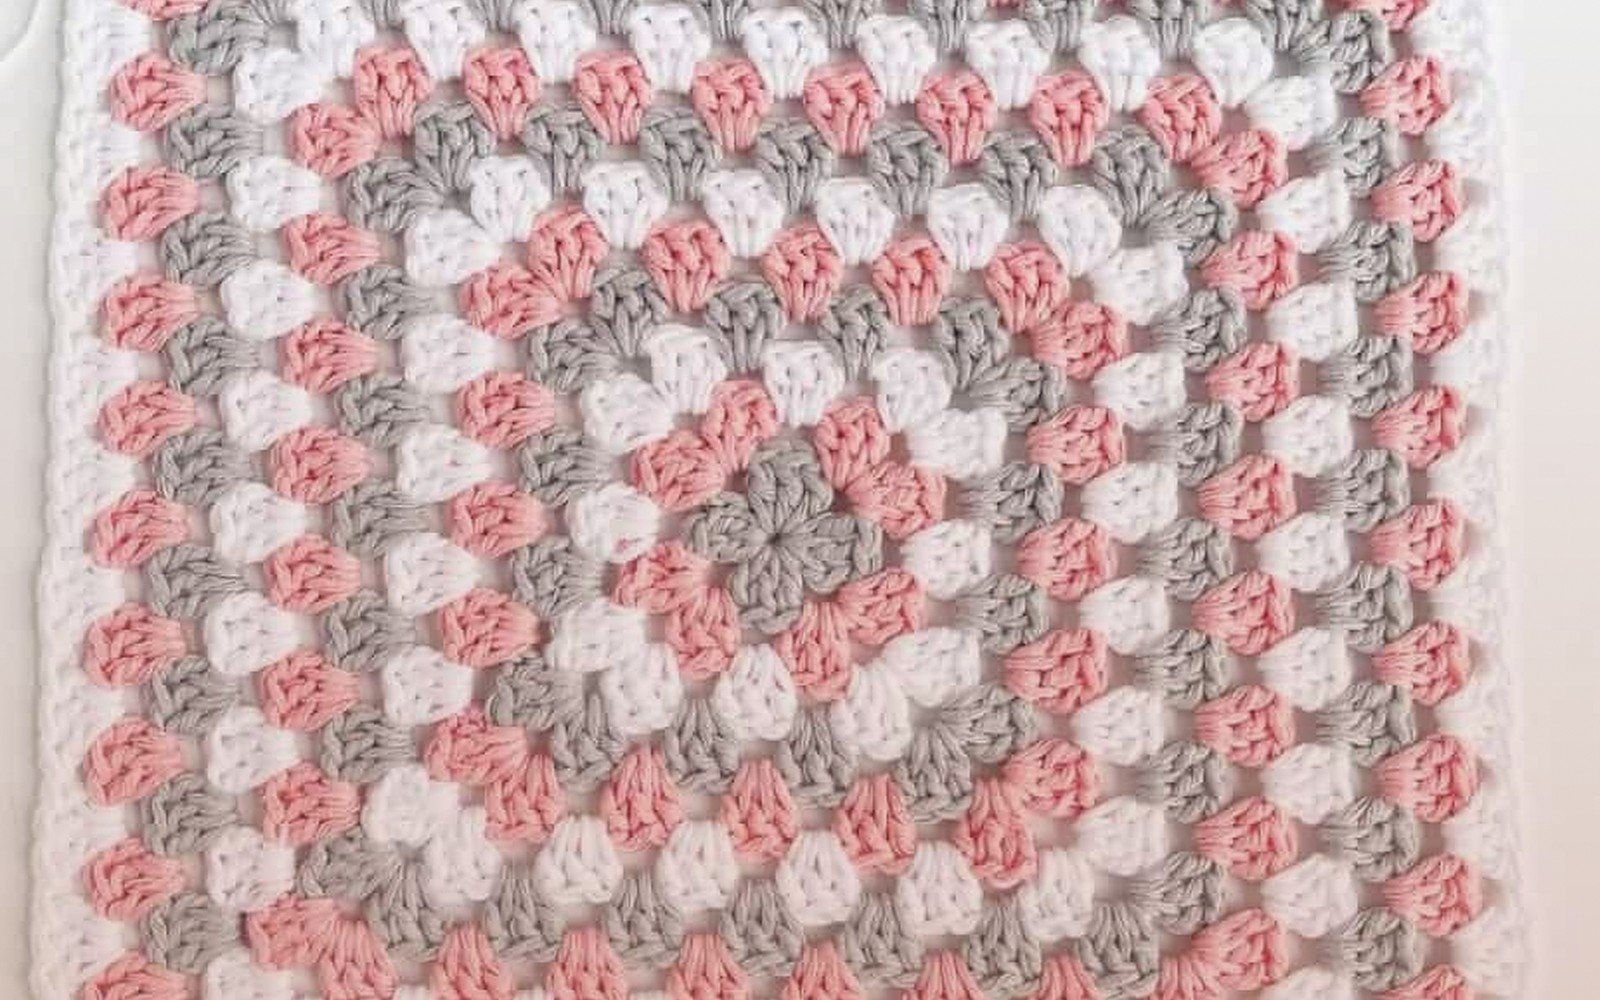
I switched to Caron Simply Soft for a while and that helped me see my stitches better because it has a nicer sheen than Red Heart. The Ocean color was really pretty. But honestly any worsted weight yarn works fine for practicing.
counting your stitches
Each side should have the same number of 3-dc clusters. So on round 3 you should have 1 cluster on each side between corners. Round 4 should have 2 clusters per side. If you’re ending up with different numbers on different sides you either skipped a space or added an extra cluster somewhere.
The chain 3 at the beginning of each round counts as a dc which means that corner actually has 3 dc even though you only worked 2 after the chain. This trips people up constantly.
When you’re slip stitching to join at the end of the round, you slip stitch into the TOP of that beginning chain 3, not into the third chain from the hook or whatever. The top. The third chain from the top of the beginning chain if that makes more sense.
what to do with finished squares
You can join them into blankets obviously. I use the join-as-you-go method usually where you connect them during the last round but honestly sometimes I just whipstitch them together later because I can’t be bothered to plan ahead.
Blocking helps a lot if your squares are different sizes. You wet them, pin them to the same dimensions, and let them dry. Makes everything look more professional even though I skip this step half the time because—wait I was gonna say something else but I forgot.
Oh right, you can also make granny square cardigans or bags or whatever. The squares are pretty versatile. I made a cushion cover once using Lily Sugar’n Cream cotton yarn which was surprisingly nice for home stuff because you can actually wash it.
common mistakes
Not counting the beginning chain as a stitch is probably the biggest one. You’ll end up with weird uneven corners.
Working into the wrong space – you should be working into the chain spaces not into the actual chain stitches. So your hook goes into that hole created by the chain, under both loops of the chain.
Forgetting the chain 1 between clusters on the sides. This makes the whole thing too tight and it won’t lay flat.
Accidentally doing single crochet instead of double crochet. They look similar when you’re new but double crochet is taller. You yarn over before inserting your hook for a dc.
the slip stitch positioning thing
This confused me for so long. When you slip stitch to the corner at the beginning of each round, you’re slip stitching into the actual stitches and then into the chain space. So if you just finished a round and you’re joined to the top of the beginning chain, you need to slip stitch into the next 2 dc stitches, then into the corner chain space.
Sometimes I just chain 3 wherever I am and work from there but that creates a visible jog and the pattern doesn’t spiral nicely. The slip stitching to the corner keeps everything aligned properly.
variations that are still basically granny squares
You can do a solid granny square where you fill in those chain 1 spaces with more dc. So instead of chain 1 between clusters you’d do 1 dc. Makes a denser fabric.
Granny stripes are the same concept but you just keep working in rows instead of rounds. Chain 1 and turn at the end of each row instead of joining.
Circle granny squares sound contradictory but you basically just keep the same corner increases going and it makes a circular shape. I never really got into those though.
There’s also half granny squares for when you need triangles to fill in edges of blankets. You work back and forth in rows and only make corners on two sides.
yarn weight matters more than you think
I tried making granny squares with sock weight yarn once and it took forever and looked weird because the stitches were so small. Worsted weight (the medium weight yarn, usually labeled as 4 on the wrapper) is really the sweet spot for granny squares.
Bulky yarn works too if you want something that grows fast but you need a bigger hook. I used Bernat Blanket yarn one time with a 9mm hook and made a square in like 15 minutes but it was huge and kind of floppy.
Hook size is usually listed on the yarn label but for worsted weight I use a 5mm or 5.5mm hook. Some people go up to 6mm for a looser fabric. Really depends on your personal tension.
the magic ring alternative
Some patterns tell you to start with a magic ring instead of chain 4 and slip stitch. A magic ring is adjustable so you can pull it tight and there’s no hole in the center. But I honestly never learned to do it properly because the chain 4 method works fine and I’m lazy about learning new techniques.
If you do want to try it you basically wrap the yarn around your fingers in a specific way and work your first round into that loop, then pull the tail to tighten it. There’s videos online that explain it better than I can in text.
when to fasten off
When your square is the size you want, just cut the yarn leaving like a 6 inch tail, pull it through the last loop on your hook, and pull tight. That’s fastening off. Then you gotta weave in that end by threading it on a yarn needle and going through the backs of stitches for a few inches, then back the other direction, then trim.
I usually weave ends into the same color areas so they’re less visible. Like if you have a blue end, weave it through blue stitches not white ones.
The starting tail from your original slip knot can be woven into the center of the square or you can work over it during round 1 to hide it as you go.
why granny squares are actually useful to know
Once you get the basic granny square down you understand clusters and corner increases which shows up in tons of other patterns. Lots of blankets use the same concept just worked continuously instead of in individual squares.
It’s also good for using up scrap yarn. You can make each square with different color combinations and then join them all together. I have a whole bag of partial skeins that I’m supposedly going to turn into a scrap blanket someday but we’ll see if that actually happens.
The repetitive nature is kind of mindless once you get the hang of it so it’s good for watching TV or whatever. I made like 30 squares during various Netflix binges and still have no idea what to do with them all.
And honestly if you mess up a granny square it’s pretty easy to just frog it (rip it out) and start over since they’re small. Way less devastating than frogging like 10 rows of a blanket.
