
May
okay so unusual granny squares
Right so the thing about granny squares is everyone thinks they’re just those basic hexagon things your grandma made into afghans but there’s actually SO many weird variations you can do. I got really into this in spring 2022 when I was stuck at home with a sprained ankle and couldn’t do much else, just sat around trying different patterns I found on random blogs and Instagram.
The basic concept is still the same like you’re working in rounds from the center out but instead of doing the typical cluster-chain-cluster thing you can mess with the stitch counts, the shapes, add texture, whatever. I’m gonna walk you through some of the weirder ones I’ve tried.
Triangle Granny Squares
These are actually triangles obviously but people still call them granny squares which is confusing but whatever. You start with a magic ring or chain 4, then instead of working evenly around you create three corner points. So like, you’d do 3 double crochet, chain 2, 3 double crochet for each corner with just 3 double crochet on the sides between corners.
I made a whole blanket of these using Red Heart Super Saver in like five different colors because I was broke and that yarn is cheap. The annoying thing about triangle squares is joining them because you have to actually think about how they fit together instead of just mindlessly whipstitching squares in rows. Had to rip out my joining twice because I wasn’t paying attention while watching Succession.
Solid Granny Squares (No Holes)
This one’s weird because the whole point of traditional granny squares is those gaps but sometimes you want something more solid. Instead of doing clusters with chain spaces between, you work double crochets directly next to each other or use half double crochet to fill in the spaces.
You still increase at the corners the same way with your chain 2 or chain 3 corner spaces, but the sides are packed tight. I used Caron Simply Soft for a baby blanket with these in summer 2024 and honestly the texture is completely different from regular granny squares, way more dense and drapey.
The thing that annoyed me about this pattern was how much more yarn it eats up. Like a regular granny square might use I dunno 20 yards per square but these solid ones were using almost 35-40 yards for the same size square which really adds up when you’re making a blanket.
Spike Stitch Granny Squares
Okay this is where it gets fun. Spike stitches are when you insert your hook into a row below instead of the current row which creates these vertical lines of texture. You can incorporate these into granny squares by working regular rounds but then on like round 3 or 4, you start doing spike stitches down into round 1 or 2.
I experimented with this using some Lion Brand Wool-Ease I had leftover from another project, the teal color. The pattern I followed had you do regular double crochet clusters for the first two rounds then on round three you’d do a double crochet spike stitch into round one, skip the stitch behind it, regular double crochet, another spike, whatever pattern you want really.
Creates this really cool dimensional look but honestly my tension was all over the place because pulling up those spike stitches from two rounds down made some stitches way looser than others. My cat kept trying to attack the working yarn too which didn’t help.
Granny Squares with Popcorn Stitches
Popcorn stitches are when you work like 5 double crochets in one stitch, remove your hook, insert it back through the first double crochet and the loop, then pull the loop through to “pop” all those stitches together. They stick out from the fabric and add texture.
You can put these at the corners of granny squares or scatter them around the square. I made coasters with this technique using some cotton yarn, I think it was Lily Sugar’n Cream in that really bright yellow color. Worked a basic granny square but put a popcorn stitch in the center of each side on round 3.
The annoying part about popcorns is they use up so much yarn for each stitch and also my fingers got tired pushing the hook back through all those loops. Plus they make the square bumpy so if you’re planning to join them for something flat like a blanket you gotta think about whether you want that texture or not.
Offset or Spiral Granny Squares
Instead of joining each round with a slip stitch and starting the next round with chains, you just keep working in a spiral without joining. This creates this offset look where the “corners” aren’t really corners anymore, they kind of spiral around.
I tried this with some acrylic yarn from Hobby Lobby, their I Love This Yarn brand in purple. You have to use stitch markers to keep track of where your corners are because otherwise you’ll lose count and end up with a wonky pentagon or something. The first few I made were definitely not square shaped because I wasn’t paying attention to my— wait actually you can also do this intentionally to make hexagons or octagons which is cool.
These work up faster than regular granny squares because you’re not constantly slip stitching and chaining but the edge looks different, less defined. Good for like bohemian style projects where you want things to look a bit imperfect.
Overlay Granny Squares
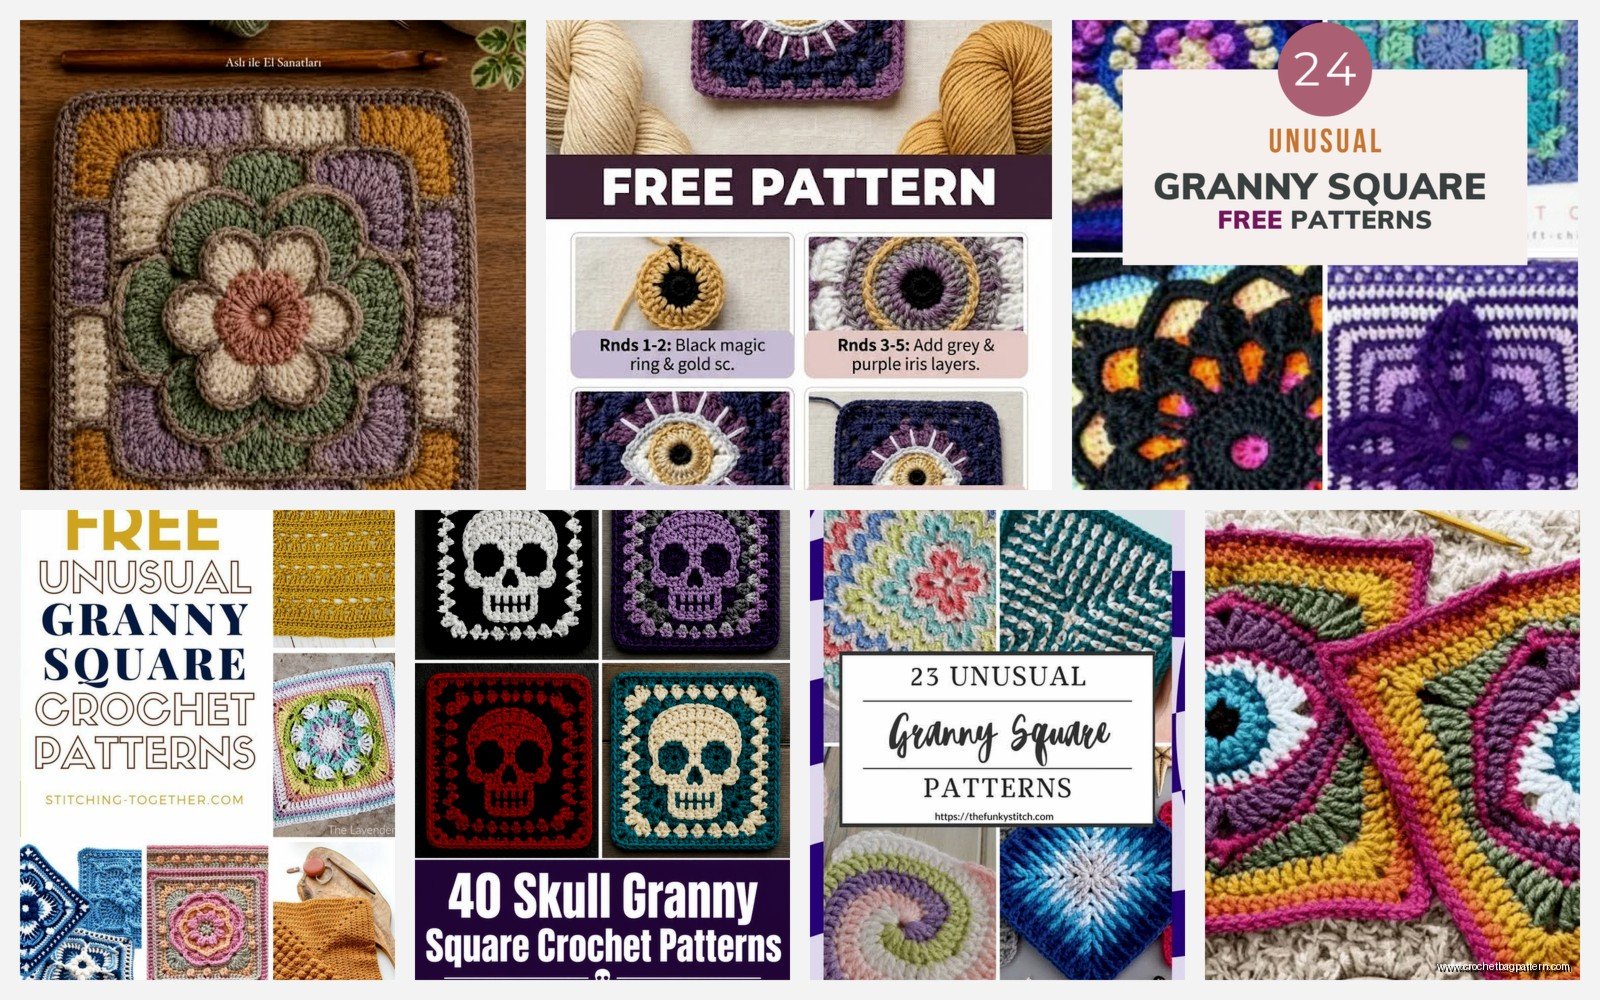
This technique is where you work a basic granny square in one color, then go back with a second color and add stitches ON TOP of the existing square by working into earlier rounds. Creates a layered effect.
I saw this on Pinterest and tried it with some Bernat Blanket yarn, the chunky stuff. Made a basic 4-round square in cream, then went back with burgundy and worked double crochets into round 2, skipping stitches to create a pattern. You can make X shapes, crosses, diamonds, whatever.
The part that drove me nuts was weaving in all the extra ends because you’re essentially working two separate elements on the same square so you’ve got double the yarn tails to deal with. Also sometimes the overlay stitches would be too tight and pucker the original square or too loose and look sloppy.
Granny Squares with Surface Crochet
Surface crochet is different from overlay because you’re not actually inserting your hook through the fabric, you’re holding the yarn behind and just pulling loops through to the front. Creates these raised chains or slip stitches on top of your work.
I used this to add designs to plain granny squares, like making a heart shape or initials or geometric patterns. Used Red Heart Soft in a couple colors for this. You work your basic granny square first, then with a contrast color you insert your hook from front to back, grab the yarn from behind, pull through, move to the next spot and repeat.
It’s actually pretty easy once you get the hang of it but my issue was the surface crochet stitches would sometimes catch on things or if your base square was too loose the surface stitches wouldn’t lay flat. Better on tighter fabric.
Textured Stitch Granny Squares
Instead of using all double crochets you can substitute different stitches. Like using front post and back post double crochets to create ribbing effects, or alternating single crochet and double crochet for a different texture.
I made a pillow cover using this method with some chunky Cascade 220 Superwash I got on sale. Did rounds alternating between front post double crochet and regular double crochet which made these vertical ridges around the square. Looked almost like corduroy kinda.
The thing is you gotta be consistent with your stitch types or it looks messy. And some stitches are taller than others so if you’re mixing single crochets with treble crochets or whatever your square might not stay square, might get wavy edges.
Joining Methods That Change the Look
Okay so this isn’t exactly about the squares themselves but HOW you join them can make unusual patterns too. Instead of the typical whipstitch or slip stitch join, you can do join-as-you-go methods where you attach squares while you’re still crocheting them.
Or you can leave gaps between squares and connect them with chain spaces to create a lacy effect. I did this with some white cotton yarn for a summer top, joined the squares with like 5 chains between each one so there were deliberate holes. Very 70s looking.
Flat braid joins are cool too where you create these thick decorative seams between squares using slip stitches worked back and forth. Makes the joining part of the design instead of trying to hide it.
Color Changing Techniques
You can make basic granny squares look unusual just by how you change colors. Instead of changing at the end of rounds, try changing mid-round to create color blocks. Or use variegated yarn that changes color on its own.
I used some Lion Brand Mandala yarn for granny squares once and the way the colors pooled was completely random, made each square look different even though I was following the same pattern. Some squares had clear color sections, others were all mixed up.
Planned pooling is another thing where you carefully control how variegated yarn creates patterns but honestly that’s too much math for me, I just let it do whatever. You can also carry multiple colors and switch between them to make plaid or checkered effects within a single square.
Size and Gauge Variations
Using different hook sizes with the same yarn weight creates different effects. A granny square worked with a huge hook and fingering weight yarn will be loose and drapey and full of holes. Same pattern with a tiny hook and bulky yarn will be… well actually that doesn’t really work, the fabric would be too stiff.
But you can deliberately make some squares in a project bigger or smaller than others for a patchwork effect. Like make some 4-inch squares, some 6-inch, some 3-inch and then figure out how to piece them together like a puzzle. Saw someone do this on Instagram and it looked chaotic but cool.
I tried making granny squares with thread and a steel hook once, super tiny. Used Aunt Lydia’s crochet thread size 10. They turned out like little delicate snowflakes, maybe 2 inches across. Could use them for jewelry or ornaments or whatever but honestly it hurt my eyes working that small and I gave up after making like six of them.
Shapes Within Squares
You can create shapes inside granny squares by strategic color placement. Like make the center rounds one color to create a circle or diamond shape in the middle, then switch to another color for the outer rounds.
Or work the corners in one color and the sides in another to create a cross or plus sign pattern. I did this with some Loops & Threads Impeccable from Michaels, made squares that had dark blue corners and light blue sides so when you put them all together it created this secondary pattern across the whole blanket.
Takes more planning than just randomly changing colors but the effect is worth it. You gotta sketch out what you want first or you’ll end up with a mess. Trust me I made that mistake and had a bunch of squares that didn’t create any coherent pattern when joined.
Working with Unusual Yarn Choices
Granny squares don’t have to be made with regular yarn. I’ve seen people use fabric strips, plastic bags cut into strips, rope, even wire. I personally tried making some with t-shirt yarn which is that thick fabric yarn made from recycled t-shirts.
Used a 10mm hook and the squares worked up SO fast, like maybe 10 minutes per square. But they were heavy and stiff, not great for a blanket but would be good for a rug or basket. The fabric yarn I used was some no-name brand from Amazon.
Also tried using metallic yarn once, that was a mistake. The stuff was so splitty and annoying to work with, kept catching on itself. Made like two squares and gave up. Looked pretty though, very sparkly.
Adding Embellishments
After you finish a granny square you can add beads, sequins, embroidery, buttons, whatever. I made some squares and then used embroidery floss to add French knots in the centers and lazy daisy stitches around them. Mixed media type thing.
You could sew on felt shapes, add ribbon, glue on rhinestones if you’re into that. Makes each square unique even if you’re using the same base pattern. Good for like art pieces or decorative stuff where you want something more elaborate.
Just make sure whatever you add is secure and won’t fall off if the item gets washed. Learned that the hard way when I glued buttons onto a baby blanket and they fell off in the wash. Oops.
Anyway those are the main unusual granny square variations I’ve messed around with. There’s probably a million more techniques out there but these are the ones I actually tried and can tell you about. Some worked better than others, some were more annoying than they were worth, but that’s how you figure out what you like right. Just gotta experiment and see what happens.
