
Jun
Getting Started with the Body Shape
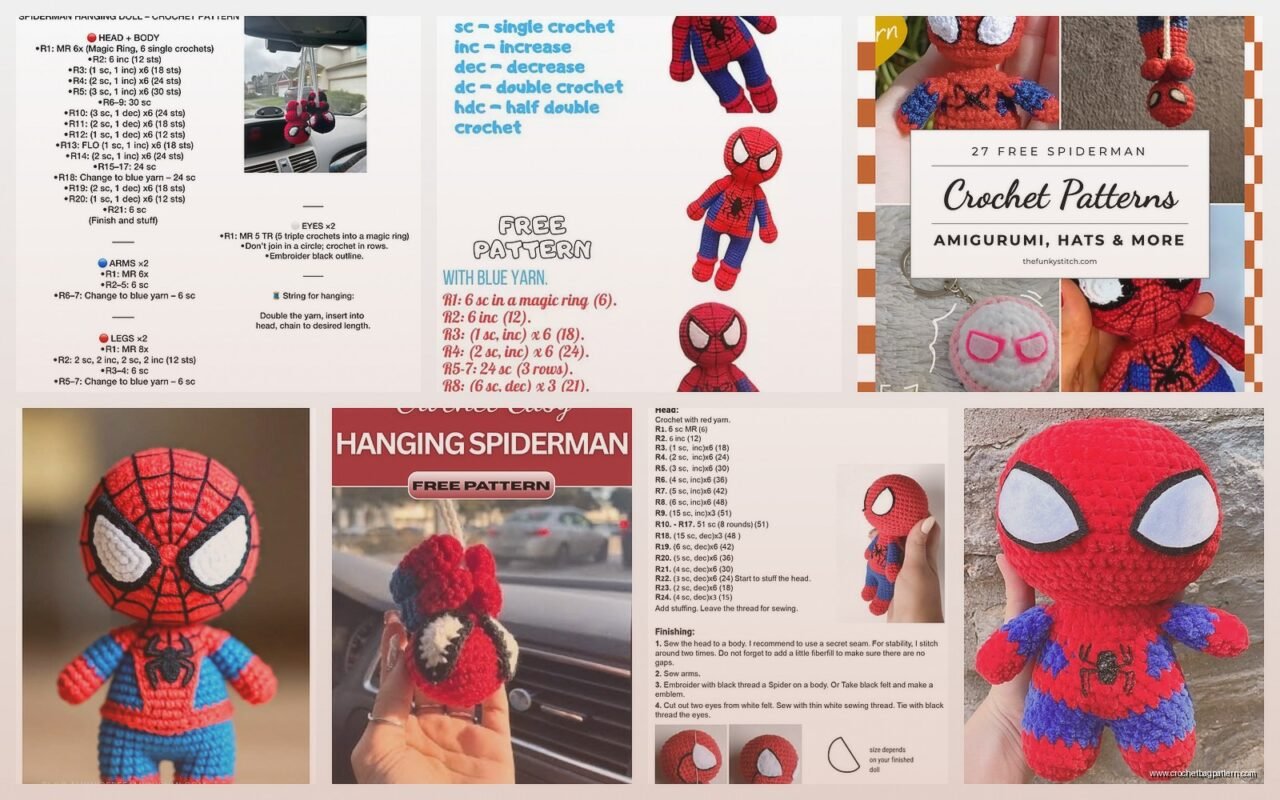
So basically when I made my first Spiderman amigurumi it was summer 2022 and I was binge-watching The Office for like the third time, and I just started with a basic body pattern because honestly most superhero amigurumi are gonna use the same base shape. You need Red Heart Super Saver in red and blue—I specifically used Cherry Red and Royal Blue because those were what Michaels had in stock and they work fine. Some people get all picky about exact shades but whatever, it looks like Spiderman either way.
Start with a magic ring for the head. Do 6 single crochets in the ring, then increase every stitch in round 2 so you have 12 stitches. Round 3 you do *sc, inc* repeated around for 18 stitches. Keep going with that pattern—one more sc between increases each round—until you hit about 48-54 stitches depending on how big you want the head. I usually stop at 48 because I don’t want a massive head but you do you.
Work straight without increases for maybe 12-15 rounds. This is where the shape actually becomes a head instead of a flat circle. Then you gotta decrease the same way you increased but backwards. *Sc 6, dec* around, then *sc 5, dec* and so on until you’re back down to like 12 stitches. Stuff it firm with polyfil before you close it up completely.
The Body Construction
The body is literally just a bigger version of the head but more oval shaped. Start the same way with a magic ring, 6 sc, then increase up to about 42 stitches. Work straight for a while—maybe 20 rounds or so. The thing that annoyed me SO much about making Spiderman was switching between red and blue yarn every few rounds to get his costume right, like you have to carry the yarn inside or weave in a million ends and it’s tedious as hell.
For the classic Spiderman look, I did red for the top portion (chest and shoulders area) then switched to blue for the lower body and legs. You can look up reference images but basically the blue comes up in like a triangle shape on his torso. I didn’t try to replicate that exactly because I’m not that patient, just did red on top and blue on bottom with a somewhat straight color change.
When you get toward the bottom of the body, decrease gradually over maybe 6-8 rounds until you have an opening small enough to attach legs but not completely closed. Stuff it before you get too far into decreasing or you’ll struggle to get the stuffing in there evenly.
Arms and Legs
Arms are basically tubes. Magic ring with 6 sc, increase to 12 stitches, then work straight in red for the entire arm length. I make them about 15-18 rounds long. You can add a few blue rounds at the top where it attaches to the body if you want but honestly it’s hidden mostly anyway. Leave them understuffed compared to the body—they look better with some flexibility and they’re easier to attach when they’re not rock hard.
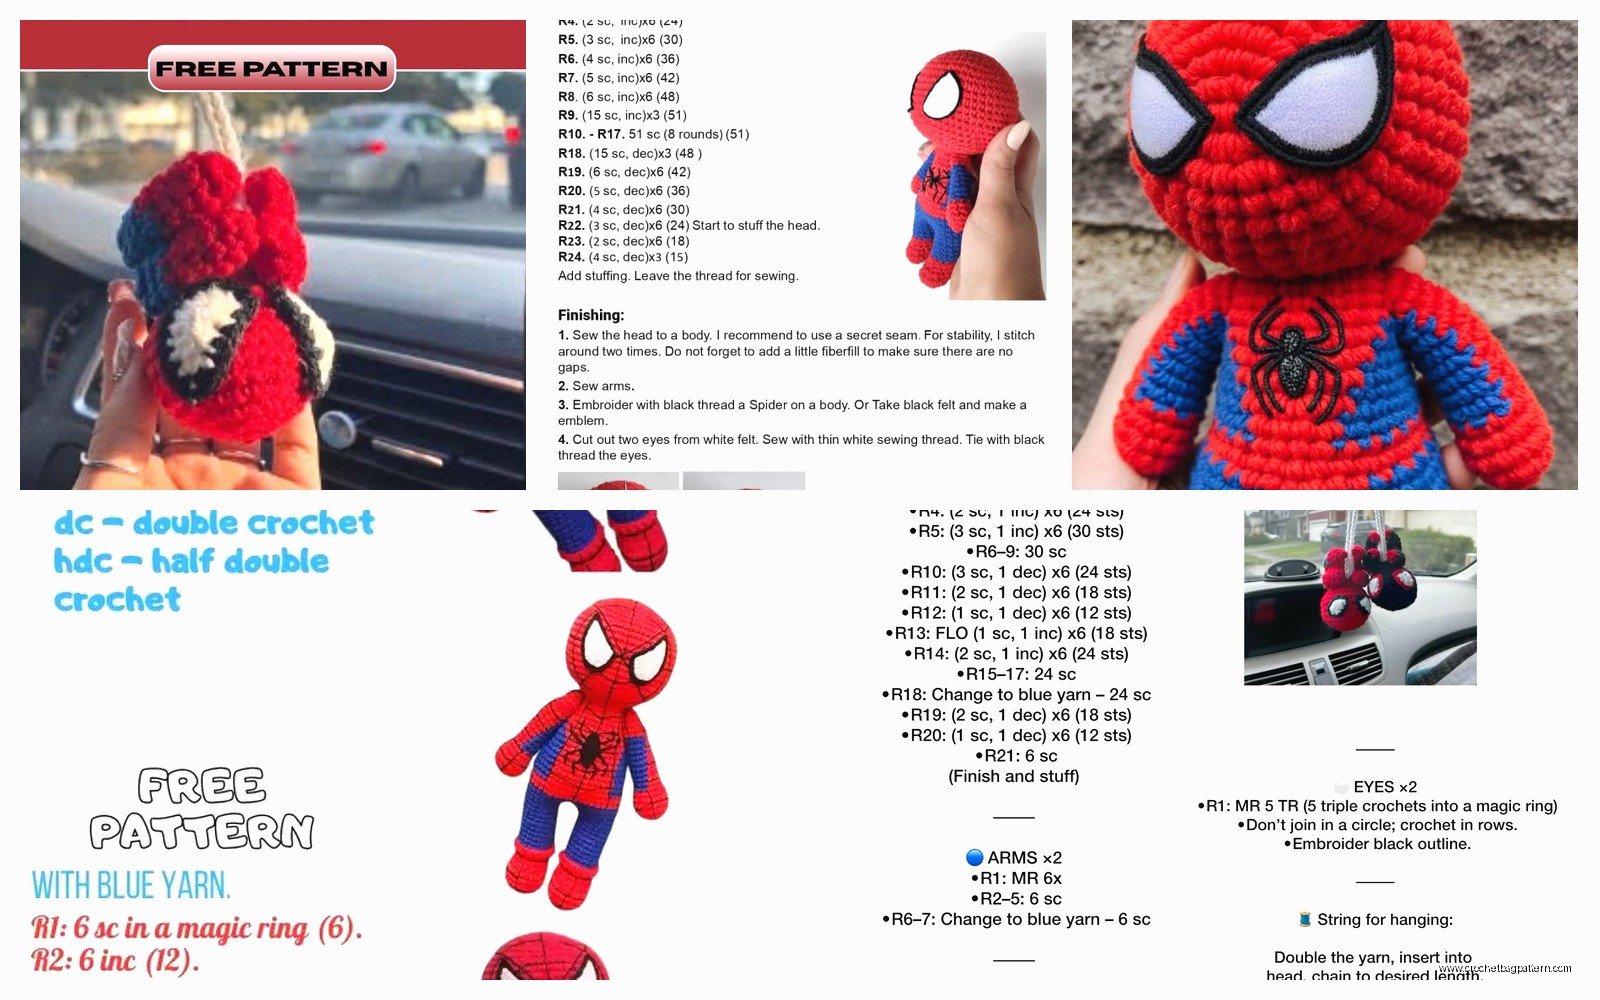
Legs are the same concept but I did them in blue since that’s the color of his pants basically. Start with 6 sc in a magic ring, increase to 12, then work straight for however long you want the legs. I usually do slightly longer than the arms, maybe 20 rounds. For the feet you can either just continue with the same tube and leave it at that, or you can do a few rounds of red to make it look like he’s wearing boots or shoes. I did red for the last 4 rounds and it looked decent enough.
Attaching Everything Together
This is where it gets fiddly. I use a yarn needle and the same color yarn as whatever piece I’m attaching. Position the arms on either side of the body where shoulders would go—usually around rounds 3-5 down from where the head will attach. I whipstitch around the entire opening of the arm to the body, going through both layers. Make sure they’re even on both sides or he’ll look lopsided and it’ll bug you forever.
Legs attach to the bottom of the body. Position them so there’s a small gap between them in the center. Same whipstitching technique all the way around. My cat kept trying to steal the body piece while I was doing this and I had to lock her out of the room which she was very offended about.
Head goes on top obviously. I like to attach it slightly tilted or angled instead of perfectly straight because it looks more dynamic and less like a snowman situation. Whipstitch all the way around the neck area where the head meets the body.
The Webbing Details
Okay so this is the part that makes it actually look like Spiderman instead of just a random red and blue doll. You need black yarn—I used Caron Simply Soft in Black because it’s thinner than Red Heart and shows up better for details. Some people use embroidery floss but yarn is easier to work with in my opinion.
The web pattern is basically a bunch of lines radiating out from a center point on the face, with curved horizontal lines connecting them. Start with the eyes—those are big white ovals that angle upward. You can crochet two small white oval shapes and sew them on, or use white felt which is honestly easier and looks cleaner. I crocheted mine the first time and they looked kinda lumpy so felt is probably the move.
For the black webbing on the red parts, thread your yarn needle with black yarn and just start making lines. There’s no exact pattern you have to follow. I looked at some pictures of Spiderman and just eyeballed it. Start with vertical-ish lines from the top of the head going down, then add curved horizontal lines that connect them. It doesn’t have to be perfect—honestly the slightly messy handmade look is part of the charm or whatever.
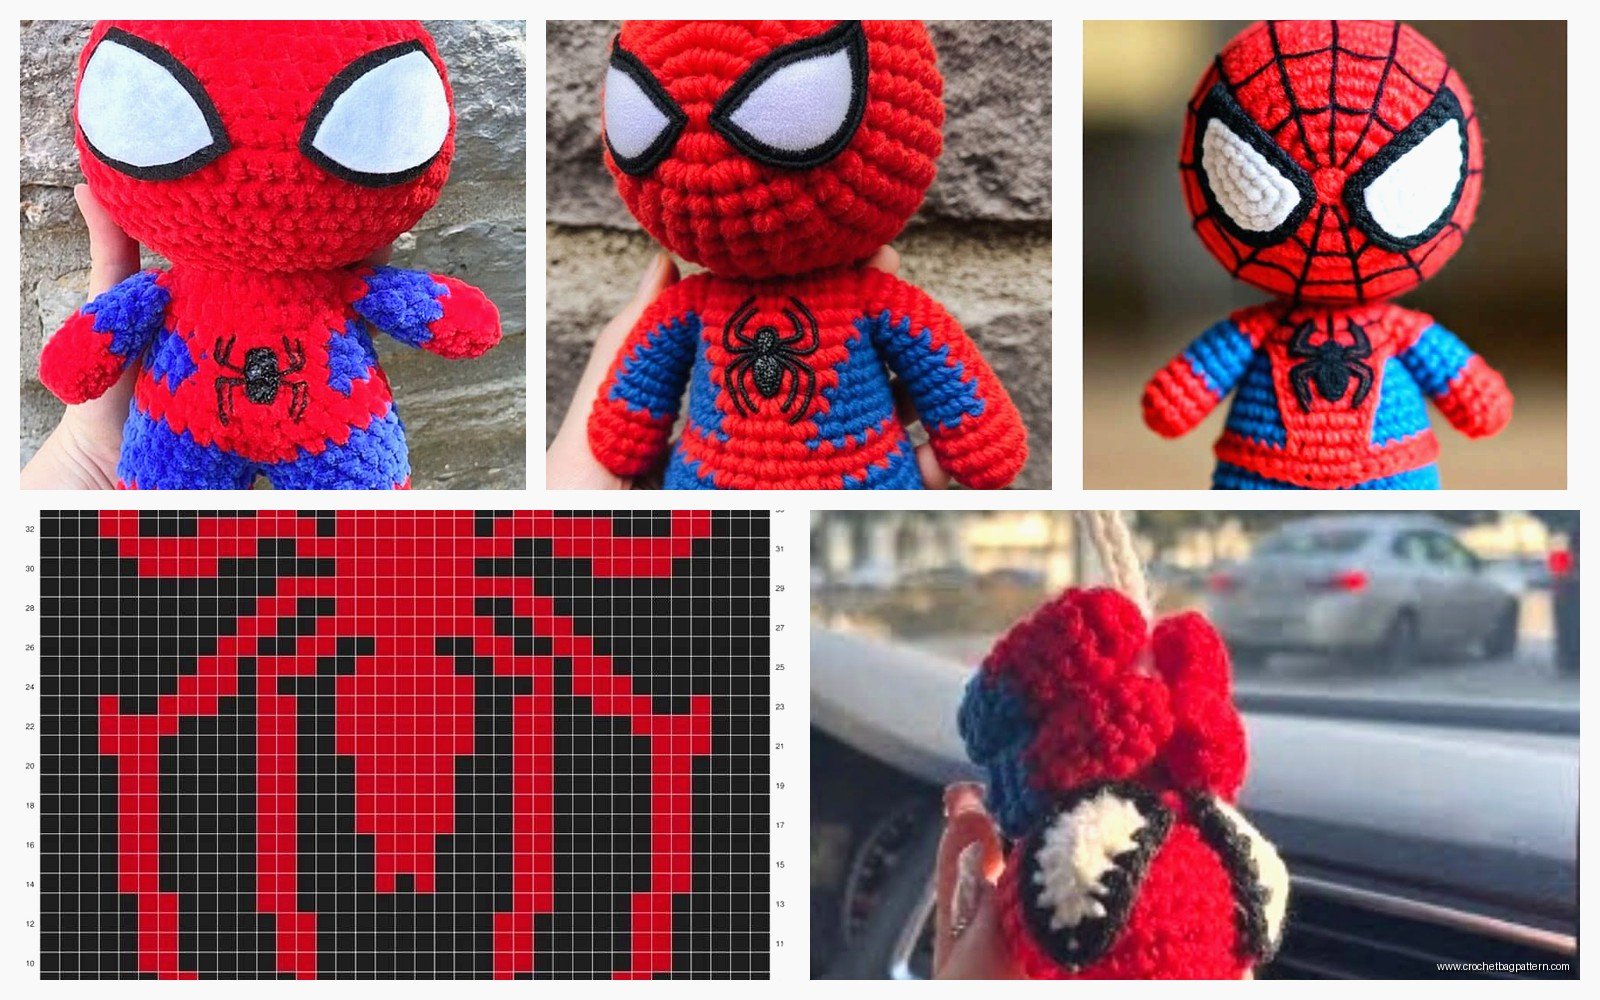
Do the same thing on the red parts of the body and arms. The blue parts don’t get webbing, just leave those plain. This part takes forever and your hand will cramp up but it’s what makes the whole thing recognizable so you can’t really skip it.
Spider Emblem
The spider logo on the chest is optional but it does make it look more complete. You can either crochet a small black spider shape separately and sew it on, or embroider it directly onto the chest. I tried crocheting one and it looked terrible—too bulky and the legs were all different sizes. Embroidering it with black yarn worked better. Just make a small oval-ish body shape with eight legs coming out. It doesn’t need to be anatomically correct, just spider-shaped enough that people get what it is.
Face Details and Final Touches
Besides the white eye pieces, you might want to add some dimension to the face. I sometimes do a few extra rows of black around the eyes to make them pop more. You can also add a tiny bit of shading with gray yarn if you’re feeling ambitious but I’ve never bothered with that.
If you want to make it poseable at all, you can insert pipe cleaners into the arms and legs before you stuff them completely. Just fold the ends over so they don’t poke through. This lets you bend the arms and legs into different positions which is cool for display purposes. I didn’t do this on my first one and he just stands there stiffly but my second attempt—or wait, was it my third? anyway, one of them I did the pipe cleaner thing and it made a difference.
Some people add extra details like web shooters on the wrists using gray or silver yarn, or texture to the suit using surface crochet techniques. I think that’s overkill for a basic amigurumi but if you want to get fancy go for it. Surface crochet would let you add the webbing lines in a raised texture instead of just embroidered flat lines.
Yarn Amounts and Hook Size
I used a 3.5mm hook for the whole thing. Some patterns call for 4mm but I like a tighter stitch for amigurumi so the stuffing doesn’t show through. You’ll need maybe one full skein of red and one of blue—Red Heart Super Saver skeins are huge so you’ll have leftovers. Black yarn you only need a tiny amount, like maybe 20 yards total for all the webbing and details. White for the eyes is even less, just a few yards.
If you use a different yarn weight everything will turn out a different size obviously. Sport weight with a smaller hook makes a tiny one that’s kinda cute. Bulky yarn would make a huge one but I’ve never tried that because it seems like it would eat through yarn and take forever.
Common Problems I Ran Into
The color changes are messy no matter what you do. I tried carrying the yarn inside and it created bulk that showed through. I tried cutting and weaving in ends and that took an entire evening just for ends. Eventually I just accepted that there would be some visible color changes and if someone looks that close at it that’s their problem not mine.
Getting the proportions right is hard without a specific pattern to follow. My first Spiderman had arms that were way too short and it looked like a T-rex situation. Just make sure when you’re planning it out that the arms reach at least to where the legs attach, preferably a bit past. Legs should be slightly longer than arms in my opinion.
The head can end up too heavy and floppy if you make it too big. If that happens you can add some support—either stuff the neck area really firmly, or insert a wooden dowel or thick wire from the body up into the head to hold it straight. I had to do that on the summer 2022 one because his head kept flopping forward and it looked sad.
Webbing lines that are too thick look weird. Use thinner yarn if possible, or split your regular yarn into separate plies. The lines should be visible but delicate-ish, not big chunky stripes across the red parts.
Variations You Could Try
There’s like a million different Spiderman suits if you’re into the comics or movies. The black suit version would actually be easier—just all black yarn with white eye shapes and a white spider emblem. No webbing lines needed which saves a ton of time.
The Iron Spider suit from Infinity War has gold/metallic details and extra arms which would be complicated but could look cool. You’d need some kind of gold metallic yarn or embroidery thread.
Miles Morales Spiderman has black and red instead of red and blue, and slightly different web patterns. Same basic construction though, just different colors.
You could also do different poses—sitting, crawling, hanging from a web. For hanging you’d need to make an actual web structure from white yarn using some kind of stiffener so it holds its shape, then attach the figure to it. I’ve seen people do that and it looks impressive but seems like a whole separate project honestly.
Adding a cape would make it look like… wait no, Spiderman doesn’t have a cape, that’s a different superhero. See this is what happens when you make too many of these, they all blur together.
Anyway the basic pattern works for pretty much any humanoid character if you just change the colors and details. I’ve used the same body structure for other superheroes and regular people dolls. Once you figure out the basic proportions you can adapt it to whatever you want.
