
Jun
Getting Started with the Basic Shape
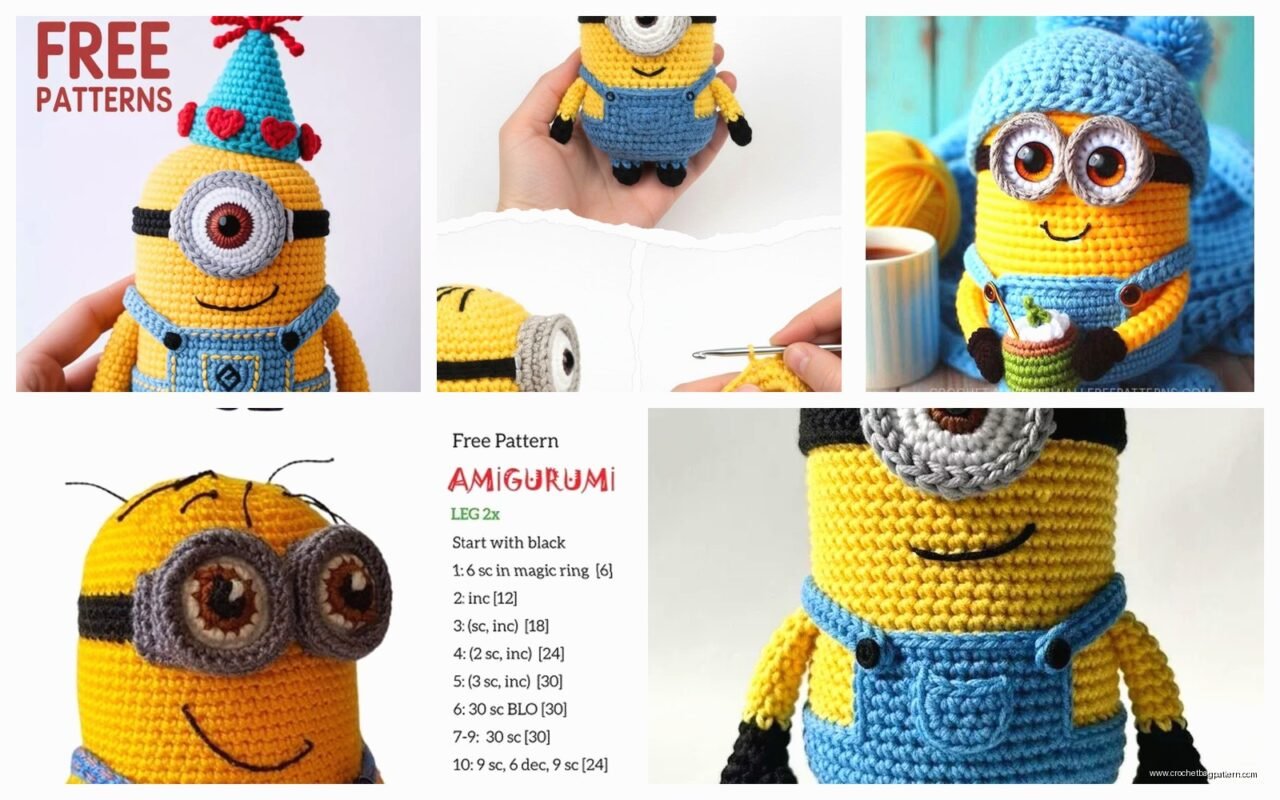
So I made my first minion back in spring 2022 when I was binge-watching The Office for like the third time and honestly the whole thing took way longer than I expected. You’re gonna need yellow yarn obviously and I used Red Heart Super Saver in Bright Yellow because it was cheap and I had a ton of it already. The body is basically just a cylinder which sounds easy but getting the proportions right so it actually looks like a minion and not just a random yellow tube is weirdly tricky.
Start with a magic ring and do 6 single crochets into it. Then you increase every stitch in round 2 so you have 12 stitches. Round 3 you do *sc, inc* around to get 18 stitches. Keep going with this pattern – *2sc, inc* for round 4 to get 24, then *3sc, inc* for 30, and I usually go up to 36 stitches for a decent sized minion. The increases create the rounded bottom part.
Once you hit your max width just crochet straight without any increases or decreases for like 15-20 rounds depending on how tall you want it. I always make mine too short at first because I forget how much stuffing compresses everything.
The Annoying Goggle Situation
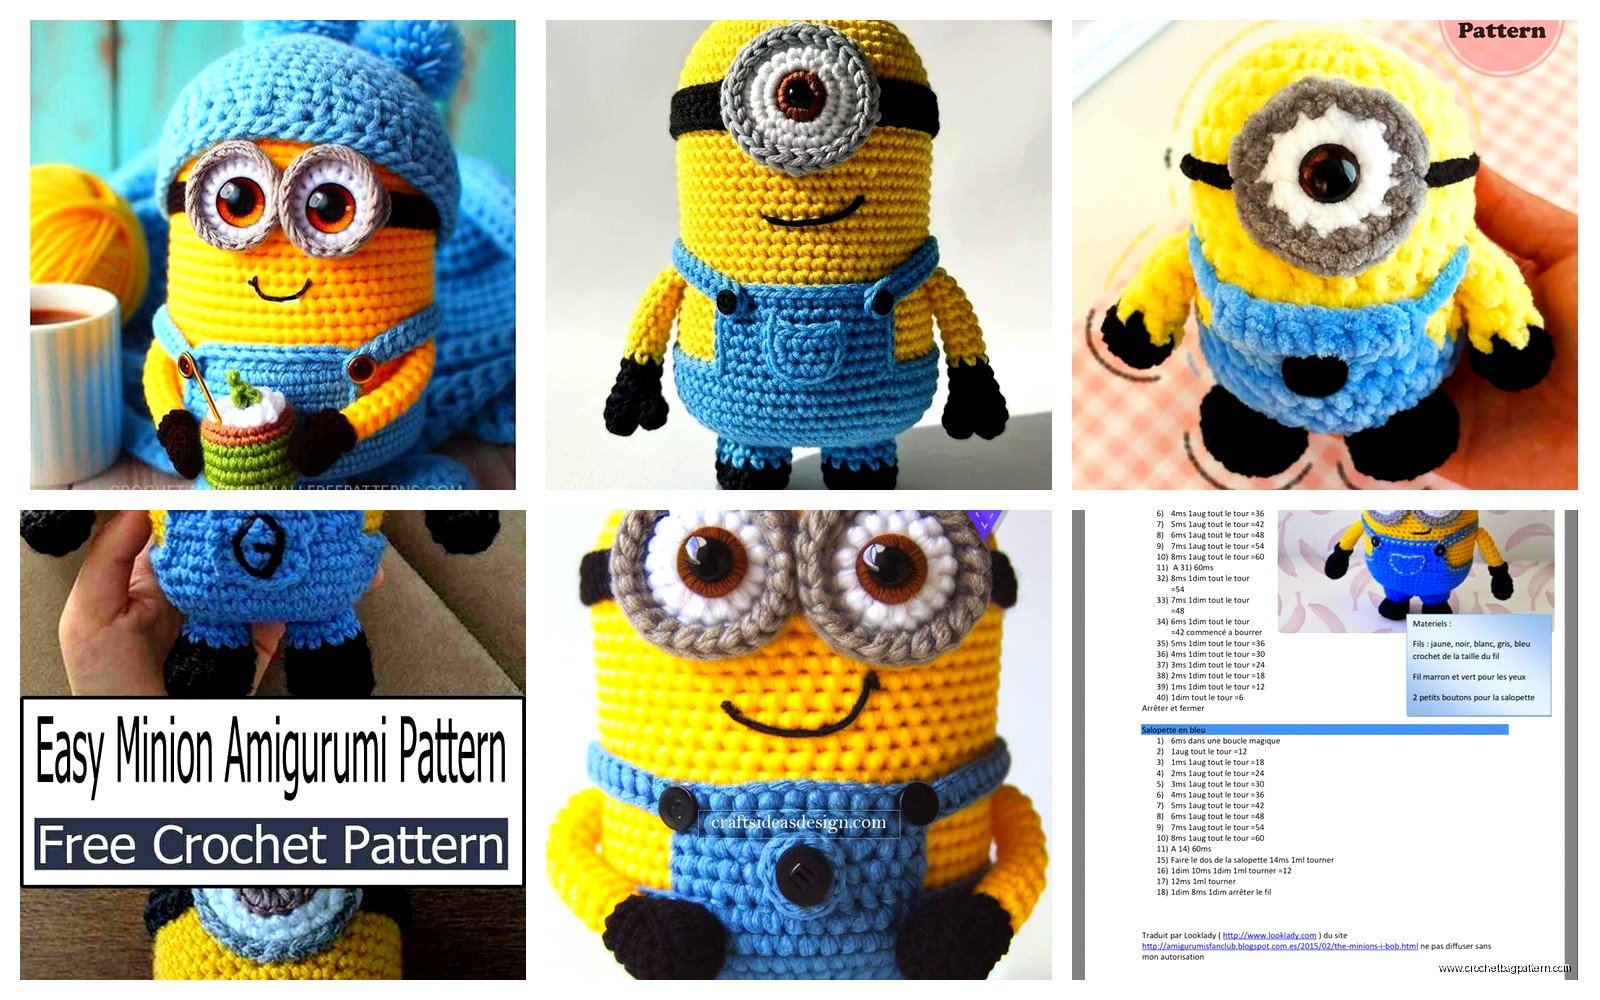
Okay so the goggles were honestly the most annoying part of the whole project and I almost gave up twice. You need gray or silver yarn for the goggle frames and white with black for the actual eyes. I used Caron Simply Soft in Gray but any gray works fine.
For one-eyed minions you make one big circle and for two-eyed ones you make two smaller circles connected by a strap. The frames are just chains crocheted in rounds – chain enough to go around your eye circles with some overlap then single crochet around both sides of the chain to make it dimensional. What really annoyed me was getting them to lay flat and not twist because if you’re tension is even slightly off the whole thing spirals and looks weird.
The eyes themselves are white circles with black pupils. Make a white circle using the same increase pattern as the body but stop at like round 4 or 5. Then either embroider a black pupil or crochet a tiny black circle and sew it on. I tried embroidering first and it looked terrible so I switched to the separate circle method. You can add a tiny white highlight with a french knot or just a stitch of white yarn to make it look more alive.
Attaching the Goggles Without Losing Your Mind
This is where it gets fiddly. You gotta position the goggles on the upper part of the yellow body before you finish stuffing it. I pin everything in place with regular sewing pins first and walk away for like ten minutes to see if I still like the placement when I come back. My cat knocked over my minion once while the pins were in it and I had to start over with positioning which was… frustrating.
Use matching thread or thin yarn to sew the goggles on with a whip stitch or ladder stitch. Go around multiple times because these need to be secure. The strap that goes around the head is just a long chain in black or gray that you sew to both sides of the goggle frame.
Arms and Legs That Actually Look Right
The limbs are basically just small tubes but getting them proportional is important. For arms I chain 4 and crochet in rounds with black or gray yarn (for the gloves part). Do maybe 4-5 rounds of black then switch to yellow for the actual arm. Crochet straight for another 8-10 rounds.
You don’t really stuff the arms much or they look too fat and stiff. Just put a tiny bit of stuffing in the hand part so they have some shape. I learned this the hard way because my first minion had these super chunky arms that looked ridiculous.
Legs are similar but you start with the overalls so it’s blue yarn. I used Vanna’s Choice in… I think it was Denim or something like that. Make a small circle for the foot in black – like 6 stitches in a magic ring, increase to 12, then crochet straight for 2 rounds. Switch to blue and continue the tube for the leg part. These you can stuff a bit more so the minion stands up but still not too much.
The Overalls Are Surprisingly Complicated
I thought the overalls would be the easy part but getting them to look like actual overalls and not just a blue blob took some problem solving. You make basically a rectangular piece that wraps around the bottom half of the body. Chain enough to go around the widest part of your minion body – probably like 36-40 chains depending on your gauge.
Single crochet back and forth in rows until you have a rectangle that covers from just below the goggles down to near the bottom. You can work in rounds instead if you want but I found rows easier to shape. Before you sew it on you need to add the pocket detail which is just a small square or rectangle crocheted separately in the same blue and sewn onto the front.
The straps are chains or narrow strips that go over the shoulders and cross in the back. I make them long enough to go from the front of the overalls over the shoulder and down to the back. Sew them on with blue thread and add a tiny button or french knot where they attach for detail or you can skip that if you don’t care.
Little Details That Make It Look Less Homemade
The pocket logo is optional but if you want to add it you can embroider a simple “G” shape in black or gray on the pocket. I never bother with this because my embroidery skills are pretty bad and it usually just looks messy.
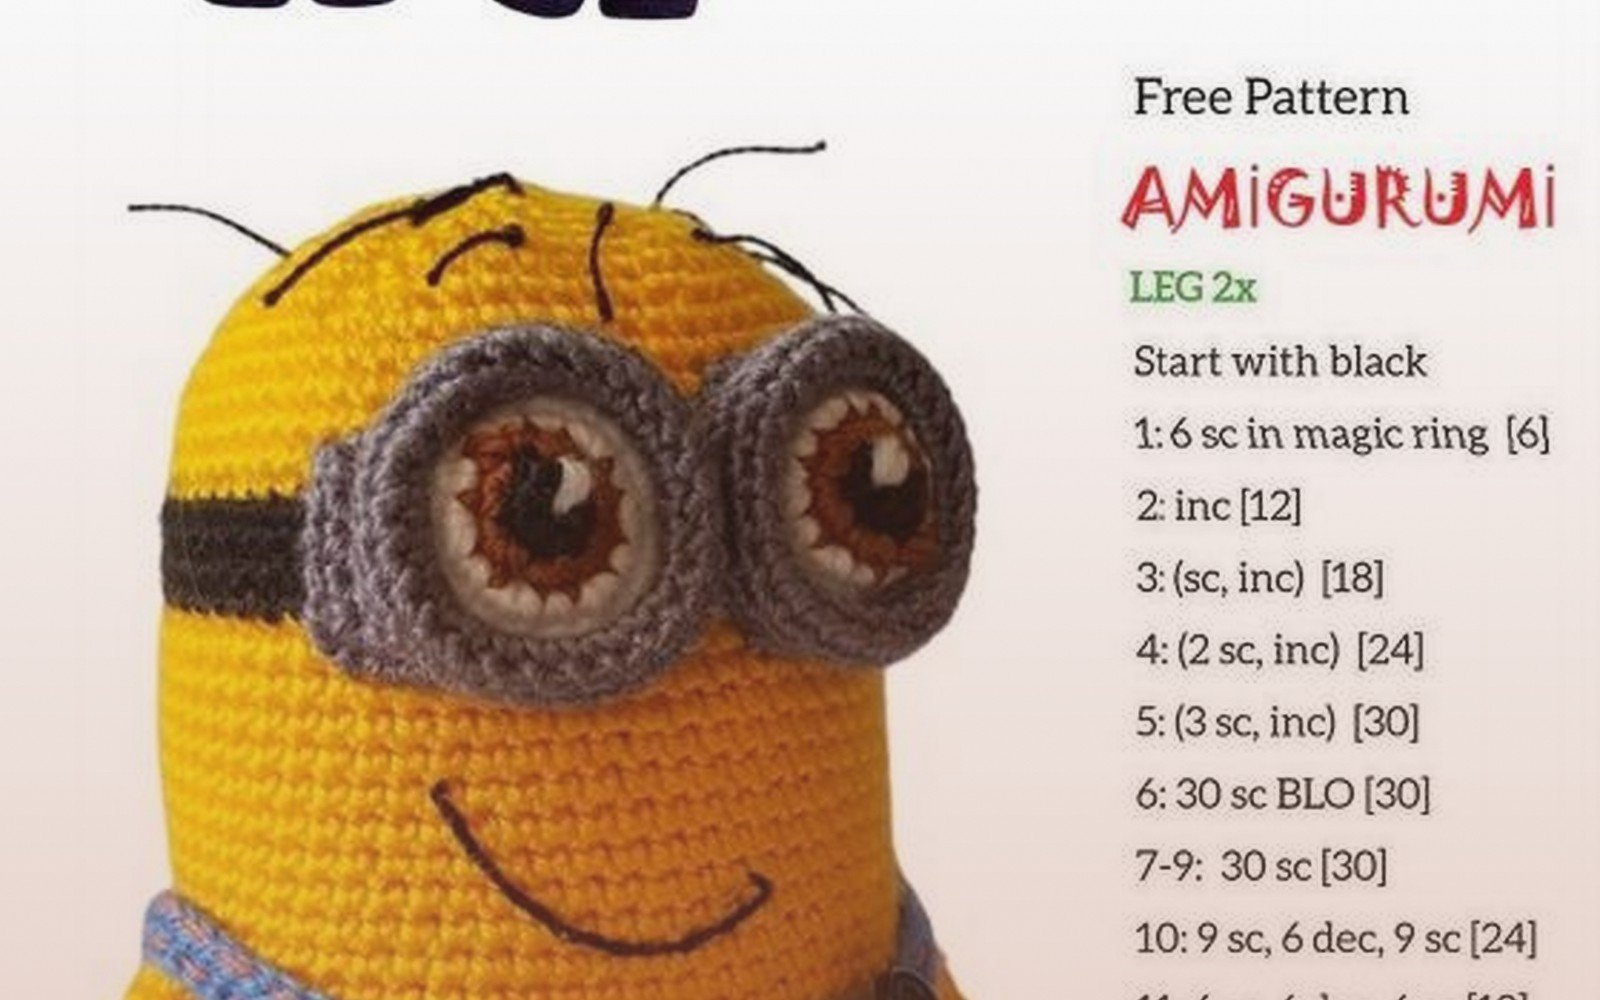
Some people add hair which is just a few strands of black yarn sewn to the top of the head. You can make it neat or crazy depending on which minion you’re going for. I usually do like 3-5 strands that stick straight up using yarn that’s been brushed out a bit to make it look more hair-like.
Assembly Order That Won’t Drive You Crazy
Don’t make all the pieces and then try to figure out assembly because you’ll mess up the proportions. Here’s what worked for me – make the body first and stuff it about 3/4 full. Position and sew on the goggles while you can still reach inside. Then finish stuffing and close up the top.
Attach the overalls next by wrapping them around and sewing the back seam closed while it’s on the body. This way you can adjust the fit as you go. Then add the straps.
Arms get sewn on at shoulder height on the sides. I usually position them slightly forward so they hang naturally. Legs go on the bottom and you want them placed so the minion can actually stand without tipping over. This took me forever to figure out because I kept putting them too close together or too far apart.
Stuffing Tips Because Lumpy Minions Are The Worst
Use polyfil stuffing not fabric scraps or cotton balls. I tried using old t-shirt scraps once to be eco-friendly or whatever and it looked lumpy and terrible. Regular polyfil gives you smooth even results.
Stuff as you go especially for the body. If you wait until the end you can’t reach the bottom parts and you end up with a saggy bottom and overstuffed top. Push stuffing down with a chopstick or the end of a crochet hook to get it into all the corners.
Don’t overstuff or the stitches stretch out and you can see gaps. You want it firm but not rock hard. The arms and legs need way less stuffing than you think – they should be kinda floppy.
Yarn Weight and Hook Size Matters More Than You’d Think
I use worsted weight yarn (size 4) for everything and a 4mm or 4.5mm hook. If you use a bigger hook your stitches will be too loose and stuffing shows through. Smaller hook makes the fabric really stiff and tight which sounds good but actually makes it harder to sew pieces together.
Your gauge doesn’t have to be perfect but try to keep your tension consistent throughout the project. My first minion had really tight stitches on the body because I was concentrating hard and then loose floppy stitches on the arms because I was watching TV and not paying attention and you could totally tell.
Color Variations If You Wanna Make Different Characters
Kevin is the tall one so make your body longer with more straight rounds in the middle. Stuart has one eye so you only make one goggle circle. Bob is short and has two different colored eyes which you can do by making one eye in blue and white or whatever colors you want.
You can also make evil purple minions by using purple yarn instead of yellow and being more chaotic with the hair. I haven’t actually made a purple one yet but I’ve seen patterns for them and they look pretty cool.
What To Do When Things Go Wrong
If your goggles end up wonky just take them off and redo them. I know it’s annoying but trying to work around badly placed goggles makes the whole thing look off. Use those pins to position everything before sewing and don’t rush this part.
When limbs end up different sizes either redo the smaller one or strategically position them so you can’t tell. One of my minions has arms that are like 3 rounds different in length but I sewed them at slightly different angles and you honestly can’t notice.
If the overalls don’t fit right you can add or remove rows from the sides. The blue fabric has some stretch so you can fudge the fit a bit by stretching it as you sew it on.
Time Investment Reality Check
The body takes maybe 2-3 hours if you’re not stopping constantly. Goggles and eyes another hour or two because of all the fiddly parts. Arms and legs are quick – maybe 30 minutes total for all four. Overalls take about an hour. Assembly and sewing everything together is another 1-2 hours depending on how perfectionist you are.
So realistically you’re looking at 6-8 hours total for one minion. My first one took way longer because I kept messing up and redoing parts but now I can finish one in an afternoon if I actually focus.
Pattern Resources and Modifications
There are tons of free patterns online but honestly once you understand the basic construction you can just wing it. The body is always a cylinder, goggles are circles with straps, limbs are small tubes, overalls are a rectangle with straps. You can adjust sizes and proportions based on what looks right to you.
I’ve made minions from like 6 inches tall to almost 12 inches and the technique is the same just with more or fewer rounds. Smaller ones are actually harder because the details get too tiny to work with easily.
You can add accessories like a teddy bear for Bob or tools for Dave or whatever. Just crochet tiny versions of objects and sew them to the hands. I made a tiny banana once that took forever and was completely not worth the effort but it did look cute.
