
May
Getting Started With Your Capybara
So I made my first capybara in spring 2022 when I was basically living on my couch binge-watching The Great British Baking Show and needed something to do with my hands. The pattern I used was one of those free ones from a blog that had like a million pop-ups but whatever, it worked.
You’re gonna need a lot more yarn than you think. Like seriously. I used Red Heart Super Saver in Toast for the body because capybaras are that weird brownish-tan color and that was the closest I could find at Walmart. Bought three skeins thinking I’d have leftovers. Used all three and had to go back for a fourth. The pattern said “worsted weight yarn” but didn’t specify HOW MUCH which was super annoying honestly.
Yarn and Hook Situation
For the hook I used a 5mm because that’s what I had and it seemed fine. Some patterns say 4mm, some say 5.5mm, but honestly capybaras are just big lumpy rodents so being exact isn’t really necessary. They’re supposed to look chunky.
You’ll also need:
- Black yarn for the eyes and nose – I used whatever black I had in my stash
- Safety eyes if you want but I just embroidered mine because my cat was around and I didn’t want choking hazards everywhere
- Stuffing – like a whole bag, these things get BIG
- A yarn needle for sewing
- Stitch markers unless you’re good at counting which I’m not
The Body Part
Okay so the body is basically a giant oval. You start with a magic ring and work in continuous rounds. Most patterns have you make like 60-70 stitches around eventually which feels like it takes forever but you just gotta push through.
I did:
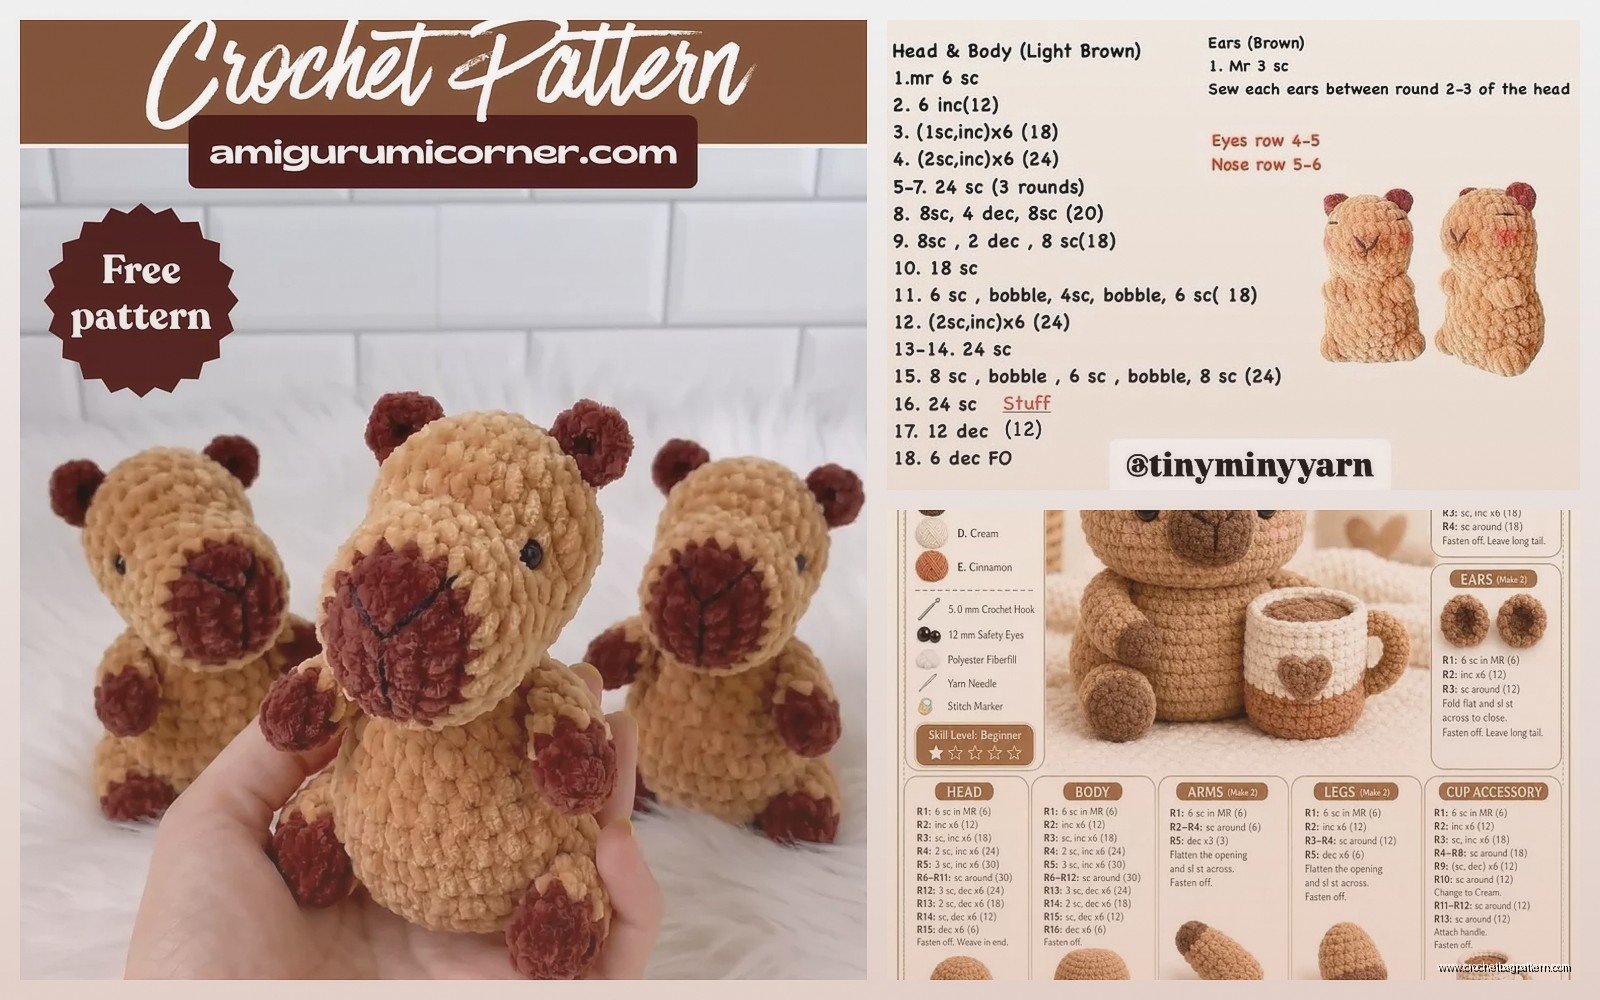
- Round 1: 6 sc in magic ring
- Round 2: inc in each stitch (12)
- Round 3: sc, inc around (18)
- Round 4: sc 2, inc around (24)
And you keep going like that, increasing every round until you hit whatever number the pattern says. Mine went up to 72 stitches which was… a lot. The annoying thing about this part is that it takes SO LONG to get through each round when you’re at 60+ stitches. I’d be sitting there thinking I was making progress and then realize I still had like 40 stitches left in the round.
Once you get to full size you work even (no increases or decreases) for like 20-25 rounds depending on how long you want your capybara. They’re pretty long animals. Mine ended up being about 14 inches long.
Shaping the Back End
Then you start decreasing the same way you increased. This part goes faster because the rounds get smaller. The pattern I used had me stuff as I went which was smart because trying to stuff through a tiny hole at the end would’ve been impossible.
I used Poly-Fil stuffing from Joann’s and went through almost an entire bag. You want it pretty firm because if it’s too squishy the capybara just looks sad and deflated. Really pack it in there.
The Head Situation
The head is basically another oval but smaller and shaped different. You want it kind of rectangular-ish because capybara heads are shaped like… I don’t know, like a brick with a nose? They’re not cute animals honestly they’re just weird looking which is why everyone loves them.
Start the same way with a magic ring but don’t go as big. I think I went up to 48 stitches. The thing that’s tricky is getting the snout right. Some patterns have you make a separate snout piece and sew it on, others have you shape it as you go. I did the separate piece method using Lily Sugar’n Cream in Jute (yeah the dishcloth yarn) because I wanted a slightly different texture for the nose area.
The snout is basically a small oval. Like maybe 15 stitches around and then work even for 4-5 rounds. Don’t stuff it too much or it looks like a pig snout instead of a capybara nose.
Eyes and Face Details
Capybara eyes are weirdly high up on their head and kind of small. I put mine probably around round 12 or 13, pretty far apart. If you’re using safety eyes you gotta put them in before you close up the head which I always almost forget to do.
I embroidered mine with black yarn – just did some satin stitches in an oval shape. Added some white highlights with regular sewing thread to make them look less dead. The nose is just a triangle of black yarn stitched onto the front of the snout piece.
Oh and ears – almost forgot the ears because they’re so small. Just make two tiny semicircles. Like chain 6, turn, sc across, then sc around the whole thing to make it rounded. Sew them on the sides of the head angled back a bit.
Legs Are the Worst Part
Okay so here’s the thing that really annoyed me about this whole project – the legs. You need four of them obviously and they’re all identical which means you’re basically making the same boring tube four times in a row.
Each leg is like:
- Start with 8 sc in magic ring
- Work even for like 12-15 rounds
- That’s it that’s the whole leg
But you need FOUR of them. And they take forever because even though they’re small you’re making four separate pieces. I watched like three episodes of my show while making legs. They’re also kind of annoying to stuff – I used a chopstick to push the stuffing down.
Some people make the legs with wire inside so they can pose them but I didn’t bother. Just stuffed them firm and sewed them on.
Attaching Everything
So once you have all your pieces you gotta sew them together which is its own whole thing. I used the same yarn as the body and a regular yarn needle.
Attach the legs first. I put the front legs kind of underneath the body about 1/3 of the way back from the front, and the back legs about 2/3 back. Pin them first if you want to check placement. Sew them on going around in a circle multiple times because you don’t want a leg falling off.
The head attaches to the front of the body. I angled mine down slightly so it looks like the capybara is looking at the ground which is what they do I guess? Sew all the way around the neck area. This takes a while and my hand cramped up honestly.
The snout gets sewn onto the front of the face. Center it and stitch around the edges.
Optional Details That Make It Better
Okay so the basic capybara is done at this point but there’s some stuff you can add. I didn’t do all of this on my first one but when I made another one last summer I added some details.
You can embroider some toes on the feet with black yarn. Just a few lines on each foot. Capybaras have webbed feet but that’s too complicated to show in crochet so just some toe lines work.
Some people add a little bit of pink embroidery on the nose to make it look more realistic. I tried this and it looked okay but not amazing so whatever.
Whiskers – you can use fishing line or clear thread and poke it through the snout area. I did this and it actually looked pretty good. Just a few on each side.
Making It Look Less Crafty
The thing about amigurumi is it can look really obviously handmade in a way that’s not always great. To make your capybara look more like an actual animal and less like a craft project:
- Brush it with a clean pet brush or toothbrush to make the yarn fuzzy – this works better with some yarns than others
- Make sure your tension is even so you don’t see stuffing through the stitches
- Use a smaller hook than recommended for the yarn weight so the fabric is tighter
- Hide your ends REALLY well, like weave them through multiple times and in different directions
Size Variations
If you want a bigger or smaller capybara you can just use different yarn weights. I made my first one with worsted weight but you could use bulky yarn and a bigger hook for a giant one, or sport weight for a smaller version.
The pattern stays basically the same you just adjust your starting stitch count. For bulky yarn maybe start with 8 in the ring instead of 6, for sport weight maybe start with 4. You’ll figure it out as you go honestly.
I saw someone made one with Bernat Blanket yarn and it was like 2 feet long which is insane but also kind of cool. Would take forever though.
Common Problems I Had
The body kept curling weird on one side because my tension was tighter on that side. I had to really pay attention to keeping it even. If this happens to you just block it at the end – spray it with water and pin it flat to dry.
Running out of yarn partway through is the WORST. Always buy more than you think you need. Worsted weight you probably want 4-5 skeins depending on the brand and yardage.
The head kept flopping to one side because I didn’t attach it securely enough. Had to go back and add more stitching around the neck. Use a lot of stitches when attaching pieces, like way more than seems necessary.
Stuffing showing through – this means your tension is too loose or you need a smaller hook. You can’t really fix it after except by making another one with tighter stitches or just accepting that it looks handmade.
Yarn Alternatives
If you can’t find the right color in Red Heart, Caron One Pound in Taupe is pretty close to capybara color. Lion Brand Vanna’s Choice in Toffee also works. Basically you want a light brown that’s kind of tan but not too orange.
I’ve also seen people use Paintbox Yarns Simply Chunky in different browns and those look good. More expensive than Red Heart though.
For the snout some people use a slightly darker shade of the same yarn instead of different yarn entirely. That works too and probably looks more cohesive honestly.
How Long It Actually Takes
My first capybara took like… I don’t know, maybe 8-10 hours total? Spread over several days because I’m not gonna sit and crochet for 10 hours straight. The body alone was probably 3-4 hours because it’s so big.
The second one I made went faster, maybe 6 hours, because I knew what I was doing and didn’t have to keep checking the pattern.
If you crochet slow or you’re new to amigurumi it might take longer. The techniques aren’t hard – it’s all just single crochet basically – but there’s a LOT of it.
What to Do With It After
I gave my first one to my sister because she’s obsessed with capybaras for some reason. The second one is just sitting on my shelf looking weird. They’re not really practical objects you know? Just something to look at.
Some people make tiny ones as keychains which is cute I guess. You’d have to use really thin yarn though.
They’re good for using up brown yarn if you have a ton of it in your stash. That’s honestly why I made the second one – I had all this tan yarn I bought for a blanket I never finished and needed to do something with it.
Kids seem to like them even though they’re not really toys they’re more like… decorative rodents? My nephew carried his around for like a week though so I guess they work as toys too if you make them sturdy enough.
