
May
Making the Body First Is Usually Easier
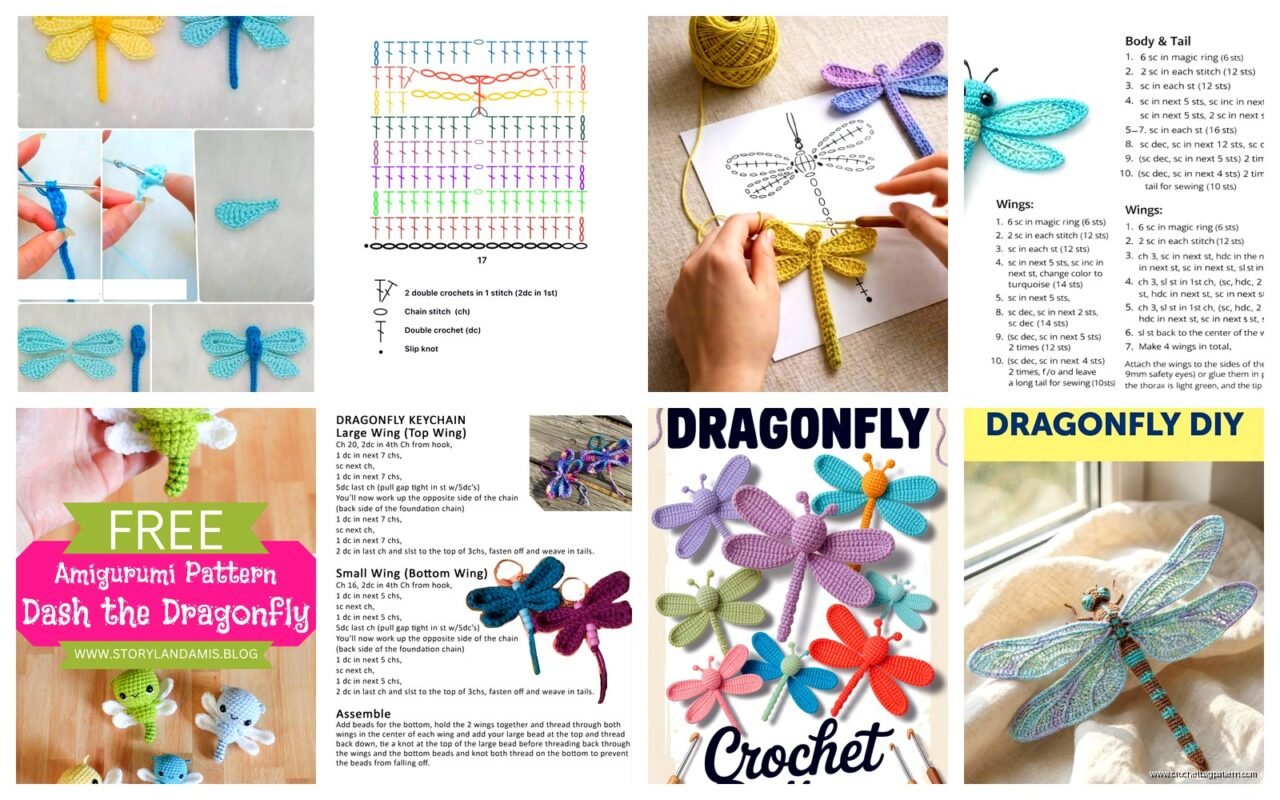
So last spring I was watching some terrible reality show about people flipping houses and decided I wanted to make dragonflies because I saw one land on my porch railing and thought yeah, that’s doable. The body is basically just a long oval shape that you’re gonna stuff pretty firmly.
I used Red Heart Super Saver in that turquoise color for the body – I think it was called Turqua but honestly their color names are weird. You want worsted weight yarn and a 4mm hook, maybe 4.5mm if you crochet really tight like I do sometimes.
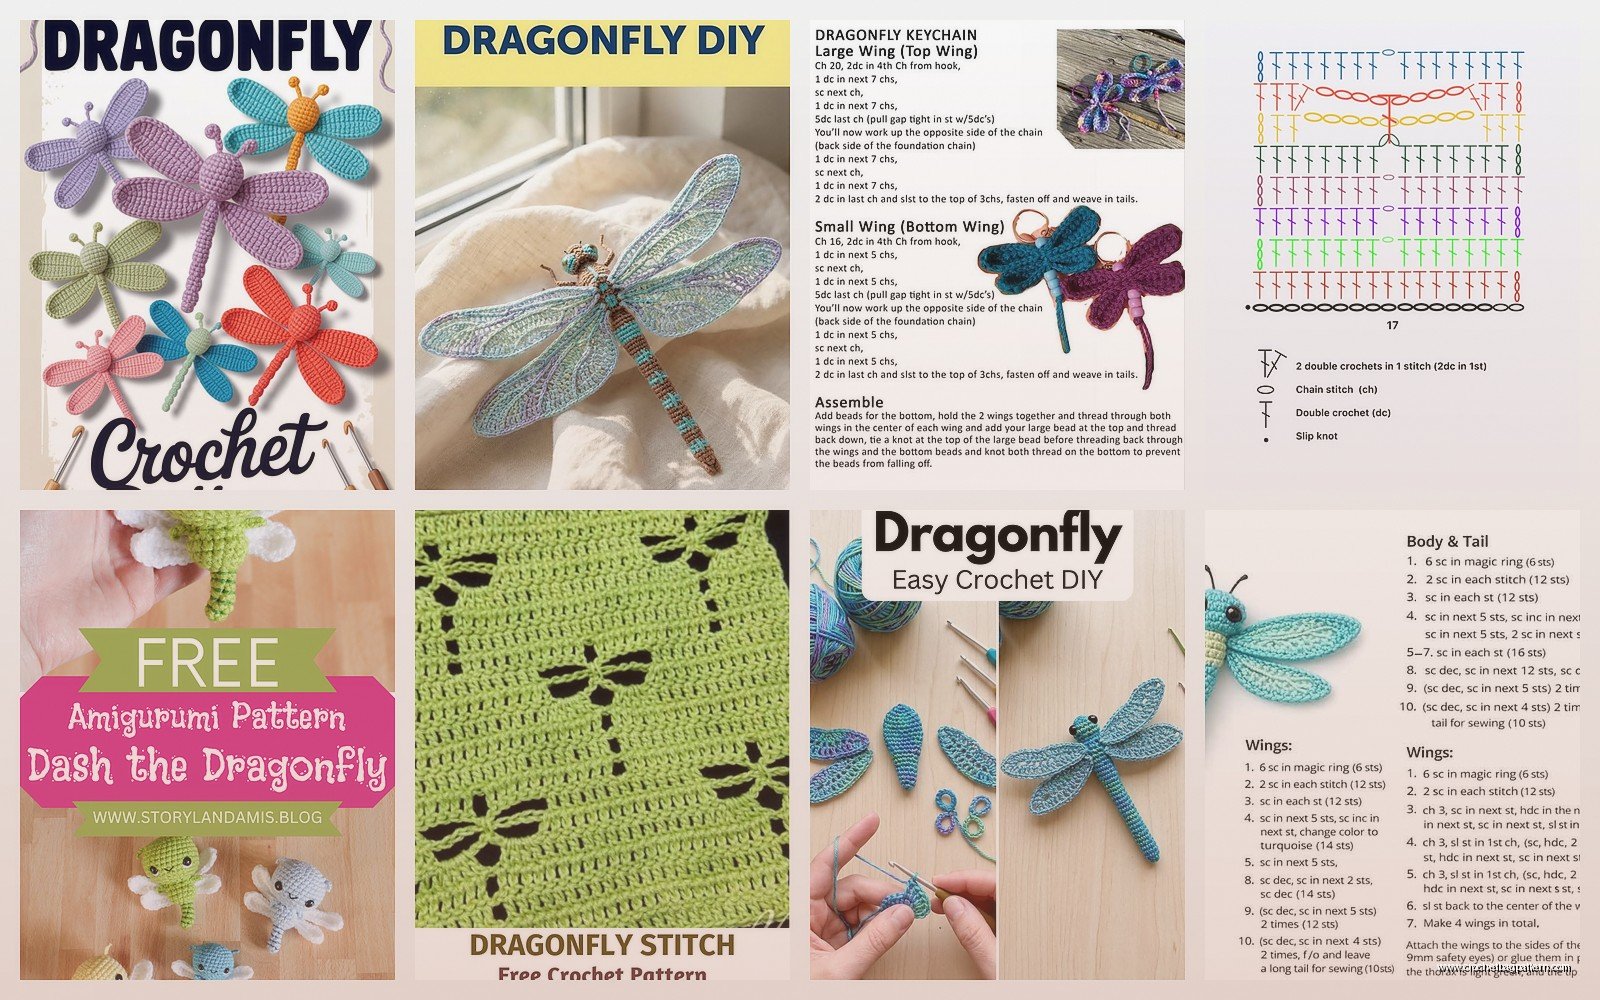
Start with a magic ring. Chain 1, then work 6 single crochets into the ring. Pull it tight. That’s your base.
Round 2 is increases – 2 sc in each stitch around so you end up with 12 stitches. Round 3 you do the typical increase pattern: sc, inc, repeat. That gives you 18 stitches. I usually stop there for the widest part of the dragonfly body because if you go bigger it starts looking like a weird bean.
Work even (just regular single crochet, one in each stitch) for about 8-10 rounds. The body should be getting longer and tube-like. This is where you gotta pay attention because if you lose count – which I did three times during that spring project – you end up with a lumpy body that looks more like a caterpillar than a dragonfly.
The Decrease Section That Always Annoys Me
Here’s the thing that really got on my nerves: the tail section where you decrease needs to be gradual but also the dragonfly tail is supposed to be segmented looking. So you’re trying to decrease while also making it look natural and not just like you ran out of yarn.
I do a decrease round (sc2tog around) to get down to 12 stitches, then work 2 rounds even. Then another decrease round to 6 stitches, work 1 round even. Then you can either fasten off or do a few more stitches to make a little pointy tail end.
Stuff the body before you close it up completely. I use polyfil but honestly you can use yarn scraps or whatever. Just make it firm because floppy dragonflies look sad.
Wings Are Actually Four Separate Pieces
Okay so the wings took me forever to figure out because I kept thinking they should be attached while you make them but actually it’s way easier to make four separate wing pieces and then sew them on later.
I switched to a lighter weight yarn here – Caron Simply Soft in white, or you could do a sparkly yarn if you’re into that. The thing about dragonfly wings is they’re supposed to look delicate and kind of translucent, so you don’t want thick chunky yarn.
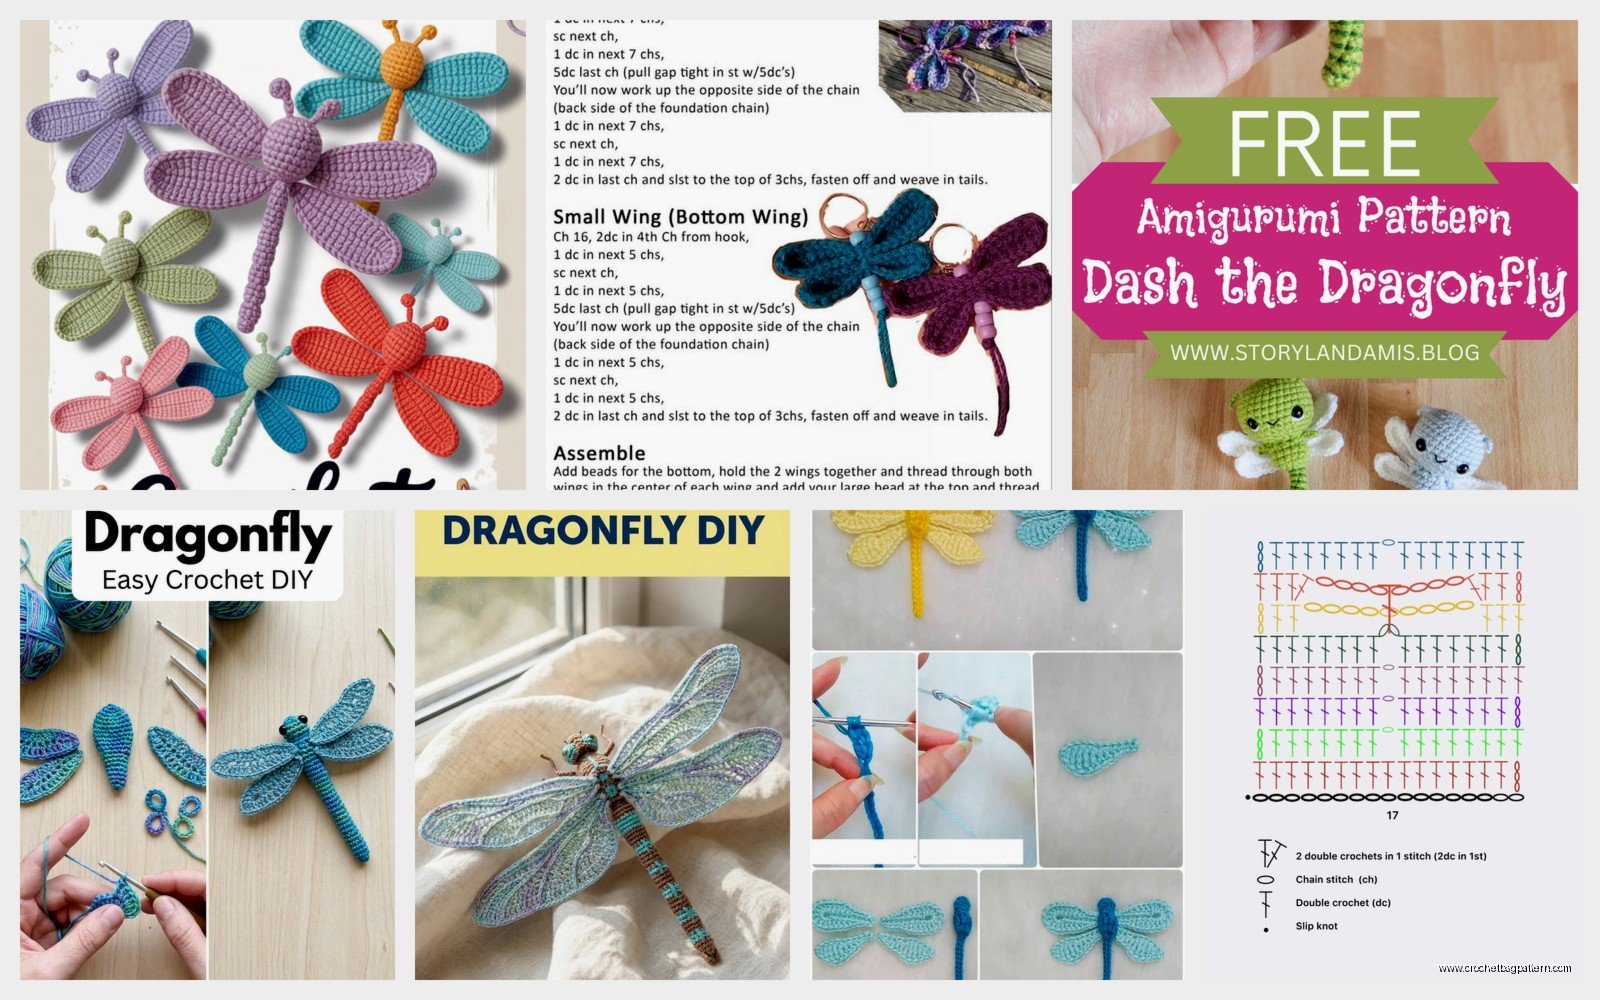
Each wing is basically a elongated oval. Chain 10 (or 12 if you want bigger wings). Starting in the second chain from hook: sc, hdc, dc, dc, dc, dc, dc, hdc, sc. That’s one side of the wing.
Don’t turn your work. Instead, continue around the bottom of your foundation chain working the same stitches in mirror: sc, hdc, dc, dc, dc, dc, dc, hdc, sc. Slip stitch to join.
Now you can either fasten off here for a simple wing or – and this is what I did for the spring dragonflies because I was feeling ambitious or maybe just avoiding thinking about other stuff – you can work one more round around the entire wing doing single crochet in each stitch and 3 sc in the pointy ends to keep the shape.
Make four of these. Two should be slightly larger than the other two because dragonfly top wings are bigger than bottom wings. For the larger wings I chain 14 instead of 10.
My Cat Kept Stealing the Wings
Random side note but my cat decided the wings were the best toy ever invented and I lost one under the couch for like three days. Had to remake it.
Attaching Everything Without It Looking Messy
This is where you need actual sewing skills which I don’t really have but figured out through trial and error. Use the same yarn you made the wings with and a yarn needle.
Position the two larger wings on top of the body, about one-third down from where the head area is. They should angle slightly back and out to the sides. Pin them if you have pins – I usually just hold them with my fingers and hope for the best.
Sew through the center of each wing into the body, going through the body and out the other side. Make several passes so they’re secure. The wings should be able to move slightly but not flop around.
The smaller wings go right below the larger ones, positioned the same way. Some people overlap them slightly but I think it looks better when there’s a tiny gap between the top and bottom wings.
The annoying part here is making sure both sides are symmetrical. I swear I spent twenty minutes adjusting and readjusting the wings on one dragonfly because one side sat higher than the other and it drove me crazy.
Head and Eyes
The head is optional honestly because the body kind of just looks like it has a head area naturally, but if you want to make it more defined you can crochet a small ball.
Magic ring, 6 sc. Next round: 2 sc in each stitch (12 total). Work one round even. Then decrease back down: sc2tog around (6 stitches). Stuff it lightly and sew it onto the front top part of the body.
For eyes I used black seed beads that I had leftover from some other project I never finished. You could also use French knots with black embroidery floss or just sew two tiny black stitches. Safety eyes look weird on dragonflies because they’re too… I don’t know, too googly or something.
Position the eyes on the sides of the head, not the front. Dragonflies have those big compound eyes that wrap around their head.
Adding Details That Make It Actually Look Like a Dragonfly
If you want to get fancy you can add some embroidery details to the body to create that segmented look. Use black or dark brown yarn and just stitch horizontal lines across the body at regular intervals – maybe every 4-5 rounds.
I did this on two of the dragonflies I made that spring but skipped it on the others because honestly it’s tedious and you can barely see it depending on the yarn color you used.
Some people add wire to the wings to make them poseable but I tried that once and it was a disaster. The wire poked through the yarn and it looked terrible. Maybe if you use a thicker yarn or work more densely it would work but for me it wasn’t worth it.
Color Combinations That Worked and Didn’t Work
The turquoise body with white wings looked great. I also did one with a navy blue body (also Red Heart) and iridescent white wings using some fancy yarn I can’t remember the name of… something with metallic thread in it.
What didn’t work: I tried making one with a green body using Vanna’s Choice in the green color and yellow wings. It looked like a bee had a weird accident. Just didn’t read as dragonfly at all.
Black bodies with any color wings look good. Deep purple or burgundy also works. I think the key is having enough contrast between the body and wings so they stand out as separate elements.
Size Variations
If you want a tiny dragonfly use thinner yarn and a smaller hook. I made some with crochet thread and a 2mm hook once for earrings but my eyes hurt after that and I decided never again.
For bigger dragonflies just use bulkier yarn – I haven’t tried this personally but I imagine it would work fine with like Wool-Ease Thick & Quick or something similar. You’d need to adjust the wing proportions though because if you just scale everything up the wings might look too small for the body.
What to Do With Them Once You Make Them
I made like eight dragonflies that spring because once I figured out the pattern I couldn’t stop. Gave some to my sister for her garden-themed baby nursery. Kept one on my desk. Lost track of the others.
You could add a pin back and wear it as a brooch. Or sew it onto a tote bag. Make a mobile with several of them hanging at different lengths – that would actually look pretty cool now that I think about it.
Some people add magnets to the back and stick them on the fridge but that seems like the kind of thing that would fall off constantly and annoy you.
Troubleshooting Common Problems
If your body is curling instead of staying straight, you’re probably crocheting too tight. Go up a hook size or consciously try to keep your tension looser.
Wings won’t stay in place: use more yarn when you sew them on, and make sure you’re going all the way through the body multiple times. Don’t just tack them on the surface.
The whole thing looks lumpy: this usually means your stuffing is uneven or you didn’t stuff firmly enough. Take it out and redo it. I know that’s annoying but lumpy dragonflies just don’t look right.
Can’t get the wings to look symmetrical: honestly sometimes you just have to accept that handmade things are a little imperfect. But if it’s really bothering you, try marking the body with a pin or stitch marker where each wing should go before you start sewing.
Yarn Amounts
You don’t need much. For one dragonfly I used maybe 20-30 yards of the body color and like 15 yards total for all four wings. So this is a good scrap yarn project if you have random balls of yarn lying around that are too small for anything else.
I made all those spring dragonflies from yarn I already had except I did buy one new skein of the Caron Simply Soft because I ran out of white and needed it for the last couple.
Pattern Variations I’ve Seen But Haven’t Tried
Some people make the body in stripes using multiple colors. That could look cool in like rainbow colors or ombre shades of blue.
There’s a version where you crochet the wings in a lacier stitch pattern instead of solid fabric. I think that would take longer but might look more delicate and realistic.
You could also make a dragonfly with bendable legs using pipe cleaners covered in crochet, but that seems overly complicated for something that’s supposed to be a simple quick project.
Why the Spring 2024 Dragonflies Were Different
I made another batch this past spring and used cotton yarn instead of acrylic – Lily Sugar’n Cream in some pastel colors. They came out stiffer and held their shape better but also felt less soft and cuddly, which I guess doesn’t matter for a dragonfly but I noticed it anyway.
The cotton ones took longer to make because cotton yarn is less forgiving than acrylic and you can see every mistake more clearly. But they also looked more polished and professional when they were done.
I gave most of those away as little gifts when I went to a friend’s barbecue and people seemed to like them or at least were polite about it.
Anyway that’s basically how you make a crochet dragonfly. It’s not complicated once you get the body shape down and figure out wing placement. The whole thing takes maybe an hour or two depending on how fussy you are about details and whether your cat steals your pieces.