
Jun
Getting Started with the Coraline Doll
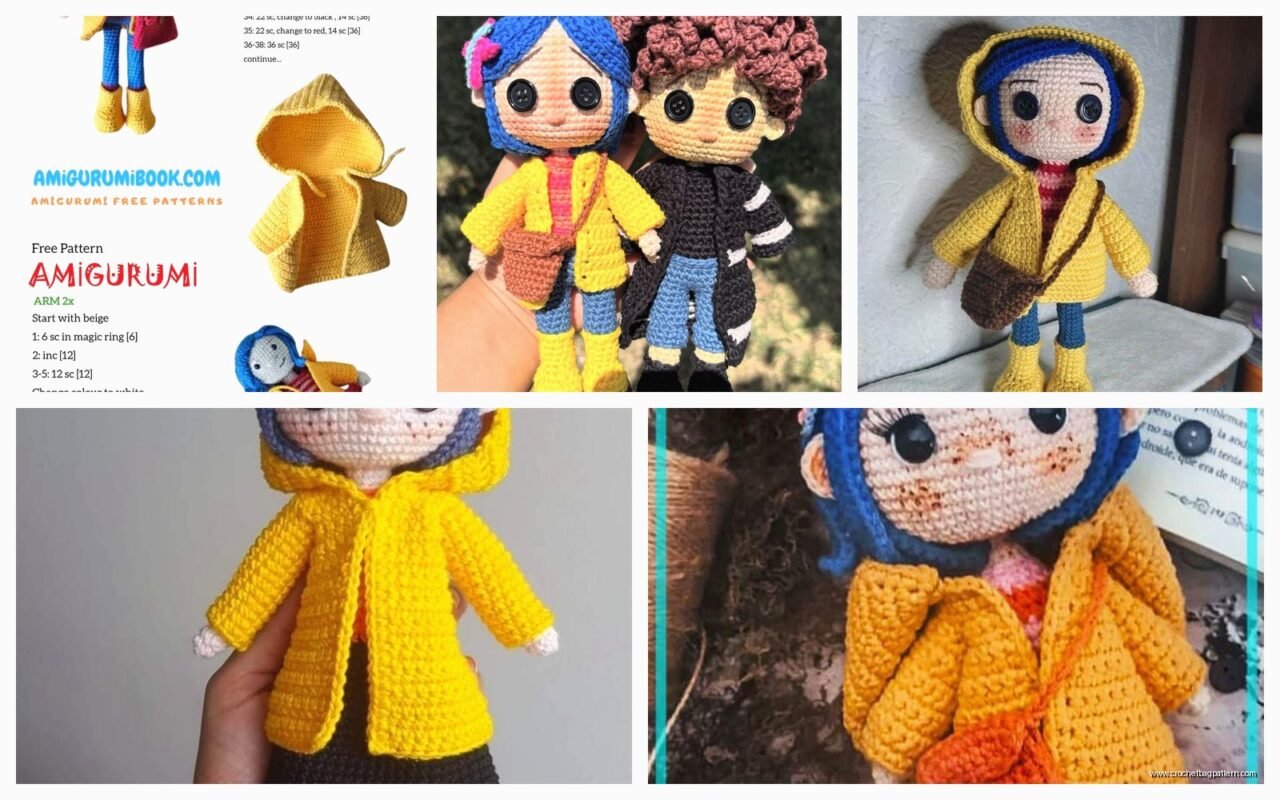
okay so I made a Coraline amigurumi back in spring 2022 when I was basically living on my couch watching true crime documentaries and needed something to do with my hands. The blue hair is honestly the most recognizable thing about her so you gotta get that right or it just looks like any random doll in a yellow raincoat.
First thing – you need worsted weight yarn. I used Red Heart Super Saver for most of it because I’m not spending $8 a skein on something that’s gonna sit on a shelf. The skin tone I used was their “Buff” color which worked fine, though it photographs kinda weird in certain lighting. For the blue hair I think I grabbed whatever blue they had at Walmart that day, probably their “Bright Blue” or maybe it was “Turquoise” – honestly can’t remember but it needs to be that really saturated blue not a navy or anything too dark.
The raincoat yellow I definitely used Red Heart in “Bright Yellow” and then for her jeans I used some random dark blue I had in my stash. Her striped shirt is the annoying part and I’ll get to that in a minute.
Basic Construction Order
You’re gonna want to start with the head because that sets the size for everything else. Most amigurumi patterns work in continuous rounds using a 3.5mm or 4mm hook. I use a 3.5mm because I crochet kinda loose and you don’t want gaps where the stuffing shows through.
The head is basically a sphere – you start with a magic ring, increase until you get to whatever diameter you want (usually around 12-15 rounds for a decent sized head), work even for a bunch of rounds, then decrease back down. The annoying thing that drove me crazy was getting the decreases even so the head doesn’t look lumpy. You have to really pay attention to where you’re placing them and not just randomly decrease or you get this weird pointy thing happening.
For Coraline specifically her face needs to be embroidered on after you stuff it. I used black embroidery floss for her button eyes in the regular world version – just two black buttons sewn on flat. If you’re doing Other Mother’s version you need actual buttons obviously but I just did regular Coraline. Her mouth is just a simple line, her face is pretty minimalist in the movie which actually makes it easier.
The Hair Situation
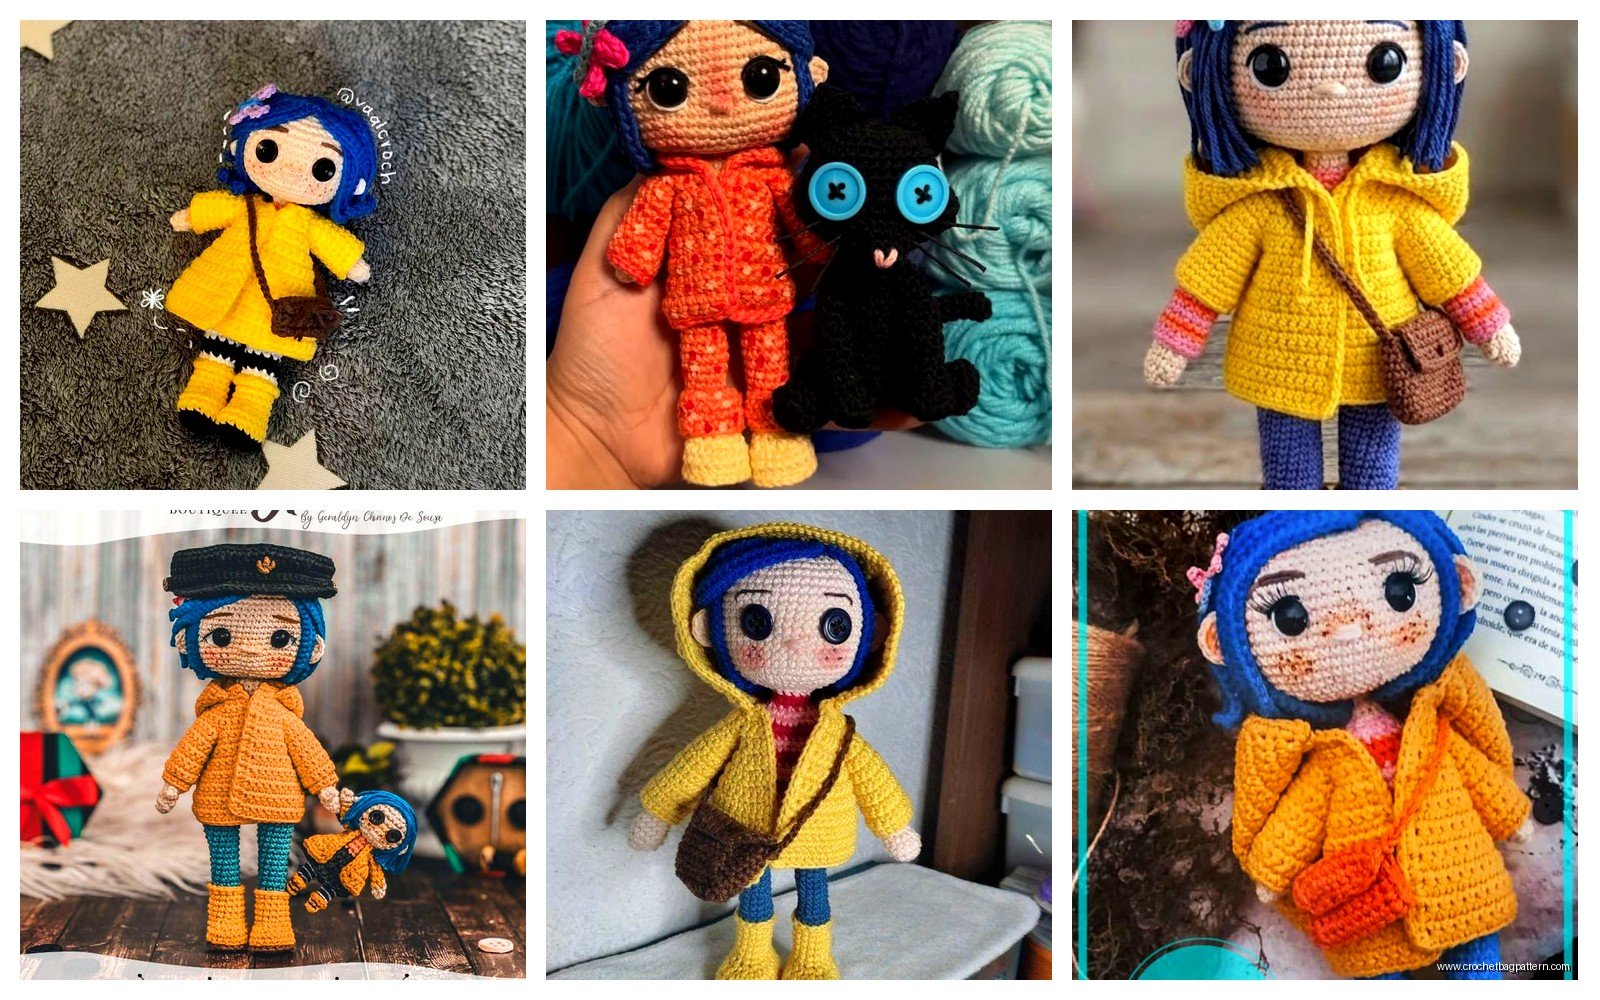
Her hair is SHORT and blue and that specific style is important. I did mine by crocheting a flat piece that fits over her head like a cap, then added fringe. You basically crochet in rows to make an oval shape that covers the top and back of her head, then sew it on.
For the fringe you cut a bunch of yarn pieces maybe 4 inches long and use a crochet hook to pull them through the edge stitches, then knot them. I did this all around the hairline and then trimmed it to that choppy bob length she has. It took FOREVER and kept falling out while I was working on it. My cat also kept trying to eat the loose pieces of yarn which was super helpful.
You can also do the hair by just sewing strands directly onto the head but I found the cap method gave it more structure and the right shape.
Body and Limbs
The body is pretty straightforward – another cylinder shape basically. You can make it all in one piece or do it in sections. I did the torso in her striped shirt colors which meant changing colors every two rows and weaving in like a million ends and this is the thing that annoyed me most about the whole project. Every. Single. Stripe. Means cutting the yarn and weaving in ends or carrying it up the side which shows through.
Looking back I should’ve just made the body in the skin color and then crocheted a separate shirt to put on her but I was following a pattern that had me do it all integrated and yeah, not doing that again. Live and learn I guess or… anyway if you make the clothes separate you can also change her outfit which is cool.
Arms and legs are just small tubes. For Coraline I made her arms pretty thin and her legs slightly thicker. You stuff them as you go – don’t wait until the end or you can’t reach up inside properly. I use polyfil stuffing, the cheap stuff from the craft store works fine. You want it firm but not rock hard.
Her hands you can do a couple ways – either just round off the arms and embroider finger lines, or actually make tiny fingers with decreases. I did the rounded method because tiny fingers on amigurumi always look weird to me unless you’re working with really thin yarn.
The Raincoat
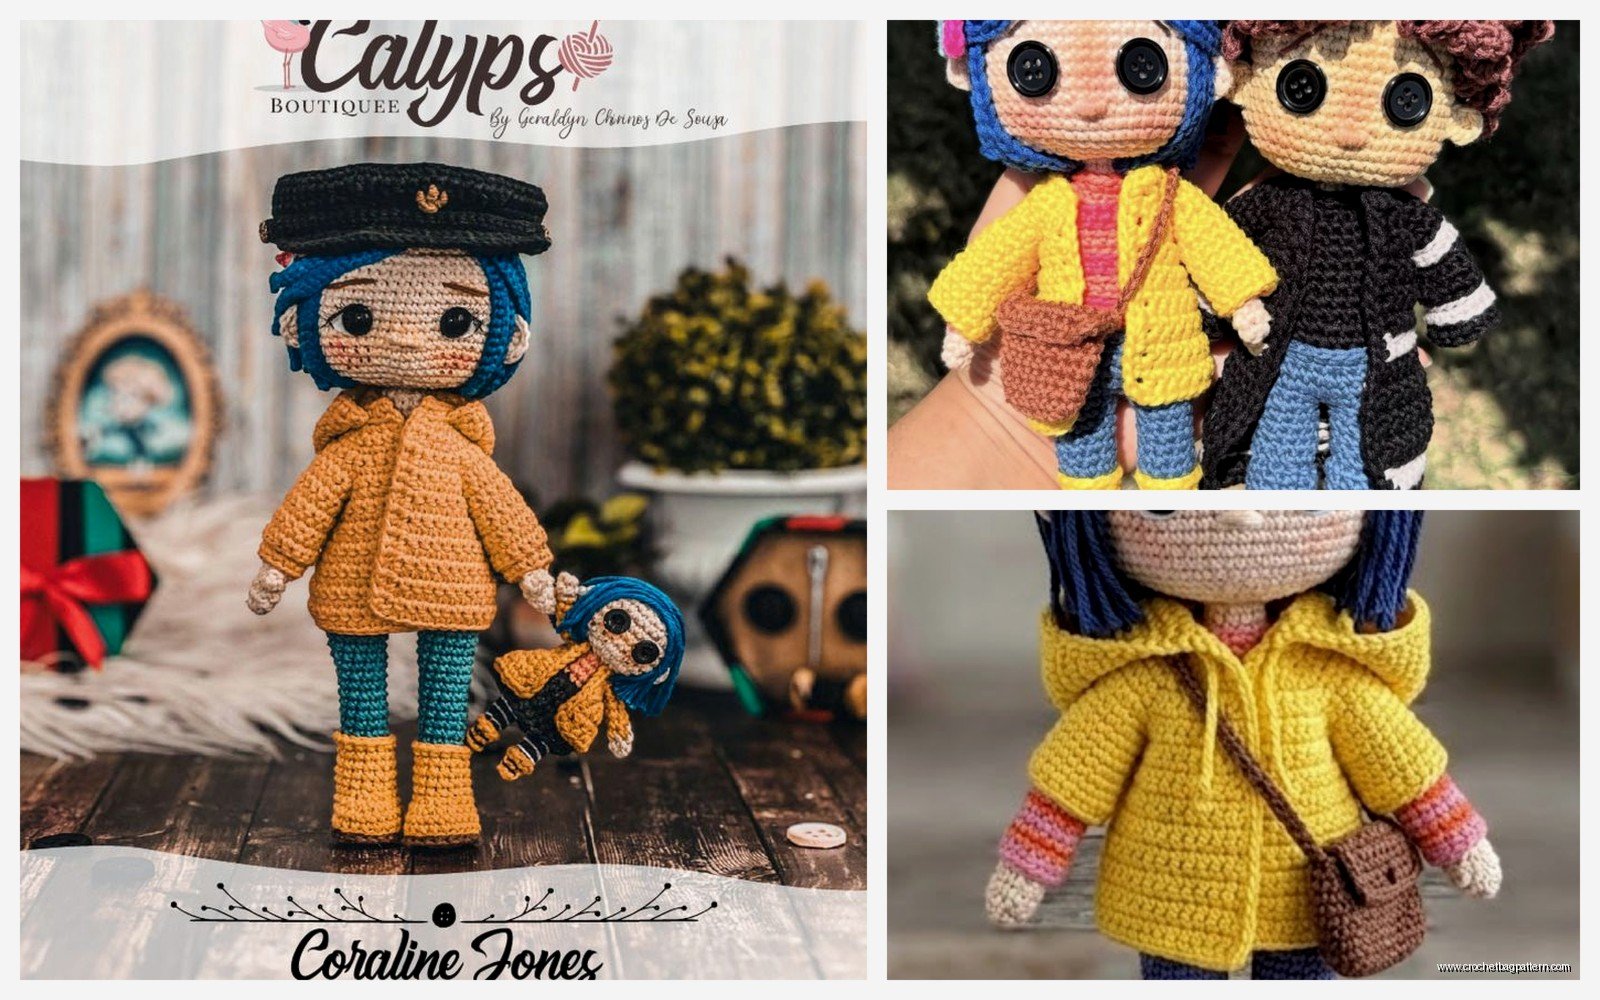
This is what makes it obviously Coraline. I crocheted a separate yellow raincoat piece that goes over the body. It’s basically a rectangle that wraps around with armholes and a hood attached.
For the hood I just chained enough to go across her shoulders, then worked in rows increasing slightly to make it bell out, then folded it in half and sewed up the back seam. The hood on Coraline is pretty big and floppy so don’t make it too fitted.
I added black buttons down the front using embroidery floss and tiny black beads I had left over from some other project. You could also just embroider button shapes if you don’t have beads.
The raincoat should be big enough that it looks a bit oversized on her – that’s part of the character design. I used probably a 4mm hook for the coat even though I used 3.5mm for everything else just to make it a slightly looser fabric.
Assembly
Once you have all the pieces you gotta sew everything together. I use the same yarn I crocheted with and a yarn needle. Start by attaching the head to the body – I usually sew around the neck join twice to make sure it’s secure because heads are heavy.
Arms get sewn on at the shoulders. You can position them however you want – straight down at her sides, bent at the elbows, reaching forward. I did mine straight down because it was easier and she’s supposed to be standing anyway.
Legs attach at the bottom of the body. Make sure they’re even so she can stand up on her own, though most amigurumi dolls need to lean against something to stay upright unless you wire the legs.
Oh and shoes – I almost forgot. I made simple black shoe shapes by crocheting little oval platforms and then working up the sides for maybe 3 rounds. They slip onto the bottom of her legs and I tacked them in place with a few stitches. You could also just do her feet in black yarn if you don’t want separate shoes.
Details That Matter
The jeans need back pockets embroidered on. Just two small rectangles in yellow or tan embroidery floss on her butt. Sounds dumb but it makes them actually look like jeans instead of just blue legs.
Her striped shirt – if you do it separate instead of integrated into the body like I did – should be orange and white or orange and cream stripes. Horizontal stripes, pretty thin, maybe 2 rounds each color.
Some people add her little bag but I skipped that. You could make a tiny drawstring bag out of brown yarn if you want to get fancy with it.
Proportions
This is something nobody really explains in patterns but the proportions matter a lot for it to look like the character. Coraline has a pretty big head compared to her body – it’s a kids’ movie style. So your head should be like almost as wide as the shoulders are, and her legs should be fairly long and thin.
If you make the head too small she looks like a regular person doll not Coraline specifically. If the body is too wide she looks… I dunno, wrong.
I made mine about 10 inches tall total. You could go bigger or smaller but that’s a good size where the details actually show up and it doesn’t take 500 hours to finish.
Yarn Amounts
You don’t need a ton of yarn for this. Maybe 50 grams of the skin color, 30 grams of blue for hair, 40 grams of yellow for the coat, 20 grams of the jeans color. The striped shirt uses barely any of each color, like maybe 10 grams total of both combined.
I always buy more than I need though because nothing’s worse than running out 3/4 through and having to match dye lots. With Red Heart Super Saver you can usually find the same colors again but still annoying.
Stuffing Tips
Use small pieces of stuffing and really push them into the corners and edges. If you just shove big wads in there you get lumps. For the head especially you want it smooth and even.
I keep a chopstick next to me when I’m stuffing to poke it down into narrow parts like arms and legs. Works way better than trying to use your fingers.
Don’t overstuff or the stitches stretch out and look weird. You want it firm enough to hold its shape but not so tight that you can see through the gaps between stitches.
Face Embroidery
This is where you can really mess it up or make it look good. I used this pin I found on Pinterest as reference – had a good close-up of her face from the movie.
Her button eyes should be placed pretty far apart, like on the outer edges of where you’d normally put eyes. They’re big and round. I sewed on actual black shank buttons I got from Joann’s, the kind with the loop on the back. Sewed them on real tight so they’re flat against the face.
The nose is barely there – just a tiny V shape or you can skip it entirely. Her mouth is a simple curved line, not smiling really, just neutral. Use black embroidery floss and do a backstitch for clean lines.
Some people add eyebrows but I didn’t because in a lot of scenes you can’t really see them under her hair.
Common Problems
The hair falling off – this happened to me twice before I figured out I needed to sew it on more securely. Go around the edge of the hair cap at least twice with your needle when attaching it.
The doll not standing up – if the legs aren’t stuffed firmly enough or they’re positioned wrong she’ll just flop over. You can add a bit of wire inside the legs before stuffing if you want her to be poseable but I didn’t bother.
The raincoat being too small – make it bigger than you think you need. It should close in the front with room to spare.
Running out of yarn in the middle of the head – this is why you buy extra. Also why I use Red Heart because I can always get more.
Alternative Versions
You could make Other Mother Coraline with the button eyes by using actual white buttons with black thread making an X through them. That’s creepier obviously but also kinda cool.
Or make her in the star sweater outfit instead of the raincoat – that’s the other iconic look. The sweater is black with silver or gray stars embroidered on it.
There’s also the nightgown version but that’s less recognizable as Coraline specifically.
Pattern Resources
I kind of frankensteined my pattern together from a basic doll pattern and then modified it. There are some paid patterns on Etsy specifically for Coraline but I’m too cheap for that when you can figure it out from a regular doll pattern and reference images.
The basic structure is the same as any amigurumi doll – sphere head, cylinder body, tube limbs. Once you know that you can make any character by changing colors and adding the right details.
Time Investment
Took me probably 12-15 hours total spread over like a week. The hair was the most time-consuming part, then all those stupid striped shirt ends to weave in. If you do the shirt separately it’d be faster.
The actual crocheting goes pretty quick, it’s the assembly and details that take time. Don’t rush the face embroidery or you’ll have to redo it and that’s just depressing.
Anyway that’s basically how you make a Coraline amigurumi. She’s sitting on my bookshelf now next to a plant that’s probably dying and I still think the hair could be better but whatever, it’s recognizable and that’s what matters.
