
Mar
okay so here’s how you actually make these headbands
I made like five of these last March when I was stuck at home with a cold and binge-watching that weird documentary about fonts on Netflix. Super easy project when you can’t really focus on complicated stuff. The basic idea is you’re making a rectangle and then seaming it together, which sounds boring but it works.
So you need yarn first obviously. I used Red Heart Super Saver in that dusty rose color because it was what I had, but honestly any worsted weight works. Lion Brand Wool-Ease is good too if you want something softer but I find Red Heart holds its shape better for headbands. You need maybe 50-70 yards depending on how wide you make it and how big your head is. I have a pretty average sized head I think.
what hook size and starting out
Use a 5.5mm hook or maybe 6mm if you crochet tight. I crochet pretty loose so I went with the 5.5mm. You’re gonna chain like 12 stitches to start but honestly this depends on how wide you want the headband. I did 12 and it came out about 2.5 inches wide which is good because it actually stays on your head without sliding around.
The annoying thing about this whole project is measuring the length while you’re working because you can’t really try it on as you go without it looking all stretched out and weird. So you just gotta chain, work your rows, and hope it fits. I’ll get to that.
After you chain 12 or whatever number you picked, you’re working in rows of single crochet. Just basic sc back and forth. Turn at the end of each row, chain 1, and sc across. That’s literally it for the main pattern.
the actual stitching part
Row 1: sc in second chain from hook and across. You’ll have 11 sc if you chained 12.
Row 2: chain 1, turn, sc across all 11 stitches
Row 3-whatever: just keep repeating row 2 until your rectangle is long enough
The “long enough” part is where it gets tricky. You need it to go around your head comfortably. For me that was like 19-20 inches but I measured wrong the first time and made it too short. My cat kept trying to sit on the yarn while I was working which didn’t help with keeping track of where I was.
I usually just hold the rectangle around my head every few rows to check but don’t stretch it too much when you do this or you’ll think it’s longer than it actually is. The fabric has some give but not a ton if you’re using acrylic yarn.
making it actually look like a headband
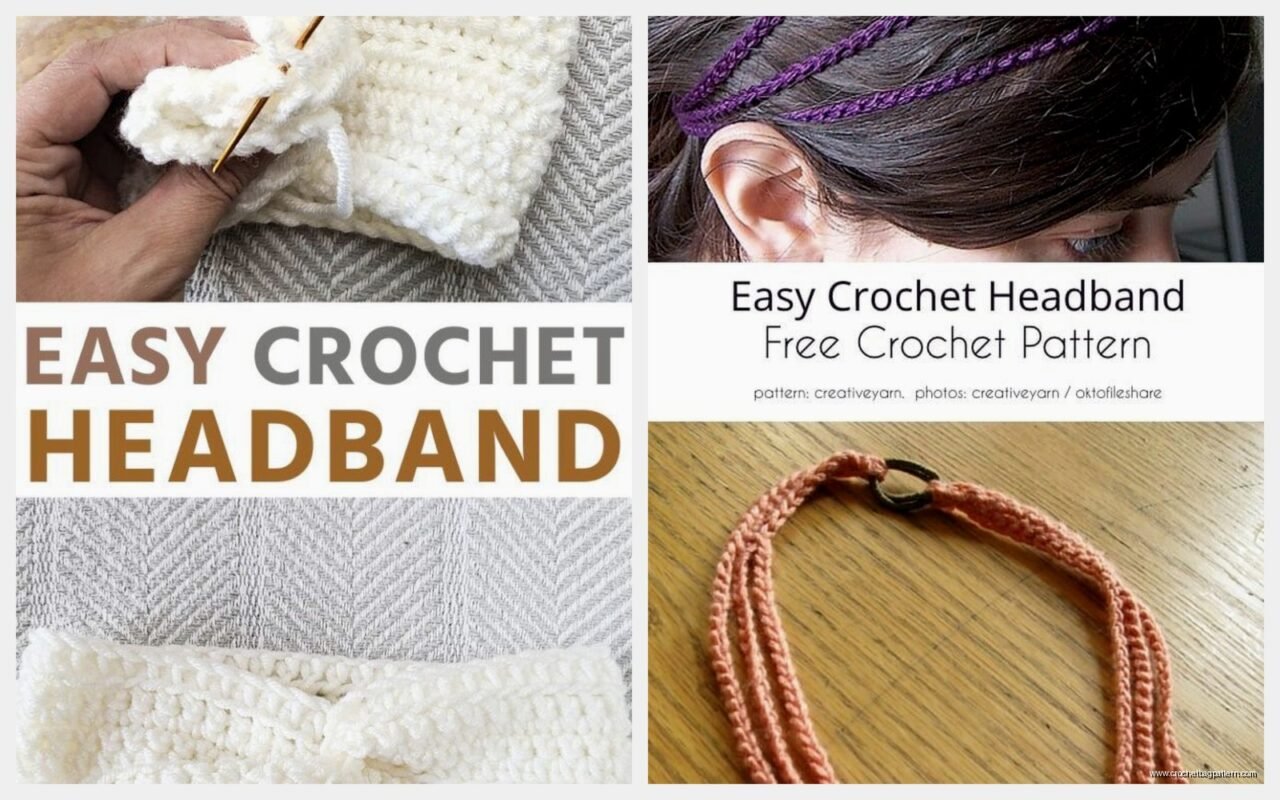
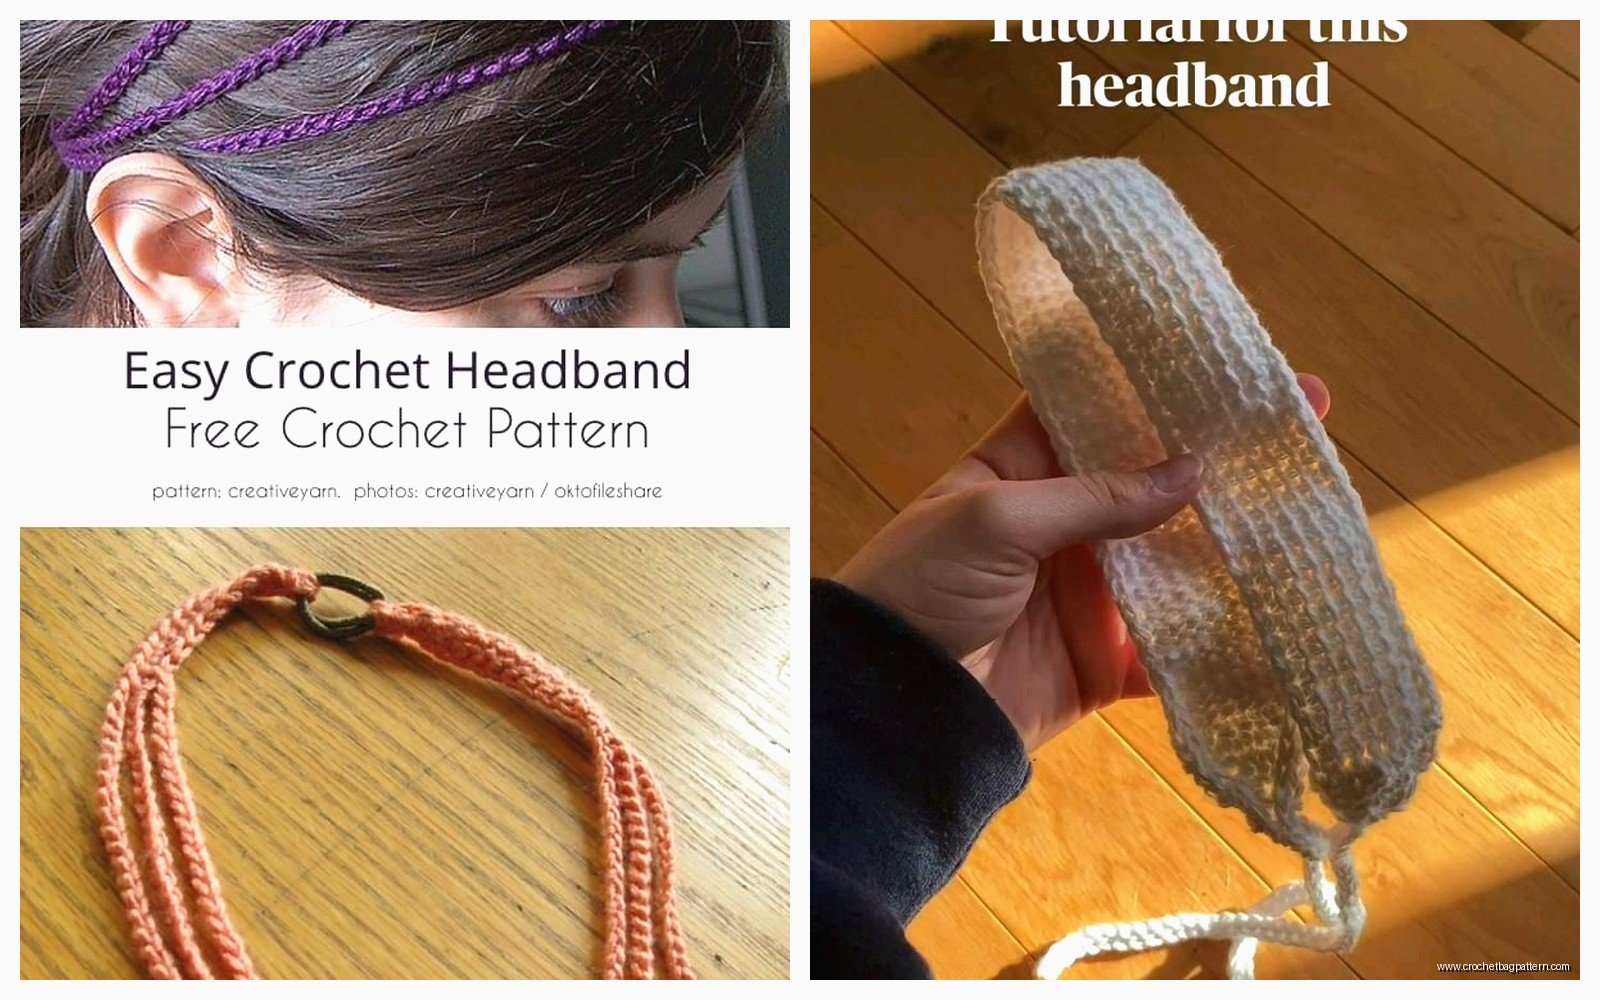
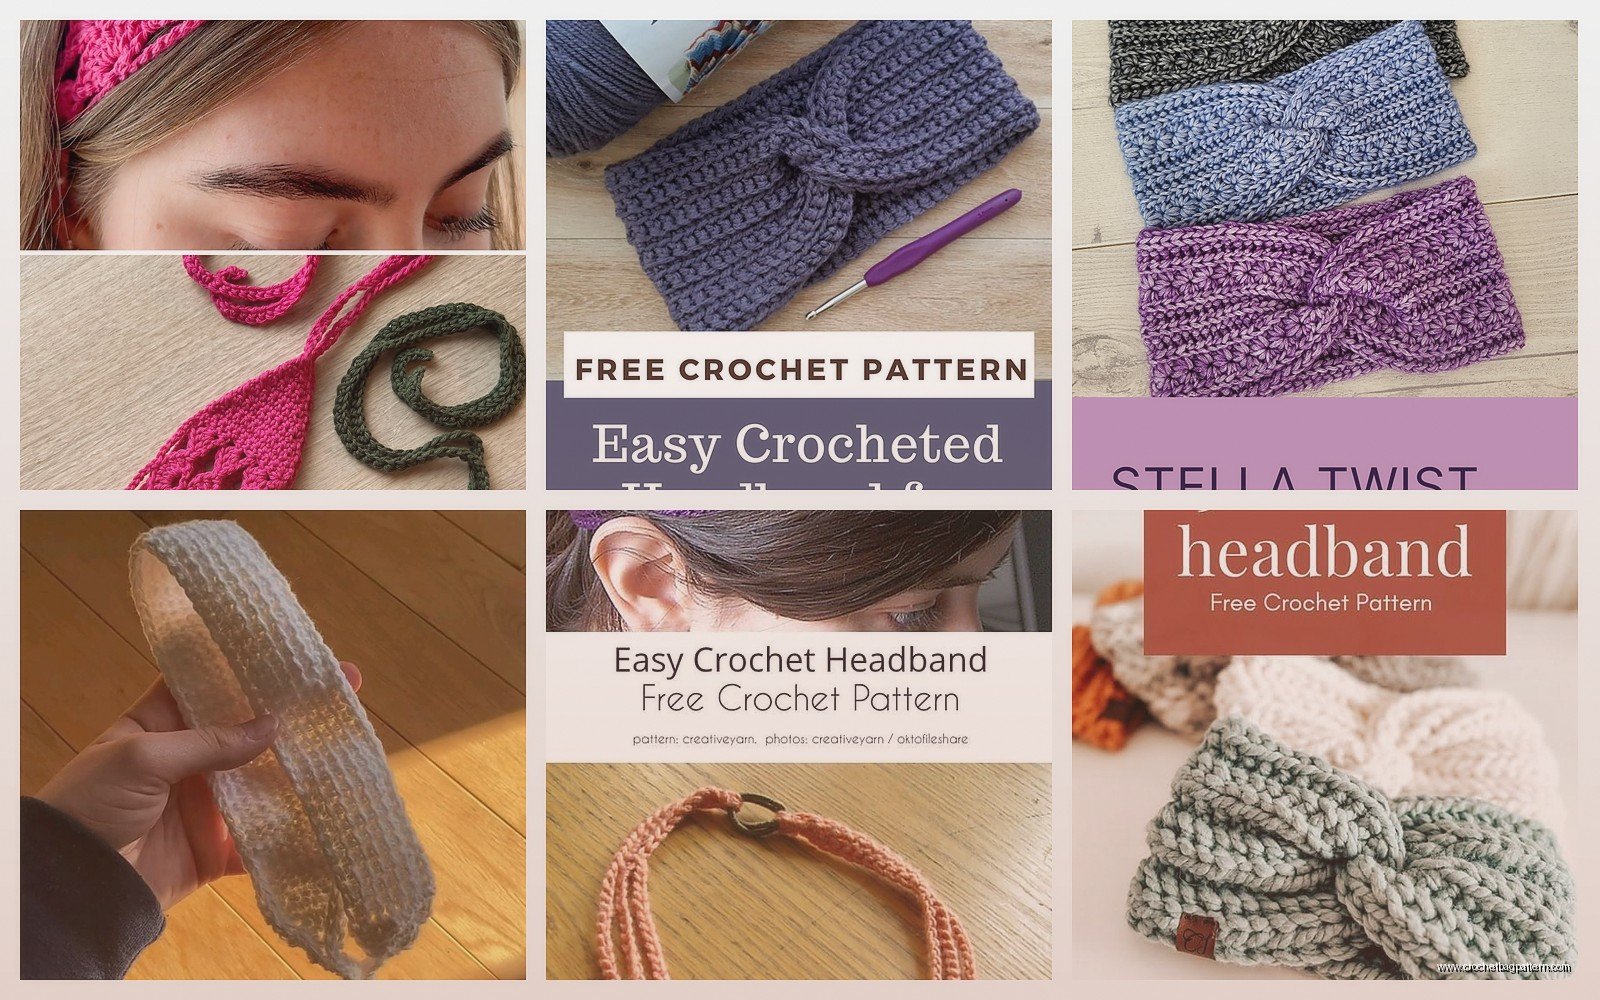
So once you have your long rectangle you need to decide if you want it twisted or not. The twisted style is pretty popular and it’s what I usually do because it looks more intentional somehow.
To make the twist: lay your rectangle flat, pick up one end and flip it over once so it makes that twist in the middle. Then you’re seaming the two short ends together. I use a yarn needle and whip stitch them because it’s flat and doesn’t create a bulky seam. Some people do slip stitch seaming with their hook but I think that shows more.
If you don’t want the twist just seam the ends together normally without flipping. This gives you more of a basic tube style headband which is fine too.
the seaming process that kind of sucks
Thread your yarn needle with like 18 inches of yarn. You can use the tail from your starting chain or just use a new piece. Line up the two ends of your rectangle so the edges match up stitch for stitch. This is important because if they’re offset it looks lumpy.
Go through the edge stitches from both sides, pulling tight enough that they stay together but not so tight that it bunches. I usually go through each stitch twice just to make sure it’s secure because the last thing you want is your headband falling apart while you’re wearing it.
Weave in your ends when you’re done seaming. I’m terrible at this part and usually just tie them in a knot and cut them short which probably isn’t the “right” way but whatever, it works.
variations that actually make a difference
You can use half double crochet instead of single crochet if you want a looser, drapier fabric. I did this once with some Caron Simply Soft in like a gray color and it was nice but stretched out more over time. The hdc version works up faster though which is good if you’re impatient.
Another thing is ribbing. If you want that ribbed texture you work in the back loops only for every row. So instead of going through both loops of the stitch, you only go through the back loop. This creates ridges that run vertically on your headband. I think this looks more polished but it takes a bit longer and you gotta pay attention to which loop you’re working in.
For the ribbed version you actually work the rows along the short edge instead of the long edge if that makes sense. So you’d chain like 60 stitches (or however long you need it to go around your head) and then only work like 10-12 rows to create the width. Then seam the long edges together instead of the short ones.
yarn weights and texture stuff
I tried making one with bulky yarn once thinking it would be faster and it was but it looked kinda chunky and weird. Unless you’re going for that really thick cozy winter headband look I’d stick with worsted weight. DK weight could work too if you adjust your hook size down.
The Red Heart Super Saver I mentioned earlier is honestly perfect for this because it’s cheap and comes in a million colors. Yeah it’s a bit squeaky and acrylic-y but for something like a headband that doesn’t need to be super soft against your skin it’s fine. The headband sits on your hair mostly anyway.
I also made one with some fancy merino wool blend I got on sale at Michaels, can’t remember the brand but it was in a purple-ish skein. That one felt nice but it was kind of a waste of expensive yarn for such a simple project. Save the good stuff for sweaters or blankets or whatever.
sizing and fit issues
The thing that annoyed me most about making these is that the fit is really specific. Too loose and it slides back off your head. Too tight and you get a headache after like twenty minutes. There’s a sweet spot where it stays put without squeezing and finding that is just trial and error.
For reference I made mine 20 inches long (before seaming) and 2.5 inches wide and it fits my adult-sized head comfortably. If you’re making one for someone with a smaller head like a teenager or kid, go down to maybe 18 inches. Bigger head, go up to 21 or 22 inches.
The width matters less for fit and more for style. Narrower headbands like 1.5-2 inches look more delicate but don’t cover as much hair. Wider ones like 3-4 inches are more of a statement and keep your ears warmer if you’re wearing it in cold weather.
adding stuff to make it less boring
You can sew a button or bow or whatever onto the seam to hide it if you’re worried about how it looks. I never bother with this because who’s really looking that close at your headband seam but some people care about that stuff.
Stripes are easy to add. Just change colors every few rows. I did a red and white striped one for Christmas last year using Red Heart again, one skein of cherry red and one of white. Looked festive I guess. You just drop the old color, pick up the new one, and keep going. Carry the unused color up the side or cut it and weave in ends, whatever you prefer.
I’ve seen people add little crocheted flowers or leaves to these but that seems like too much work for something you’re probably gonna throw in a drawer most of the time. But if you’re into that go for it.
actual time and when to make these
Each headband takes maybe an hour or hour and a half depending on how fast you work and if you’re watching TV or talking or whatever. They’re good mindless projects. I made three in one afternoon last spring when I was supposed to be doing other things but needed something to do with my hands.
They make decent quick gifts too. I made one for my sister’s birthday because I forgot until the day before and didn’t have time to buy anything. She actually wore it which was surprising. Used some Bernat Softee Chunky in a teal color for hers and did the half double crochet version so it worked up super fast.
The best time to make these is honestly when you’re learning crochet or getting back into it after a break because they’re simple enough that you can’t really mess up. If you drop a stitch or add an extra one it doesn’t really matter that much. The whole thing is just a rectangle so there’s no shaping to worry about or stitch counts that have to be exact.
washing and care I guess
If you used acrylic yarn you can throw it in the washing machine. I do cold water and lay flat to dry just to be safe but honestly these things are pretty indestructible. The Red Heart Super Saver ones I made two years ago still look basically the same.
Wool or wool blend ones need to be hand washed obviously or they’ll felt up. But again I don’t think fancy yarn is necessary for headbands so this probably won’t come up.
They can stretch out over time especially if you’re pulling them on and off a lot. If this happens you can try washing them in warm water and the fabric usually tightens back up a bit. Or just make a new one because they’re so quick.
common problems and fixes
If your edges are curling it usually means your tension is too tight. Try going up a hook size or just being more conscious about keeping your stitches loose. Curled edges don’t really affect how the headband works but they can look messy.
If you’re getting a trapezoid shape instead of a rectangle you’re probably adding or losing stitches as you go. Count your stitches at the end of each row for the first few rows until you get into a rhythm. Should be the same number every time.
The twist looking weird or uneven usually happens if you twisted it more than once or didn’t line up the ends properly when seaming. Just undo the seam and try again, paying attention to keeping that single twist in the middle.
If it’s too tight after you finish you can try blocking it to stretch it out a bit but honestly it’s probably easier to just frog it and start over with a longer starting chain. Frogging sucks but it’s better than having a headband that doesn’t fit.
using up scraps
These are good scrap projects if you have leftover yarn from other stuff. You don’t need a full skein, just enough to make that rectangle. I’ve made striped ones using like four different leftover colors and they actually looked pretty cool in a chaotic way.
Just make sure all your yarns are the same weight or it’ll look lumpy. Mixing worsted and bulky doesn’t work. But different brands of worsted weight are usually fine together even if the textures are slightly different.
Color-wise anything goes really. I tend to stick with neutrals like gray, black, cream because they go with more outfits but bright colors are fun too. Made a neon yellow one once that I never actually wore but it was fun to make I guess.
Okay so that’s basically it. Chain your starting width, sc back and forth until it’s long enough to go around your head, seam the ends together with a twist if you want one, weave in ends, done. Don’t overthink it because it’s really just a rectangle and if it doesn’t fit right the first time you’ll know for next time. I’ve probably made like fifteen of these at this point and they’re still a good go-to project when I want to make something fast without thinking too hard about it.