
May
Getting Started With Purse Patterns
So the thing about crochet purses is they’re actually way more practical than people think but you gotta pick the right pattern for your skill level. I made this tote bag thing last summer, like August 2024, and honestly I was just bored watching The Bear for the third time and needed something to do with my hands that wasn’t scrolling.
First thing is deciding what kind of bag you even want. There’s like crossbody bags, totes, clutches, market bags, bucket bags… the list goes on forever. For your first one I’d say do a simple tote or market bag because they’re basically just rectangles or circles and you don’t have to stress about shaping too much.
Yarn Selection Actually Matters
Okay so yarn is weirdly important for bags. You can’t just use any soft acrylic like you would for a blanket because the bag will stretch out and look sad after like two uses. Trust me on this. I used Red Heart Super Saver for my first attempt and the whole thing got saggy and weird.
Better options are cotton yarn or cotton blend. I really like Lily Sugar’n Cream for smaller bags and dishcloths, it’s cheap and comes in tons of colors. For bigger totes I’ve used We Are Knitters cotton stuff which is pricier but holds its shape better. Hobbii also has some good cotton options that ship fast if you order online.
The weight matters too. Most bag patterns call for worsted weight (size 4) or sometimes bulky if you want it to work up fast. I made a chunky bucket bag in like 3 hours once using some random bulky cotton I found at Michaels, can’t remember the brand but it was in their clearance section.
Basic Construction Methods
There’s basically two ways to make a bag – working in the round or working flat pieces and seaming them together. Working in the round is easier in my opinion because you don’t have to sew anything except maybe attaching straps.
For a round bottom bag you start with a magic ring and increase in a circle like you’re making a flat circle. Then when it’s the size you want for the base, you stop increasing and just work even rounds going up. That creates the sides of the bag. The annoying part is keeping track of your stitch count – I always lose count around row 15 and have to go back and… anyway.
Flat construction means you make rectangles or squares and sew them together. This is good if you want a structured looking bag or if you’re using a stitch pattern that doesn’t work well in the round. But seaming is the worst, it takes forever and my cat kept trying to lay on the pieces while I was trying to arrange them.
Stitches That Work Well
You don’t need fancy stitches for a bag honestly. Single crochet is your friend because it’s dense and sturdy. Half double crochet works too and goes faster. Double crochet is gonna be too loose and holey unless that’s the look you want for like a beach bag.
The moss stitch is really good for bags because it has nice texture but still dense. It’s just alternating single crochet and chain stitches. Suzette stitch is similar and looks more interesting. I used moss stitch for that summer 2024 bag and it turned out pretty decent actually.
Linen stitch is another one people use a lot. It’s basically single crochet but you go through the back loop and the chain space instead of both loops. Creates a woven looking fabric that’s really sturdy.
The Strap Situation
Straps are where I always get annoyed because they take forever and you need them to be strong. Nothing worse than having your strap break when you’re carrying groceries or whatever.
The easiest strap is just a long chain of single crochet. Make it the length you want, attach it to the bag. Done. But these can twist and get annoying. You can make them wider by doing multiple rows of single crochet to create a flat strap.
Some people do braided straps with three separate chains braided together. Looks nice but is extra work. I’ve also seen people use actual webbing or leather straps attached to the crochet bag which is kinda cheating but also practical.
For the attachment you can either crochet the straps directly onto the bag as you’re working the last round, or sew them on after. Sewing is more secure but I usually just crochet them on because I’m lazy. Just make sure you reinforce it by going through multiple times or it’ll rip off.
Lining Your Bags
This is optional but makes a huge difference in how professional the bag looks and how functional it is. Unlined bags can have stuff fall through the stitches and they don’t hold their shape as well.
I didn’t line anything for like the first year I was making bags and then I finally tried it and was like oh okay this is way better. You need fabric, a sewing machine or needle and thread, and patience.
Basically you measure the inside of your bag and cut fabric pieces that match. Add seam allowance. Sew the fabric pieces together to create a bag shape. Then you either hand stitch it into the crochet bag or use fabric glue. I use fabric glue because hand sewing the whole perimeter makes me want to die.
For fabric I just use whatever’s cheap at Joann’s. Cotton quilting fabric works fine. You can add pockets to the lining too which is actually useful for keys and phone and stuff.
Specific Pattern Types
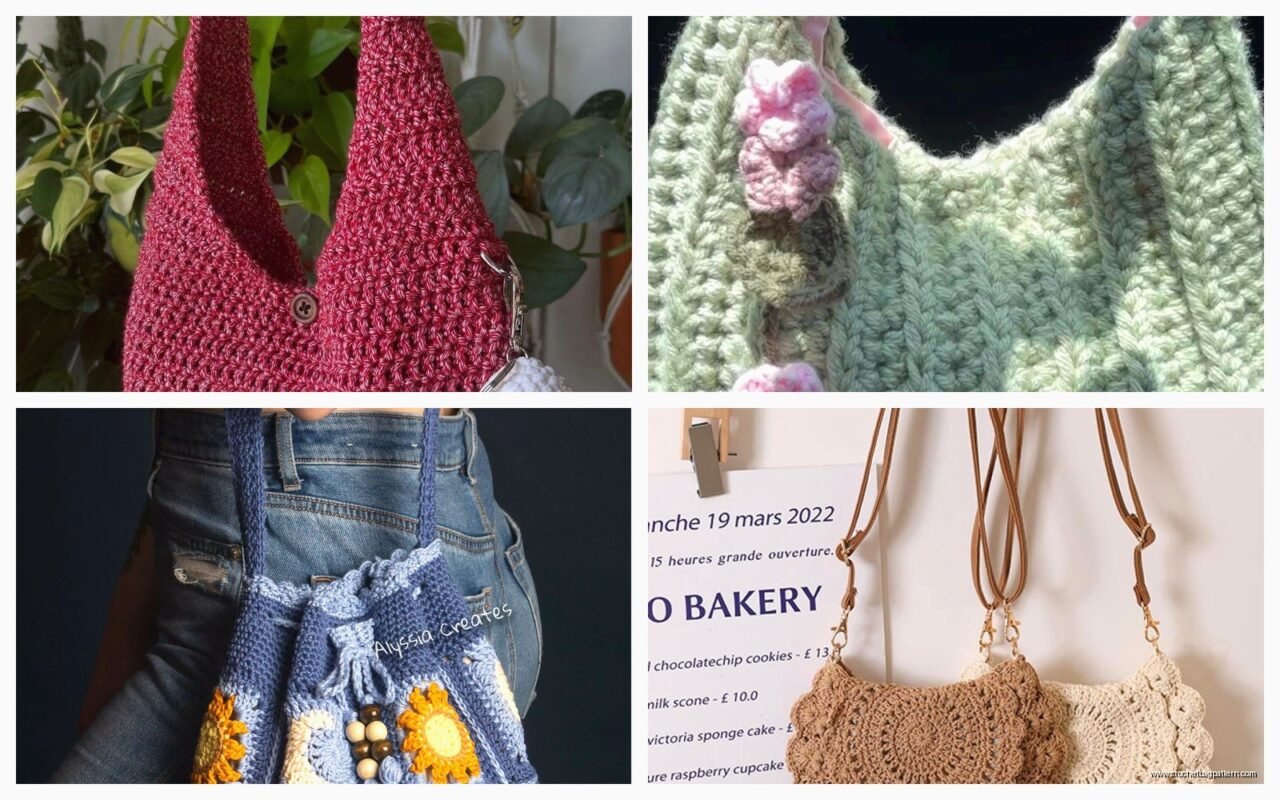
Market bags are probably the easiest to start with. They’re just open totes basically. You can find free patterns everywhere online. I made one in spring 2022 when I was trying to be all eco-conscious and stop using plastic bags… that lasted like a month but I still have the bag.
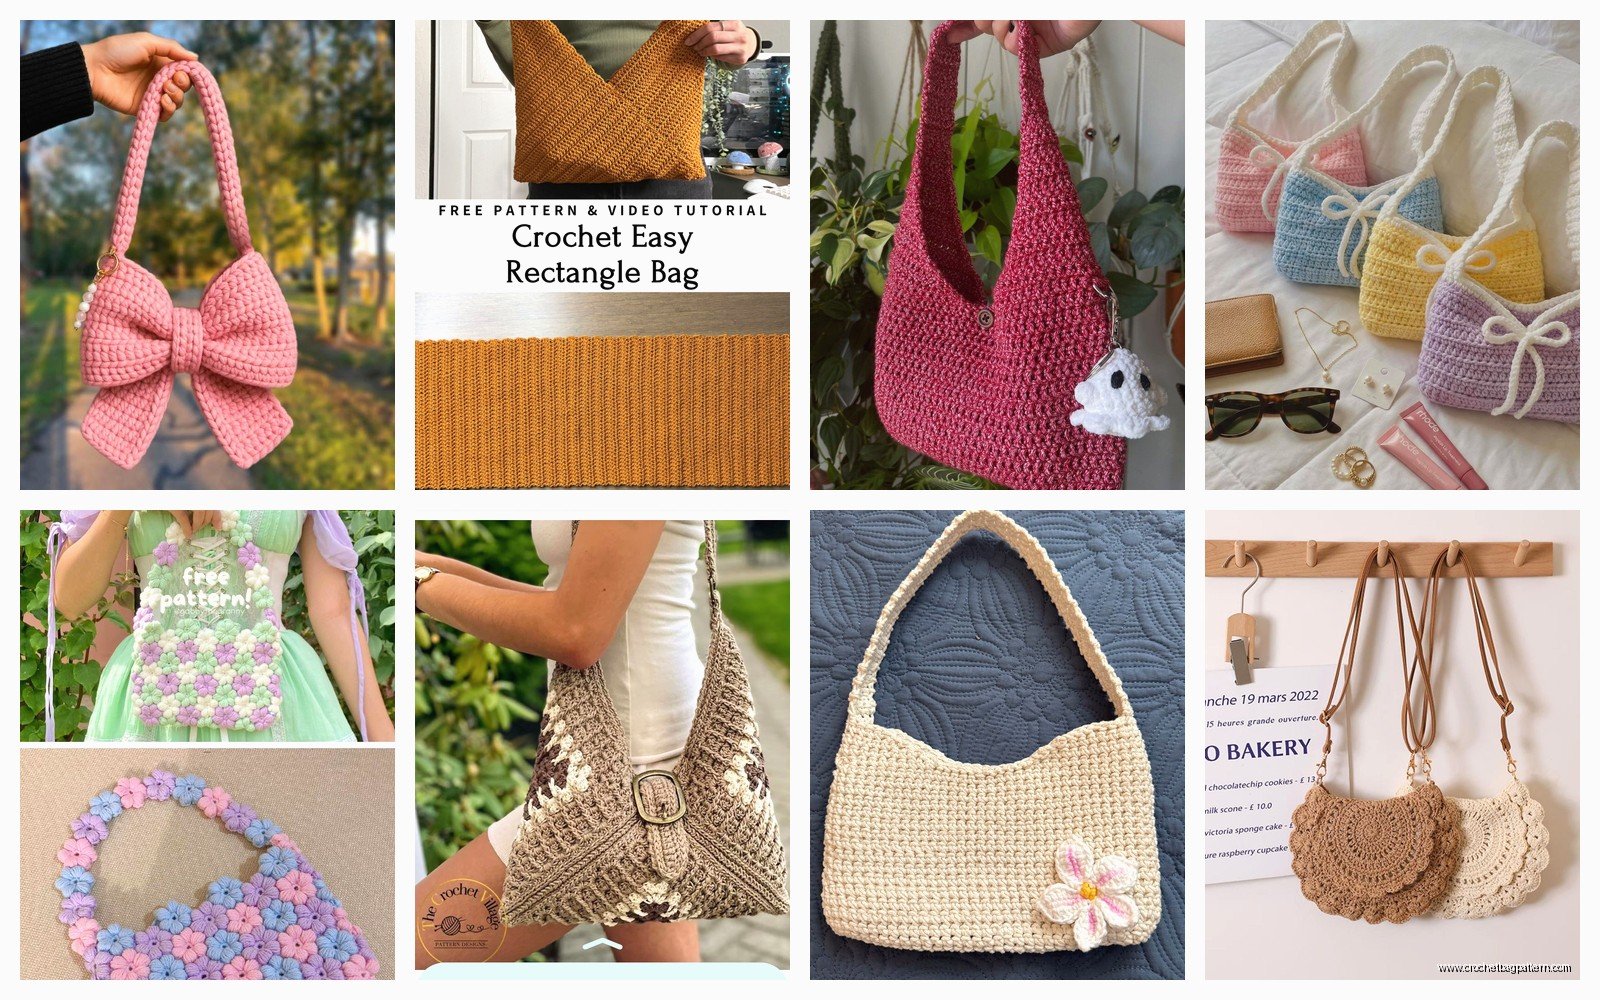
The typical market bag is worked in the round from the bottom up. You make a circle base about 6-8 inches across, then work even for however tall you want it. Add handles. That’s it. Some patterns have you do mesh stitch for a stretchy market bag which is cool for produce but your stuff is visible to everyone.
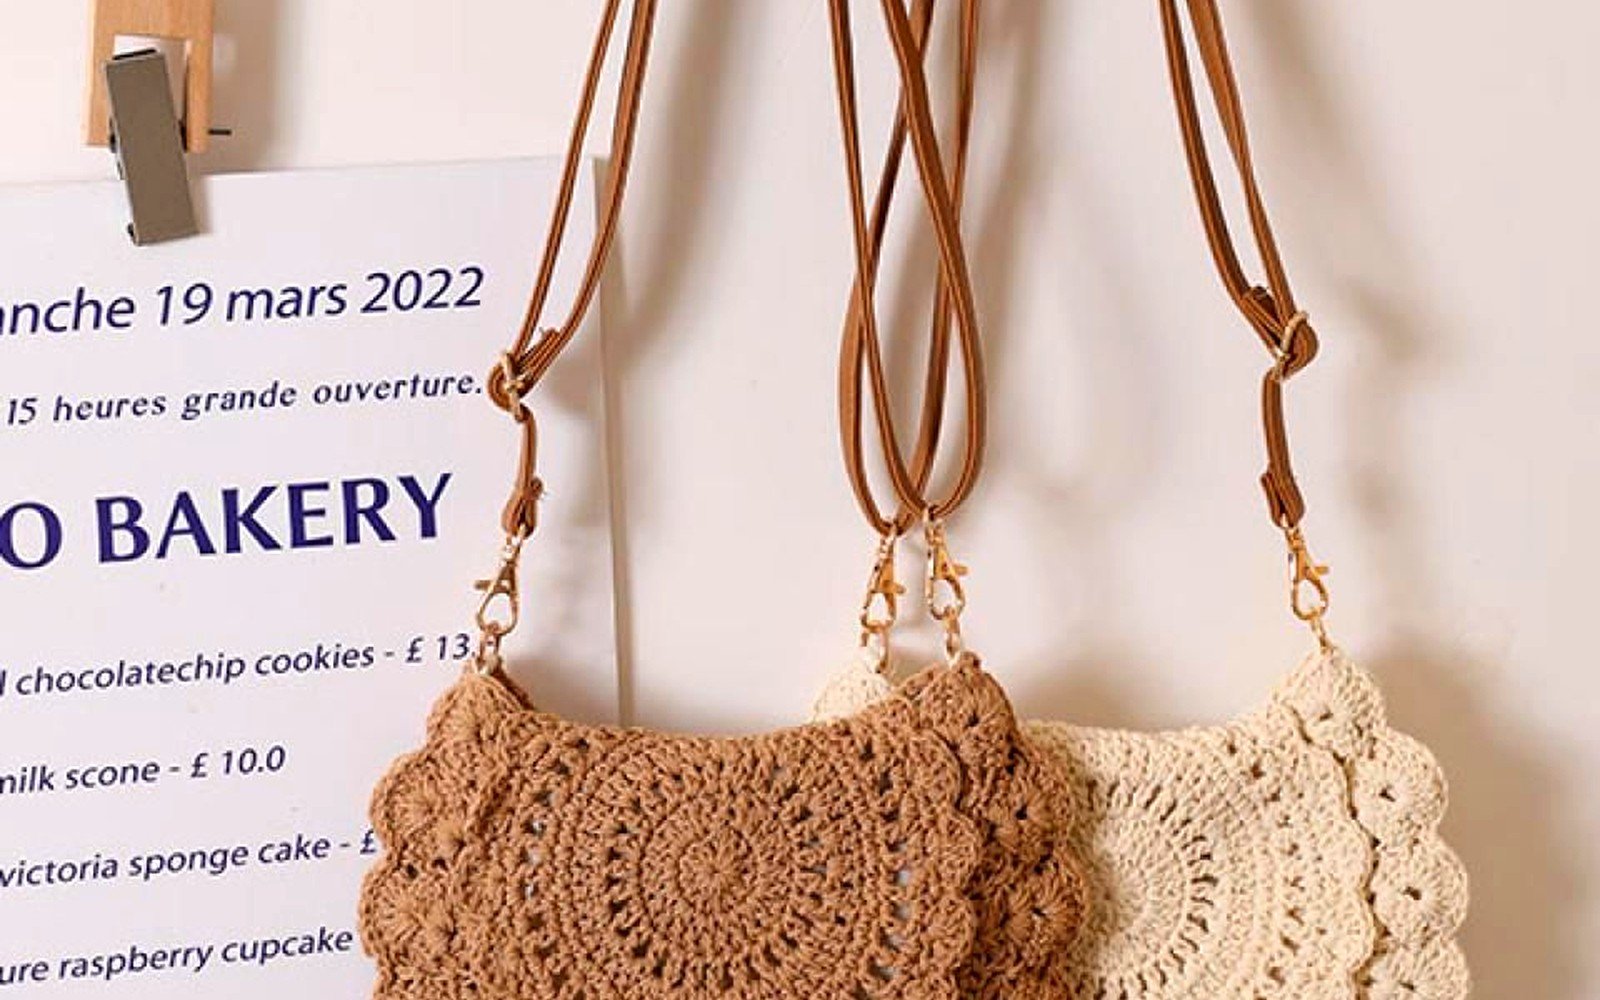
Granny square bags are popular and pretty easy if you already know how to make granny squares. You just make a bunch of squares and join them together in whatever configuration makes a bag shape. Then add a lining because granny squares are super holey. These bags are more cute than practical honestly but they look good.
Crossbody bags are more complex because you need to get the shaping right and the strap needs to be long and strong. I made one once using a pattern from a blog that I can’t find anymore and it was fine but took way longer than expected. The shaping was weird around the flap closure.
Closures and Hardware
If you want your bag to close you need some kind of closure. Lots of options here and this is where it gets kinda fussy.
Buttons are the simplest. Just sew a button on and make a loop or use the spaces between stitches as a buttonhole. Works fine for casual bags. I have like a million random buttons in a jar that I’ve collected from old clothes so I just use those.
Zippers are more professional looking but harder to install. You need to hand sew the zipper into the crochet which is tedious. Make sure you get a zipper that’s the right length. I tried to make a zipper pouch once and the zipper was too short and the whole thing was wonky.
Magnetic snaps are really nice for bag closures. You can buy them at craft stores. You need to attach them to the lining fabric though, not directly to the crochet. They come with instructions but basically you mark where you want them, make small holes, push the prongs through, and secure with the metal backing piece.
Some bags just stay open which is fine for totes but annoying if you’re carrying it around a lot and worried about stuff falling out.
Common Problems
The most annoying thing that happened to me was making an entire bag and then realizing the bottom was too small so it couldn’t hold anything useful. Like it was this cute little thing but completely non-functional. Had to frog the whole thing and start over with a bigger base. So measure and think about what you actually want to carry in it.
Uneven stitches show up really obviously in bags, way more than in blankets or scarves. If your tension is all over the place the bag will look lumpy and weird. I still struggle with this especially when I’m tired or distracted. Just gotta practice I guess.
Straps that are too thin will dig into your shoulder. Make them at least an inch wide if you’re gonna carry anything heavy. I made a book bag once with skinny straps and it was painful to actually use.
Color changes can be tricky if you’re doing stripes or colorwork. The jog where the round ends is super visible. There’s techniques to minimize this like the jogless join but I usually just ignore it because I don’t care that much.
Free vs Paid Patterns
There’s tons of free bag patterns on blogs and YouTube. I’ve used patterns from MakeAndDoCrew, Dabbles and Babbles, that kind of thing. They’re usually fine but sometimes the instructions are unclear or there’s errors.
Paid patterns from places like Etsy or Ravelry are usually better written and tested. They’re like $5-8 typically. Whether it’s worth it depends on how complex the bag is and how much you trust your ability to figure stuff out on your own.
Honestly for basic bags you don’t even need a pattern once you understand the construction. Just decide on a size, pick your stitches, and go for it. That’s how I made most of mine after the first few.
Yarn Amounts
This varies so much depending on the size and stitch you’re using. A small clutch might only need one skein of yarn. A big tote could need 4-6 skeins. Always buy more than you think you’ll need because dye lots matter and you don’t wanna run out and not be able to match it.
I made a huge beach bag once using like 8 skeins of Paintbox Cotton DK. It was massive and took forever but I still use it every summer so I guess it was worth it.
Tips That Actually Help
Use stitch markers to mark the beginning of rounds. I use those little plastic ones from Amazon, like a pack of 100 for $6. Otherwise you’ll lose track and your bag will be wonky.
Block your finished bag before adding lining or hardware. Just wet it, shape it how you want it, let it dry. Makes everything look neater and helps it hold its shape.
If you’re adding a base like cardboard or plastic canvas to make the bottom stiff, cut it slightly smaller than the actual bottom so it doesn’t poke through. I learned this the hard way when the corners of my cardboard base started poking out through the stitches.
Test your yarn choice with a swatch first if you’re not sure about it. Make a small square and see if it’s too stretchy or too stiff. Saves you from making a whole bag in the wrong yarn.
Don’t overthink it honestly. Bags are pretty forgiving and even if they’re not perfect they’re still functional. I’ve given away bags that had mistakes in them and people still loved them and used them.
The one thing that really annoyed me about the whole process is weaving in ends. Bags have so many ends especially if you’re changing colors or adding straps. It takes forever and it’s boring and I hate it. But you gotta do it or they’ll come undone.