
May
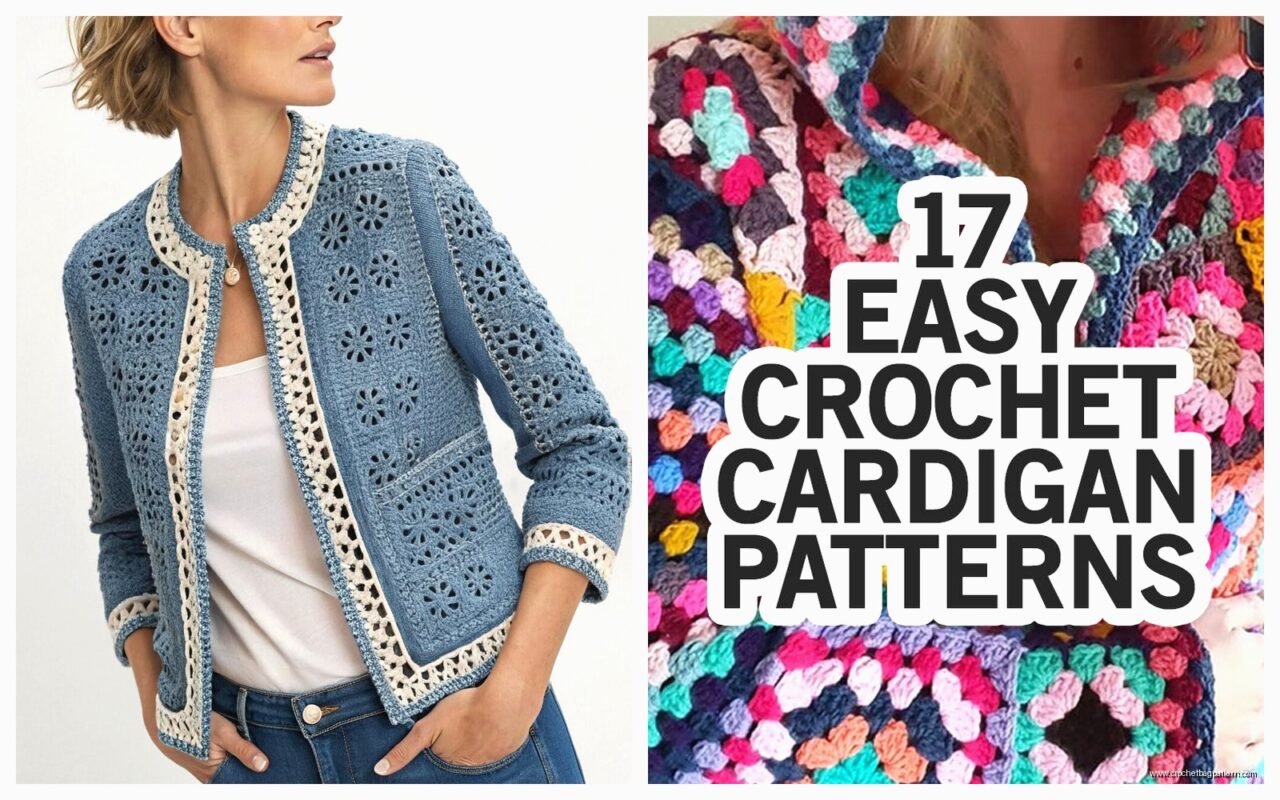
Getting Started With Jacket Patterns
So the thing about crochet jackets is that they’re basically just rectangles and sleeves if you really think about it. I made my first actual wearable cardigan in spring 2022 when I was mostly just trying to avoid thinking about other stuff, and honestly it turned out better than expected even though I definitely messed up the gauge at first.
You’re gonna want to pick a pattern that matches your actual skill level, not what you think you should be able to do. I learned this the hard way. Most jacket patterns break down into a few types: top-down constructions where you start at the shoulders, bottom-up where you make panels and seam them, or those hexagon/granny square situations where you connect motifs. Each one has a different feel and time commitment.
Yarn Choices That Actually Matter
The yarn thing is huge. I used Lion Brand Heartland for my first cardigan because it was cheap and I wasn’t sure I’d finish it, but looking back I wish I’d gone with something that had better drape. For jackets you really need yarn that won’t be too heavy or too stiff. Caron Simply Soft works pretty well for lightweight cardigans, and I’ve used Wool-Ease for heavier coat-style pieces.
Weight matters more than people tell you upfront. A DK or worsted weight is probably your best bet for a first jacket. Bulky yarn seems like it would work up faster but then you end up with this stiff heavy thing that doesn’t hang right on your body. Unless you’re going for that oversized chunky look, which is fine, but know what you’re getting into.
Understanding Construction Methods
Top-down patterns usually start with a yoke, and you’re basically making a circle that gets bigger until it’s time to separate for the arms. The nice thing about this method is you can try it on as you go. The annoying thing is that you’re dealing with a ton of stitches all on your hook at once by the time you get to the body portion. My cat knocked my work off the couch like three times while I was making a top-down cardigan last summer and I wanted to scream.
Bottom-up construction means making a back panel, two front panels, and sleeves separately. Then you seam everything together at the end. I actually prefer this even though everyone says seaming is the worst part, because you can work on different pieces depending on your mood. If you’re watching TV and don’t wanna think too hard, do a sleeve. If you’re paying attention you can work on the back panel with any shaping.
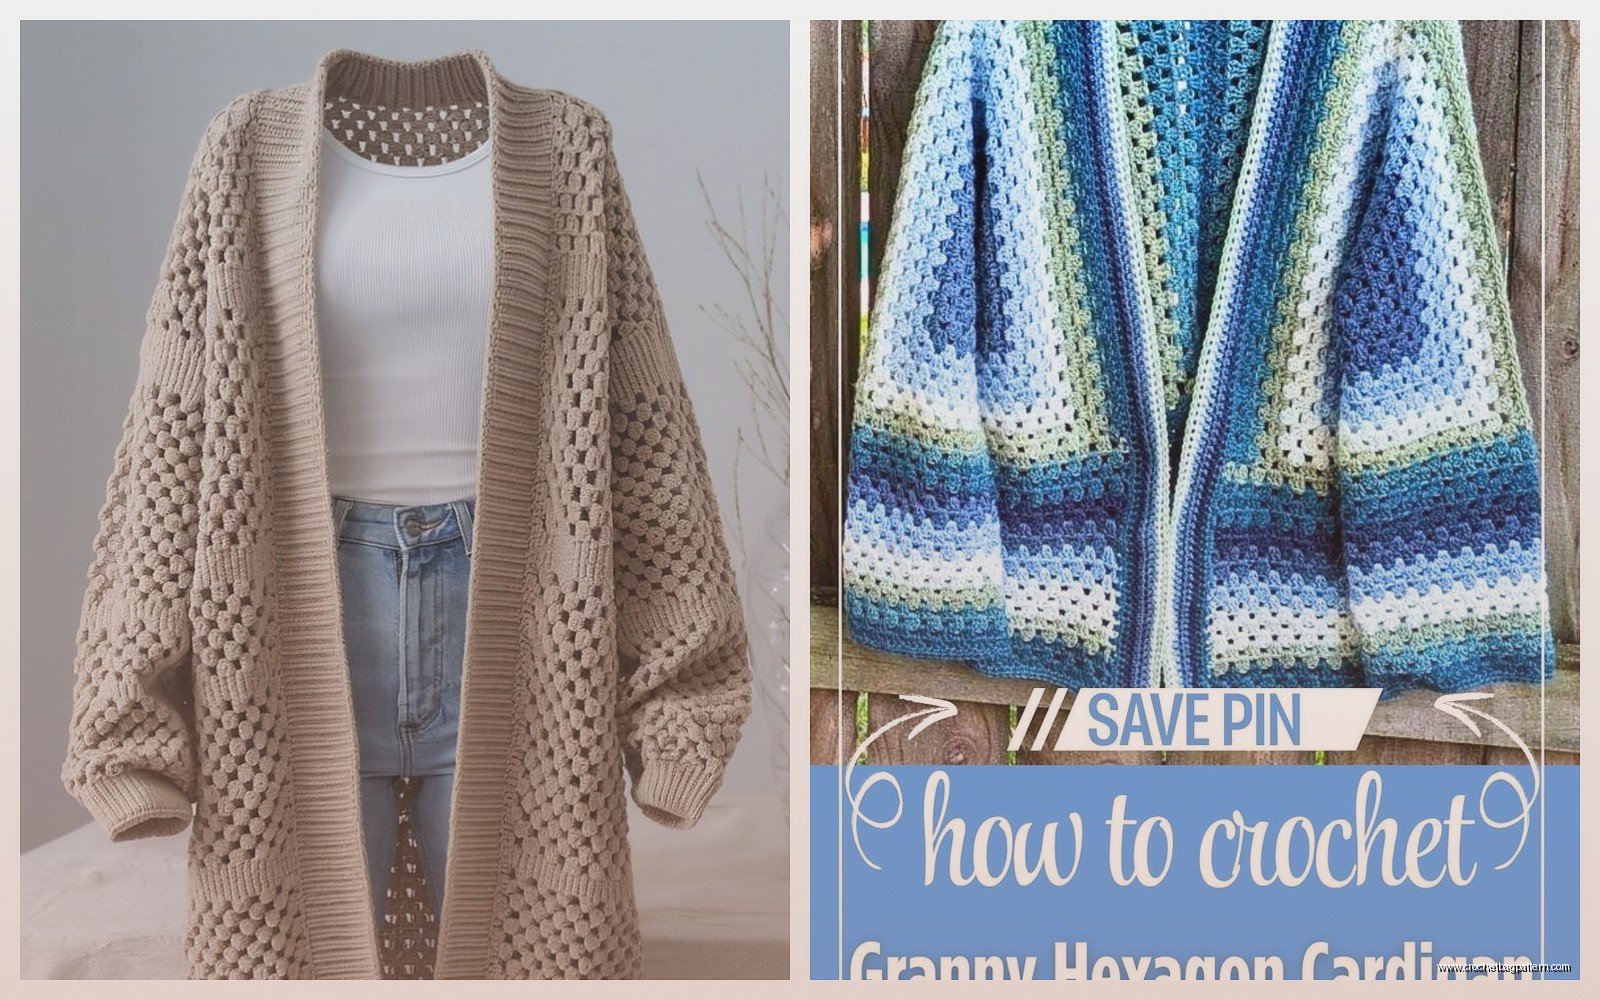
Granny square or hexagon jackets are their own category. You make a bunch of individual pieces and connect them, usually with slip stitches or single crochet. These look really cool and vintage but the process is so tedious that I only finished one and swore I wouldn’t do it again. Then I probably will anyway because I forget how annoying things are.
Sizing and Measurements You Actually Need
This is where things get real. You gotta measure yourself properly or the jacket won’t fit right, and then you did all that work for something you won’t wear. Get your bust measurement at the fullest part, your shoulder width from one shoulder edge to the other, sleeve length from shoulder to wrist, and the length you want the jacket to be.
Most patterns give you a finished bust measurement that includes ease. Ease is extra room so the jacket isn’t skin-tight. For a cardigan you usually want 2-4 inches of positive ease. For a coat you might want 4-6 inches so you can layer underneath. This confused me forever because I thought the bust measurement should match my actual measurement but then everything fit weird and tight.
One thing that really annoyed me about the whole process is that gauge swatches lie sometimes. You make a little 4×4 inch square, measure your stitches, think you’re good to go, and then when you’re actually working in the round or with a different stitch pattern everything changes. I’ve learned to just accept that I might need to rip out the first few rows and start over with a different hook size.
Hook Sizes and Gauge
Speaking of hooks, the size matters way more for jackets than for like, a dishcloth or whatever. If your gauge is off by even half a stitch per inch, that adds up over the width of a jacket body and suddenly you’ve made something two sizes too big or too small.
I usually start with whatever hook the pattern recommends and then adjust. If you crochet tight, go up a size. If you crochet loose, go down. With the Red Heart Super Saver I used for a coat project in summer 2024, I had to go up from an H to a J hook because my tension was creating this stiff fabric that wouldn’t drape at all.
Following the Pattern Without Losing Your Mind
Read through the entire pattern before you start. I know everyone says this and nobody does it, but seriously you’ll catch things like “oh this pattern assumes I know how to do a reverse single crochet” or “wait there’s blocking involved at the end?” Better to know upfront.
Mark your place as you go. I use sticky notes on printed patterns or the notes app on my phone for digital ones. When you’re doing increases or decreases for shaping, it’s easy to lose track of which row you’re on, especially if you’re working on it across multiple days.
For cardigans with button bands, you’ll usually add those at the end. The pattern should tell you how many rows to make and where to place buttonholes. I always do the buttonhole side first and then match the button side to it, and I mark where the buttons should go with stitch markers before I sew them on.
Sleeves Are Weird
Sleeves are probably the most annoying part of any jacket because they require shaping and they have to match each other. Most patterns have you decrease as you work toward the wrist so the sleeve tapers. Count your decreases carefully on the first sleeve and write down exactly what you did, because you’ll need to replicate it exactly on the second one.
Some patterns have you work sleeves in the round, some have you work them flat and seam them. In the round is less finishing work but can be awkward with a long cardigan sleeve. Flat is more seaming but easier to keep track of your rows. Pick your poison basically.
Setting in sleeves is its own skill. You’re either seaming them to armholes or picking up stitches around the armhole and working the sleeve from there. The second method is what I usually see in top-down patterns and it’s less finishing work, but you have to pick up the right number of stitches evenly spaced or the sleeve will pucker or gap.
Different Stitch Patterns for Jackets
Simple single crochet or half double crochet makes a dense fabric that’s good for structure. Double crochet is faster and creates a more drapey fabric. I used mostly HDC for that first cardigan and it worked fine but took forever.
Openwork patterns with chains and spaces are great for lightweight spring cardigans but won’t keep you warm. I made a virus stitch cardigan once and it looked cool but was basically decorative. You can see your entire shirt through it which I guess is the point but felt weird to wear.
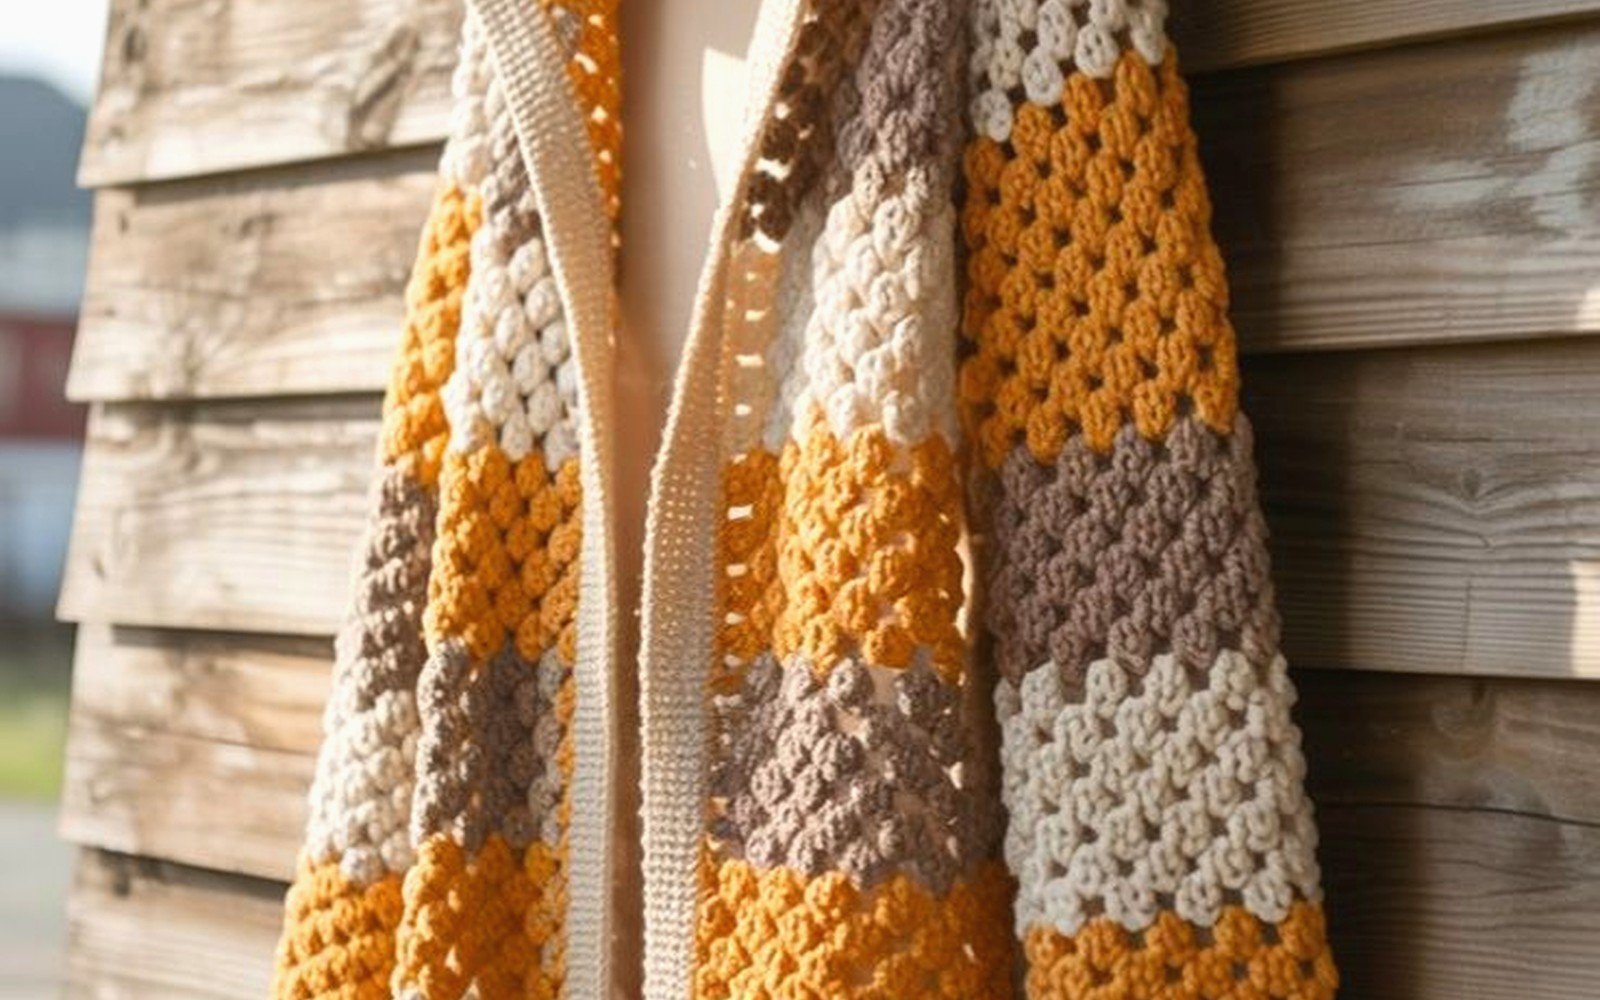
Textured stitches like bobbles, popcorns, or cables add visual interest but also add weight and stiffness. Use them as accents rather than for the whole jacket unless you want a really structured piece. I did a coat with a cable panel up the back and it looked amazing but weighed like five pounds.
Edging and Finishing
Most jacket patterns will have you add an edging around the front opening, bottom hem, and neckline. This is usually single crochet or a simple shell stitch. It stabilizes the edges and makes everything look more finished and professional or whatever.
For the button band, you’re adding extra rows along one front edge and creating buttonholes in one of them. The pattern should tell you spacing but a general rule is to place one button at the fullest part of your bust, one at the neckline, one at the bottom hem, and space the rest evenly between. I always end up with one fewer or one more button than I planned and just go with it.
Blocking is technically optional but makes a huge difference. You pin the jacket pieces to your blocking mats in the right shape and measurements, spray with water or use a steamer, and let them dry. This evens out your stitches and helps the fabric drape better. I skip this step half the time because I’m impatient and then regret it when the jacket looks homemade in a bad way.
Common Problems and How to Fix Them
If your jacket is twisting or the edges are curling, you probably have a tension issue. Single crochet edges tend to pull in tighter than the body fabric, so some patterns have you use a larger hook for edging or skip stitches to keep things flat.
If the armholes are too tight or too loose, you might need to adjust the number of stitches you chain for the underarm when separating the body from the sleeves. This is one of those things you kinda have to figure out by trying it on and being honest about whether it’s comfortable.
If one front panel is longer than the other, you miscounted rows somewhere. I’ve done this so many times and the only fix is to rip back to where they match and redo it. Yeah it sucks but a jacket that hangs crooked looks bad and you won’t wear it.
Color pooling can happen with variegated yarn and there’s not much you can do about it except switch to a solid color or embrace the chaos. I tried to make a cardigan with some fancy hand-dyed yarn once and it pooled so weird that I frogged the whole thing and used the yarn for a blanket instead where it didn’t matter as much.
Time Investment Reality Check
A simple cardigan in worsted weight yarn will probably take 30-50 hours depending on the size and your speed. A coat in bulky yarn might be faster, like 20-30 hours, but will use way more yarn. Those granny square jackets can take 60+ hours because of all the ends to weave in and the assembly.
I worked on my spring 2022 cardigan mostly while binge-watching some show about baking, I can’t even remember which one now, and it took me about three weeks of evening work. The summer 2024 coat took longer because I kept putting it down and forgetting about it, but actual working time was maybe 35 hours.
Don’t start a jacket project right before you need it. If you want to wear it in October, start in August at the latest. Things take longer than you think and you’ll need time for finishing work and blocking if you decide to do that.
Yarn Amounts and Budgeting
Most patterns tell you yardage requirements but it’s always better to buy extra. I usually get one more skein than the pattern calls for in each color because dye lots change and you can’t always match it later. You can return unopened skeins to most craft stores or use the extra for a matching hat or something.
A women’s medium cardigan usually needs 1200-1800 yards of worsted weight yarn. A coat might need 2000-2500 yards. If you’re using expensive yarn like that gets pricey fast, which is why I usually go with Caron, Lion Brand, or Red Heart for bigger projects. Save the fancy stuff for cowls and hats where you only need one or two skeins.
Budget at least $40-60 for yarn even with cheaper brands, plus buttons if the pattern needs them. Those decorative wooden buttons at the craft store are like $8 for a pack of 4 and you usually need 5-7 buttons for a cardigan so that adds up too.
What to Do When You Mess Up
You’re gonna make mistakes and that’s fine. Small mistakes in the body of the jacket usually disappear into the fabric once you’re wearing it. Big mistakes like entire missed rows or wrong stitch counts will haunt you every time you put it on, so it’s worth fixing those even if it means ripping back.
I have a jacket in my closet right now where I messed up the button spacing and I hate it every single time I look at it. Should’ve redone the button band but I was so done with the project that I just accepted it and now I never wear the thing. Learn from my mistakes I guess or don’t, we all make our own bad choices.
If you really hate how something is turning out, it’s okay to frog it and start over or use the yarn for something else. Not every project needs to be finished just because you started it. I have definitely rage-frogged things and felt better afterward.