
Feb
When I Actually Made My First Flower Bag
So back in spring 2022 I was sitting on my couch binge-watching The Office for like the third time and decided I wanted to make one of those cute flower bags I kept seeing on Instagram. I’d been crocheting on and off for years but never really followed patterns properly, just kinda winged it most of the time.
The thing is, these flower bag patterns look way more complicated than they actually are. You’re basically making a bunch of granny squares or flower motifs and stitching them together into a bag shape. That’s it. The hard part is getting them all to be the same size which honestly I never fully managed but whatever, it still looked fine.
What Yarn You’re Gonna Need
I used Lily Sugar’n Cream cotton yarn for my first one because it was cheap and I wasn’t sure if I’d even finish it. Cotton holds its shape better than acrylic for bags since you’re gonna be putting stuff in there and don’t want it stretching out all weird. I bought like 6 balls in different colors – the hot pink, the yellow, white, and this teal color.
For my second attempt in summer 2024 I splurged on Paintbox Yarns Cotton DK and yeah, it made a difference. The stitches looked cleaner and the colors were more vibrant. But honestly for your first one just use whatever cotton yarn is on sale at Michaels or Joann’s.
Weight and Amount
You want DK or worsted weight. I’ve tried both and worsted works up faster but DK looks more delicate if that’s what you’re going for. Plan on getting about 400-600 yards total depending on how big you make it. I always buy more than I think I need because running out of yarn halfway through is the worst.
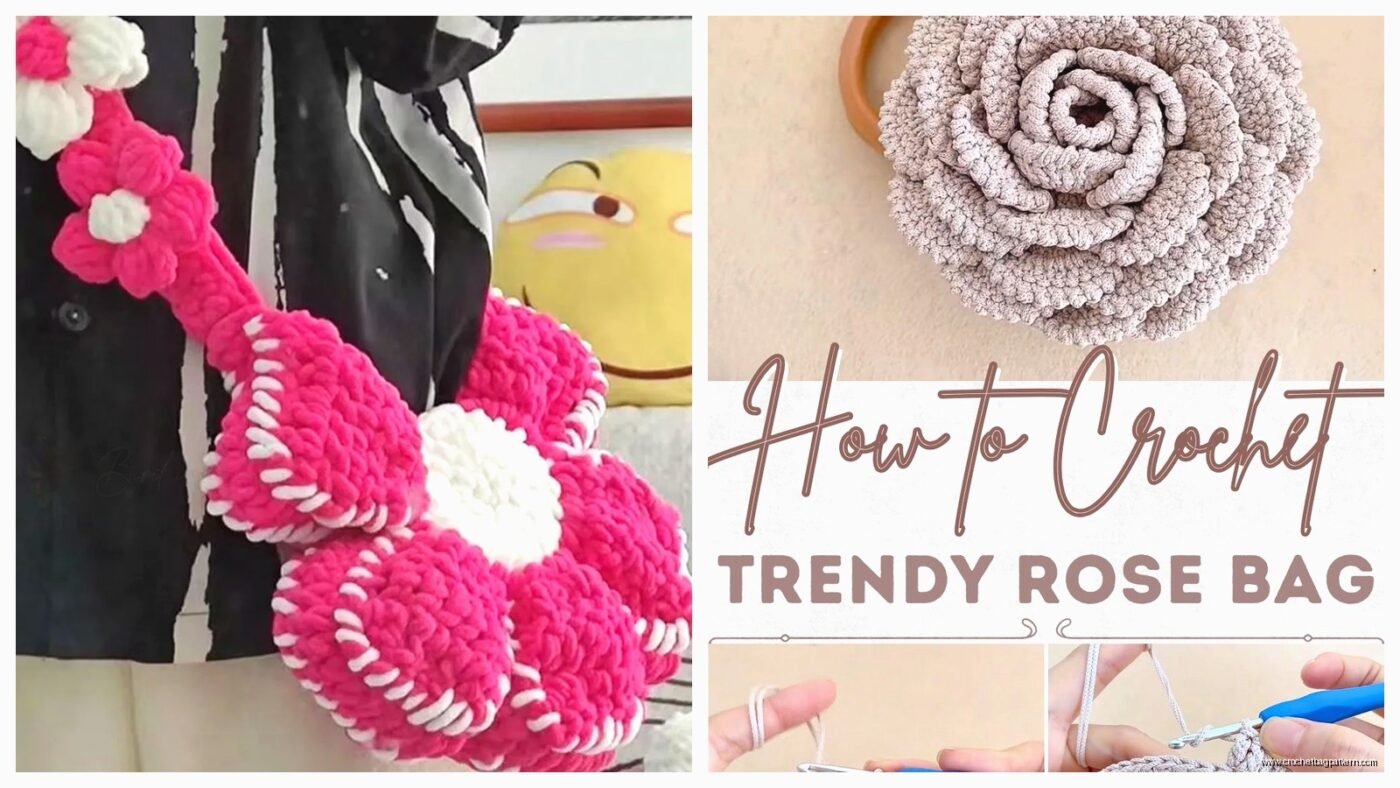
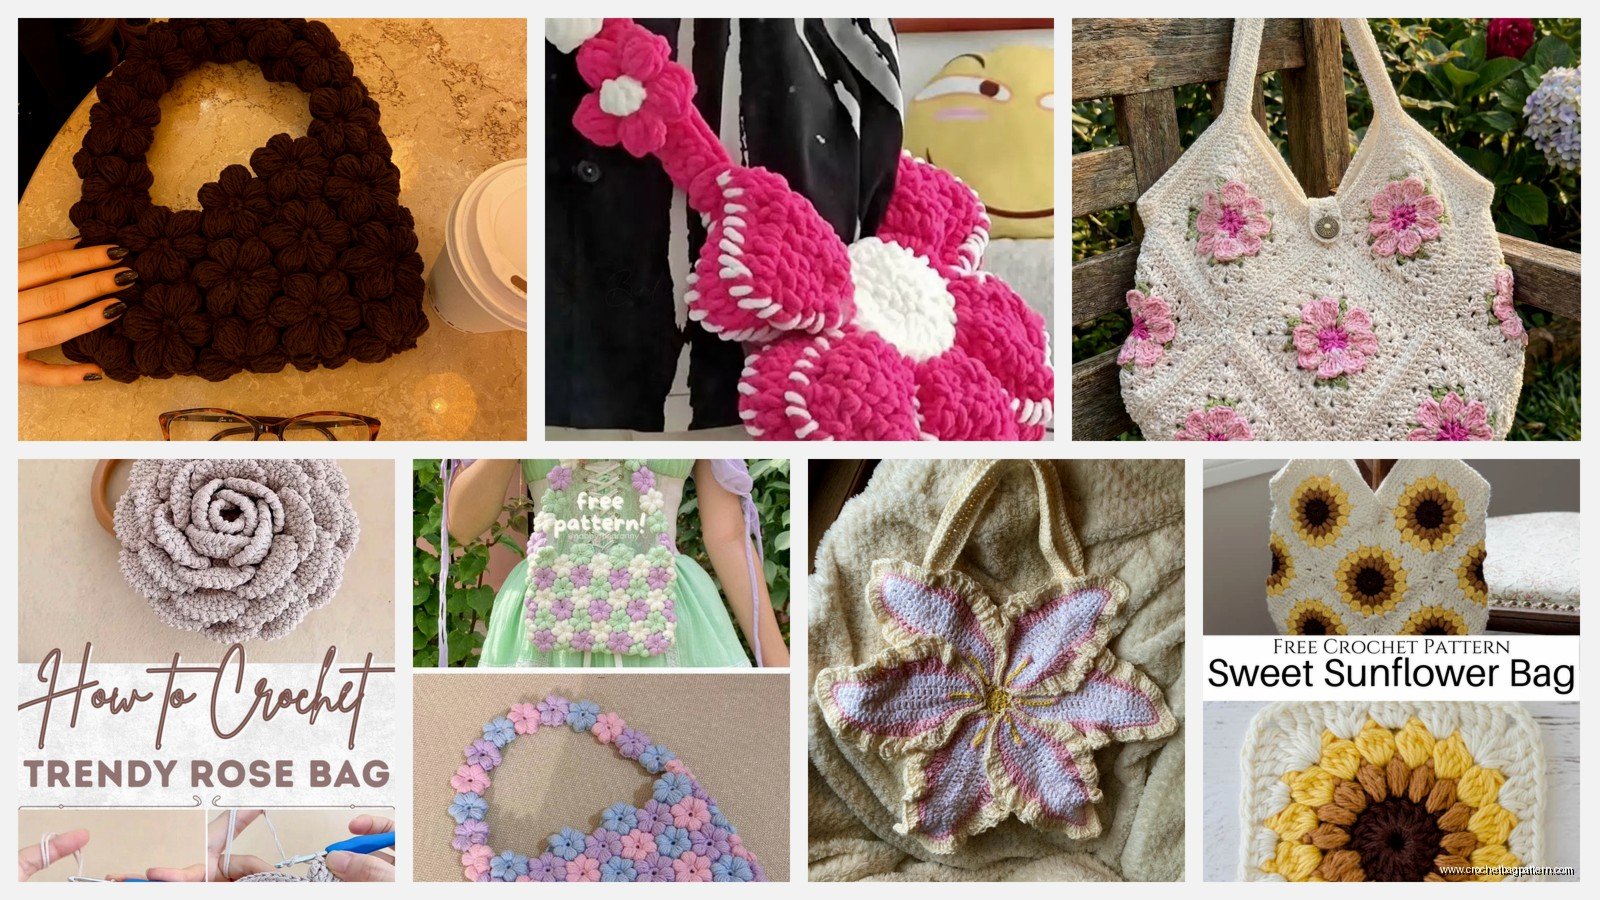
The Basic Flower Motif Pattern
Most flower bags use a simple 5-petal or 6-petal flower motif. Here’s how I do mine but like, I probably learned this from watching random YouTube videos at 2am so take it with a grain of salt.
Start with a magic ring. Chain 3 (counts as first dc), then make 11 more dc into the ring. Pull tight, slip stitch to top of chain 3. That’s your center.
For petals: chain 3, then in the same stitch do 2 dc, chain 3, slip stitch back into same stitch. Skip the next stitch, slip stitch into the following stitch. Repeat around until you have 6 petals. The annoying thing here is keeping your tension consistent because if one petal is tighter than the others your flower looks wonky and—actually you know what, they’re gonna look a little wonky anyway so don’t stress about it.

Make like 20-30 of these flowers depending on bag size. I made 24 for mine and it was a decent small purse size.
Colors and Planning
Don’t try to plan out your color scheme too much beforehand. I wasted so much time in spring 2022 laying out flowers in different arrangements. Just pick 3-5 colors that look good together and randomize them. The chaotic look is actually better than trying to make it all matchy-matchy.
One thing that annoyed me SO MUCH about the whole process was weaving in ends. Every single flower has at least 2 ends to weave in, sometimes more if you changed colors. That’s like 50+ ends for one bag. My cat kept trying to attack the yarn tails while I was working which didn’t help. I eventually just did it while watching TV because otherwise I would’ve lost my mind.
Joining the Flowers Together
There’s a couple ways to do this. You can whipstitch them together with a yarn needle, which is what I did first. It works but you can see the joining stitches pretty clearly.
The better method is join-as-you-go where you connect flowers during the last round of each motif. Basically when you’re making your petals on flower #2, instead of chain 3 at the tip of the petal, you chain 1, slip stitch into the corresponding petal on flower #1, then chain 1 more. It’s hard to explain in text but there’s good video tutorials for this.
I didn’t learn this until my summer 2024 bag and yeah, it looks way cleaner. But it also means you gotta plan your layout beforehand which I’m terrible at.
Arranging Flowers Into Bag Shape
For a basic bag you want two rectangular-ish panels of flowers (front and back) and then a strip for the bottom and sides. I did 4 flowers across by 3 flowers down for front and back panels, then a strip of 2 flowers wide going around the bottom.
You could also make it all one piece if you’re clever about it but I haven’t figured that out yet. Maybe if you started from the bottom and worked in rounds… I dunno, that’s probably more complicated than it needs to be.
Adding the Lining
Here’s something nobody tells you: these bags need lining or everything falls out through the holes between flowers. I learned this the hard way when my phone almost fell through at the grocery store.
You’re gonna need fabric, scissors, needle and thread. I used some cotton fabric from Joann’s, nothing fancy. Measure your bag, add seam allowance, cut two rectangles. Sew them together leaving the top open. The sewing part is honestly more annoying than the crochet if you don’t sew much.
Then you hand-stitch the lining to the inside of your bag around the top edge. Use regular sewing thread that matches your yarn color and just do a simple whip stitch all the way around.
Handles
For handles I just made two long chains and then went back and slip stitched or single crocheted along the chain to make it sturdier. Made them about 24 inches long each. You want them long enough to go over your shoulder comfortably.
Attach them by sewing them firmly to the inside top corners of the bag, like really stitch them in there good because handles take all the weight. I reinforced mine by stitching through multiple flowers at each attachment point.
Some people use wooden handles or those plastic purse handles you can buy, which would probably be sturdier. I haven’t tried that yet but it’s on my list.
Sizing Issues and Fixes
If your flowers are coming out different sizes (which mine always do), you can try blocking them. Get them wet, pin them out to the same size on a blocking mat or foam board, let them dry. I’m way too impatient for this usually but it does work.
Or just embrace the chaos. Handmade stuff isn’t supposed to be perfect anyway.
Variations You Can Try
Instead of flowers you can use granny squares, which are actually easier and work up faster. Same construction method, just different motifs.
You could make a bigger tote bag version with more flowers. Or a tiny coin purse with like 6 flowers.
I’ve seen people add a zipper to the top which would be smart for security but I haven’t figured out how to do that yet. Probably gotta sew it to the lining somehow.
Different Flower Styles
The basic flower I described is the easiest but there’s fancier ones. African flower motifs are really popular and look amazing but they have more rounds and more ends to weave in. There’s also puffy flowers where you make bobbles or popcorn stitches for texture.
I tried an Irish rose pattern once and gave up halfway through because it was too fiddly. Maybe I’ll go back to it eventually.
Time Investment
My first bag took me probably 15-20 hours total? Spread out over a couple weeks. The flowers themselves are quick, maybe 10-15 minutes each once you get in a rhythm. It’s the joining and finishing that takes forever.
If you’re trying to finish one for a specific event or gift deadline, start way earlier than you think you need to. I almost didn’t finish the summer 2024 one in time for my friend’s birthday because I underestimated how long the lining would take.
Pattern Resources
I mostly learned from free YouTube tutorials. Bella Coco has good ones, also TL Yarn Crafts. For written patterns Ravelry has tons of free flower bag patterns if you search “flower purse” or “granny square bag.”
The Wildflower Bag pattern by TL Yarn Crafts is specifically good for beginners. It’s free on her website and has clear instructions.
Some paid patterns on Etsy are really detailed with photo tutorials which can be worth it if you want something specific. I bought one for like $5 that had a nice structured bottom design.
Stuff That Didn’t Work
I tried making one with acrylic yarn (Red Heart Super Saver) and it was too stretchy and floppy. Even with lining it just didn’t hold its shape well. Stick with cotton.
Also tried making really small flowers thinking it would look more delicate but then I needed like 50 of them and wanted to quit. Bigger flowers = fewer to make = actually finishing the project.
Don’t make your handles too thin. I made skinny little chain handles on my first bag and they dug into my shoulder. Make them at least an inch wide, more if you’re gonna carry heavy stuff.