
May
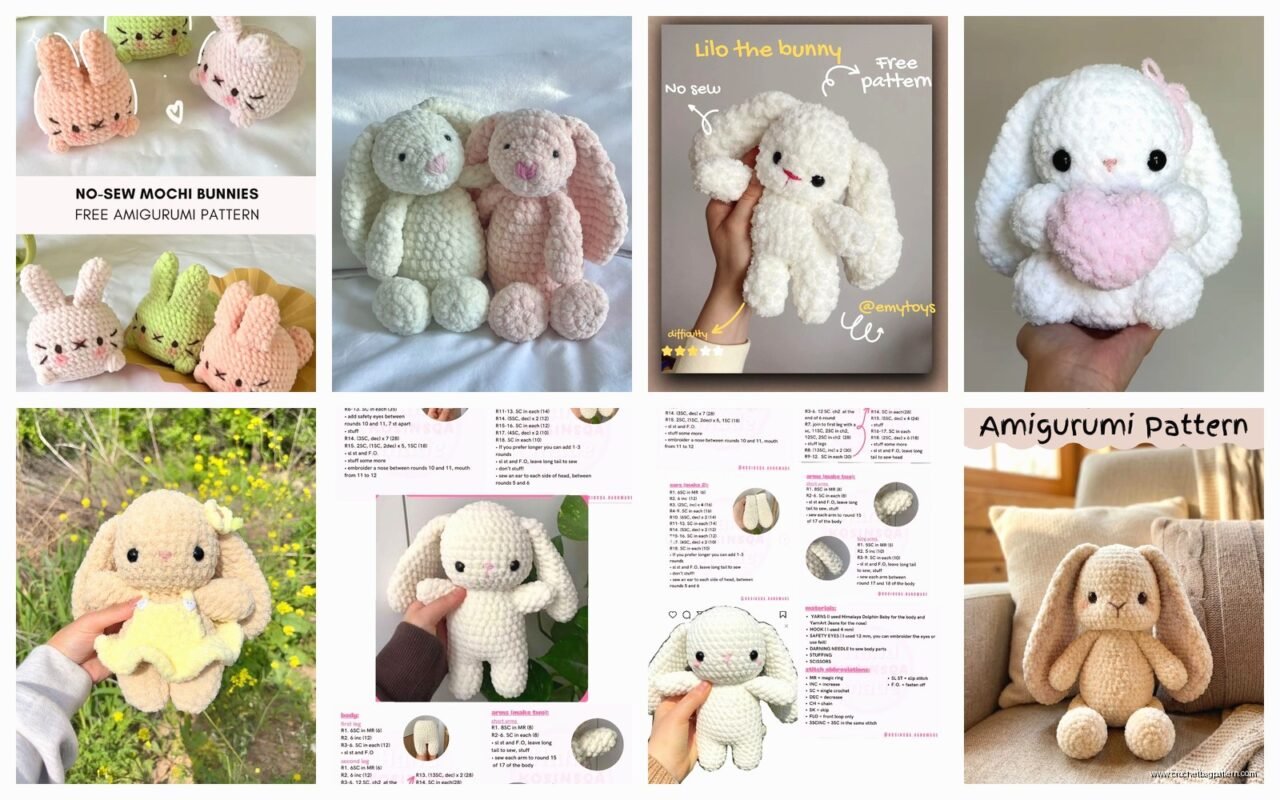
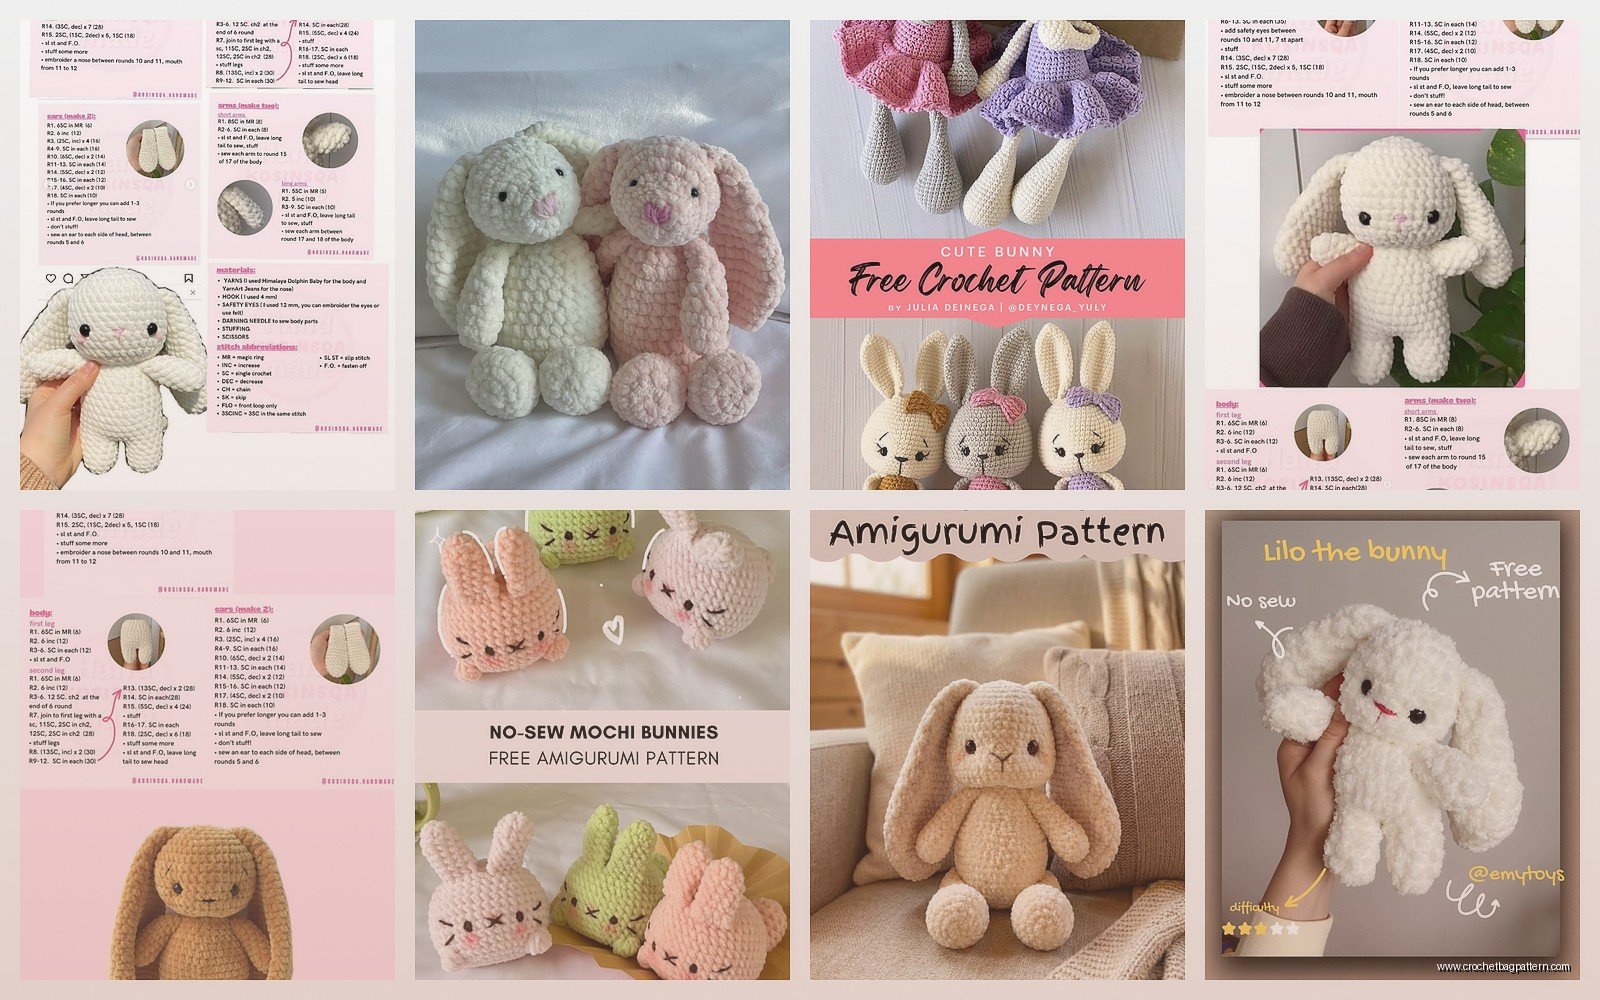
Getting Started With Your Bunny
okay so the first bunny I actually finished was in spring 2022 when I was supposed to be doing like ten other things but kept picking up my hook instead. I used this light pink Red Heart Super Saver yarn because honestly that’s what was in my stash and I wasn’t about to go buy fancy stuff for what might turn out looking weird.
The magic ring is where you start for the head. If you don’t know how to do a magic ring just youtube it real quick because trying to explain it in text is basically impossible. You need to make 6 single crochets into that ring and pull it tight. Then you’re gonna increase in every stitch for round 2 so you end up with 12 stitches total.
Round 3 is where the pattern gets into that rhythm – you do 1 single crochet, then an increase, and repeat that all the way around. This gives you 18 stitches. Round 4 is 2 single crochets then an increase (24 stitches). Round 5 is 3 single crochets then an increase (30 stitches). You see the pattern here right?
The Head Shape
Keep going with this increase pattern until you hit about 42-48 stitches depending on how big you want the head. I usually stop at 42 because these bunnies can get weirdly huge if you’re not careful. Then you just work even – meaning no increases or decreases – for like 8-10 rounds. This creates the main body of the head.
One thing that really annoyed me was stuffing the head partway through because all the tutorials say to stuff as you go but then you can’t really see what you’re doing and your stitches get all wonky. But if you wait too long the opening gets too small and it’s a nightmare. There’s like this tiny perfect window and I always miss it.
For decreasing you basically do the increase pattern in reverse. So if your last increase round was 5 sc then increase, your first decrease round is 5 sc then a decrease (where you crochet 2 stitches together). Keep tracking your stitch count or you’ll end up with a lumpy weird shape.
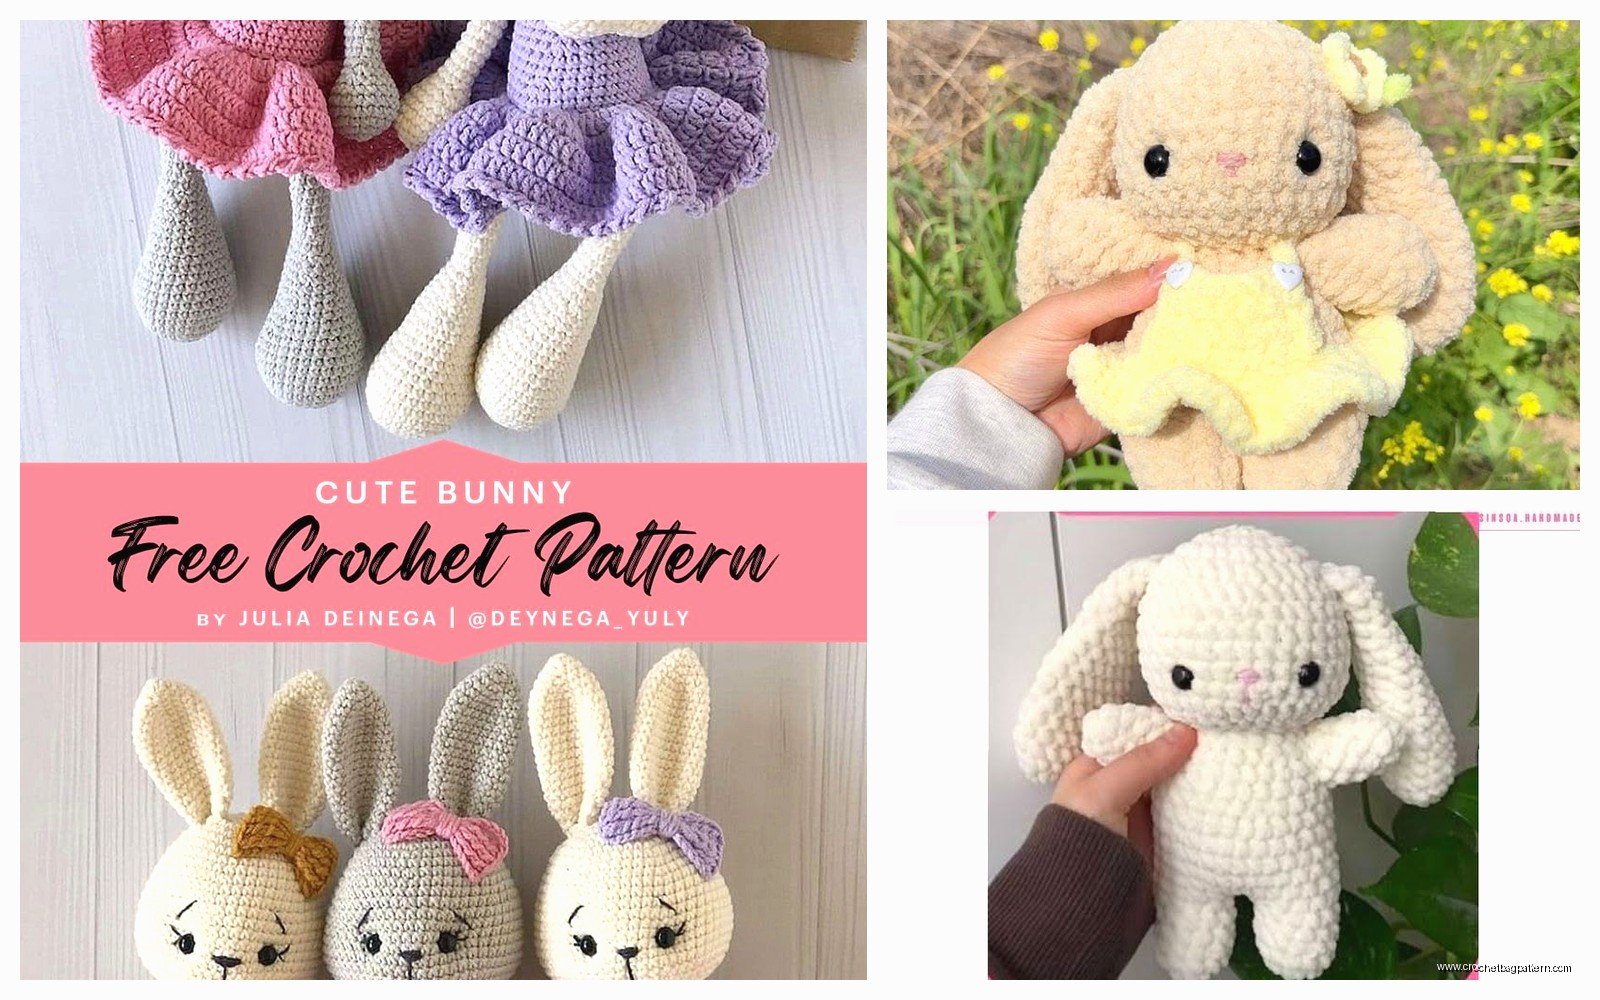
Ears Are Easier Than They Look
The ears are actually pretty straightforward. Chain like 12 or 15 stitches depending on how floppy you want them. Then single crochet back down the chain starting in the second chain from your hook. When you get to the end you can either fasten off or if you want slightly more structured ears you can work back up the other side of the chain too.
I made a bunny last summer 2024 using Bernat Blanket yarn which was a MISTAKE because that stuff is so thick and the bunny turned out absolutely massive. Like bigger than my cat who was very suspicious of it and kept batting at the ears. I was watching that baking show with the british people while making it and kept losing track of my stitch count.
You need two ears obviously. Pin them onto the head before you sew them because the placement is weirdly important for whether your bunny looks cute or slightly demonic. I usually put them kind of close together near the top of the head but some people space them farther apart. Whatever works for you.
Body Construction
The body starts exactly like the head with a magic ring and 6 sc. Follow the same increase pattern but you might want to go a bit bigger – I usually increase until I hit 36 stitches for the body. Then work even for maybe 12-15 rounds depending on if you want a chubby bunny or a more elongated one.
When you decrease the body you don’t go all the way down to closing it off. Stop when you have like 12-15 stitches left because that’s where you’ll attach it to the head. Stuff it firmly but not like rock hard or it looks weird and lumpy.
Arms and Legs
Arms are pretty simple. Magic ring with 6 sc, then you can either increase slightly for one round (to 8-9 stitches) or just keep it at 6 for skinnier arms. Work even for like 8-10 rounds. You don’t really need to stuff them too much, just a little bit at the paw end.
Legs are basically the same but slightly bigger. I do 6 in the magic ring, increase to 12 for the foot part, work even for 3-4 rounds, then decrease back to 8-9 stitches for the leg part. Work even for another 6-8 rounds. The foot thing makes them actually look like bunny legs instead of just tubes.
I’ve used Hobby Lobby’s I Love This Yarn for bunnies and it works fine, it’s cheap and comes in a million colors. The acrylic yarn is actually better for amigurumi than cotton because it has more give and forgives mistakes easier.
Assembly Is Where Things Get Real
This is honestly the part that can make or break your bunny. You need a yarn needle and a lot of patience. Start by attaching the head to the body – I usually sew around the opening of the body and attach it to the neck area of the head. Use the same color yarn as your body and do a whip stitch all the way around, pulling tight every few stitches.
The arms can either be sewn onto the sides of the body or if you want them to move you can do this button joint thing where you – actually that’s kind of advanced, just sew them on for your first one. Position them slightly toward the front of the body not directly on the sides or it looks weird.
Legs go on the bottom obviously but angle them slightly forward. If you attach them pointing straight down your bunny won’t sit right and will keep falling over which is frustrating.
Face Details
For eyes you can use safety eyes which you can get on Amazon or at craft stores. The 9mm or 12mm size works good for most bunnies. You gotta put these in before you fully close up and stuff the head because they have a backing that goes on the inside. Position them kinda low on the face and relatively close together – bunnies have that prey animal eye placement but for amigurumi you want them more forward-facing or it looks off.
If you don’t have safety eyes you can embroider them with black yarn. Make a small circle or do french knots. I prefer safety eyes because embroidering faces is its own whole skill that I haven’t fully figured out yet.
The nose is usually an upside-down triangle shape embroidered with pink yarn. Start at the bottom point and make a small triangle, then you can add a line down from it and two lines out to the sides for the mouth if you want. Some people skip the mouth entirely which is fine too.
Tail and Optional Stuff
For a tail you can make a small pompom with white or cream colored yarn. There’s pompom makers you can buy but honestly just wrap yarn around your fingers like 50 times, tie it tight in the middle, cut the loops, and trim it into a ball shape. Sew that onto the back of the bunny’s bottom.
Some patterns include a little cotton tail that’s crocheted which is basically just like 6 sc in a magic ring, increase to 12, work one round even, then decrease back down and stuff it slightly. That works too but pompoms are faster.
You can add a bow tie or a ribbon around the neck if you want it to look more finished. I usually skip this because I’m gonna lose the ribbon anyway and it ends up looking fine without it.
Yarn Weight and Hook Size
Most amigurumi patterns use a smaller hook than the yarn recommends because you want tight stitches so the stuffing doesn’t show through. If you’re using worsted weight yarn (the most common kind like Red Heart Super Saver or Caron Simply Soft), use a 3.5mm or 4mm hook even though the label probably says 5mm.
With bulky yarn like that Bernat Blanket I mentioned you’d use maybe a 6mm hook. The rule is basically go down a hook size or two from whatever the yarn label suggests. Your fabric should be tight enough that you can’t easily see through the stitches when you hold it up to light.
Lily Sugar’n Cream is a cotton yarn that some people use for amigurumi but I think it’s kind of stiff and not as cuddly. Better for dishcloths honestly but if you want a more structured bunny it could work.
Troubleshooting Common Issues
If your bunny is coming out lopsided you’re probably not counting stitches correctly or your tension is inconsistent. Use a stitch marker (or just a piece of different colored yarn) to mark the beginning of each round so you know where you are. I still mess this up constantly.
Lumpy stuffing shows through the stitches usually means either your stitches are too loose (use a smaller hook) or you’re using the wrong kind of stuffing. Polyfil stuffing works best – the stuff that comes in bags at craft stores. Pull it apart and fluff it before stuffing it in, don’t just shove clumps in there.
If the head is wobbly on the body you didn’t attach it securely enough. You really gotta sew all the way around and pull those stitches tight. It feels like you’re overdoing it but you’re probably not.
When the ears won’t stay up it’s because they’re too heavy or floppy for the yarn weight. You can either make them shorter, use a stiffer yarn, or put a little piece of wire inside them (like floral wire) to help them hold shape. I usually just accept floppy ears because that’s cute too.
Variations You Can Try
Once you make a basic bunny you can change colors obviously – do a white body with pink inner ears, or make a brown bunny, or go wild with rainbow colors. You can also make the ears different lengths or shapes. Really short ears make it look more like a baby bunny.
Some people add a little vest or dress to their bunnies which involves basically making a tiny rectangle and sewing it on. I’ve never done this because sewing fabric onto crochet seems like asking for trouble but people post pictures and they look cute.
You can make the body taller and skinnier for a more realistic bunny shape or keep it round and chubby for a cuter cartoon style. The same basic pattern works for both you just adjust how many rounds you work even before decreasing.
Adding embroidered details like little paw pads on the feet or shading around the eyes with pink yarn can make them look more detailed but honestly a simple bunny is just as good. Don’t stress about all the extra stuff until you’ve made a few basic ones.
Actual Time Investment
A basic bunny takes me maybe 4-6 hours total if I’m working on it steadily. That’s spread across a few days usually because who actually sits and crochets for 6 hours straight. The head takes the longest, then the body, then all the little pieces go pretty fast. Assembly probably takes 45 minutes to an hour.
Your first one will take longer because you’re figuring out the pattern and probably frogging (ripping out) stitches when you mess up the count. That’s totally normal. I still frog stuff all the time when I zone out watching TV and lose track of where I am in the round.
The pattern I loosely follow is just a generic one I found online years ago and have modified based on what works. There’s a million free bunny patterns out there – some are more detailed with specific stitch counts for every single round and some are more vague guidelines. Either type works fine you just gotta find what makes sense to your brain.