

Mar
Basic Supplies You Actually Need
So the first time I really sat down and made a proper bracelet was spring 2022 when I was stuck at home with covid and needed something to do with my hands besides doom-scrolling. You need thread weight yarn or thin cotton—I used Aunt Lydia’s crochet thread size 10 in that weird teal color they call “Turquoise” but honestly it looked more blue-green to me. A small hook, like 1.5mm or 1.75mm steel hook works. The sizing on steel hooks is backwards from regular hooks which is annoying but whatever.
You’re also gonna need some kind of clasp situation. I bought a pack of lobster clasps from the craft store, those little jewelry findings in the beading section. They come in gold or silver tone usually. Jump rings too—those tiny metal circles you can open and close to attach things. Scissors, obviously, and maybe some clear nail polish or fabric glue to seal your ends so they don’t unravel.
The Absolute Simplest Pattern
Start with a foundation chain. For a bracelet that fits my wrist (about 6.5 inches around) I chain like 35-40 stitches depending on how tight I’m working. The thing that really annoyed me about making bracelets is you can’t try them on as you go because they’re flat and floppy until you finish, so you kinda have to guess or measure against your wrist constantly.
Once you have your chain, you can either:
- Single crochet back across for a simple flat band
- Do a row of half double crochet for something slightly wider
- Make it in the round by slip stitching the ends together first, then working in a spiral
The flat method is easier for beginners honestly. Chain your length, then sc in the second chain from hook and across. You’ll have this thin strip. Do another row if you want it wider, or leave it skinny for a delicate look.
Adding the Hardware
This part I figured out after ruining like three bracelets. Before you fasten off, you need to leave a long tail—at least 6 inches. Thread that tail onto a yarn needle (the plastic ones with big eyes work fine). Take your jump ring and thread your yarn through it a few times, then weave the yarn back through your last few stitches. Pull tight. Add a dab of clear nail polish over where you wove it in. Let it dry completely.
On the other end, do the same thing but attach the lobster clasp instead of a jump ring. Or you can do jump rings on both ends and attach the clasp to one of them after—that’s actually easier because you can see what you’re doing better.
Slightly Fancier Version With Beads
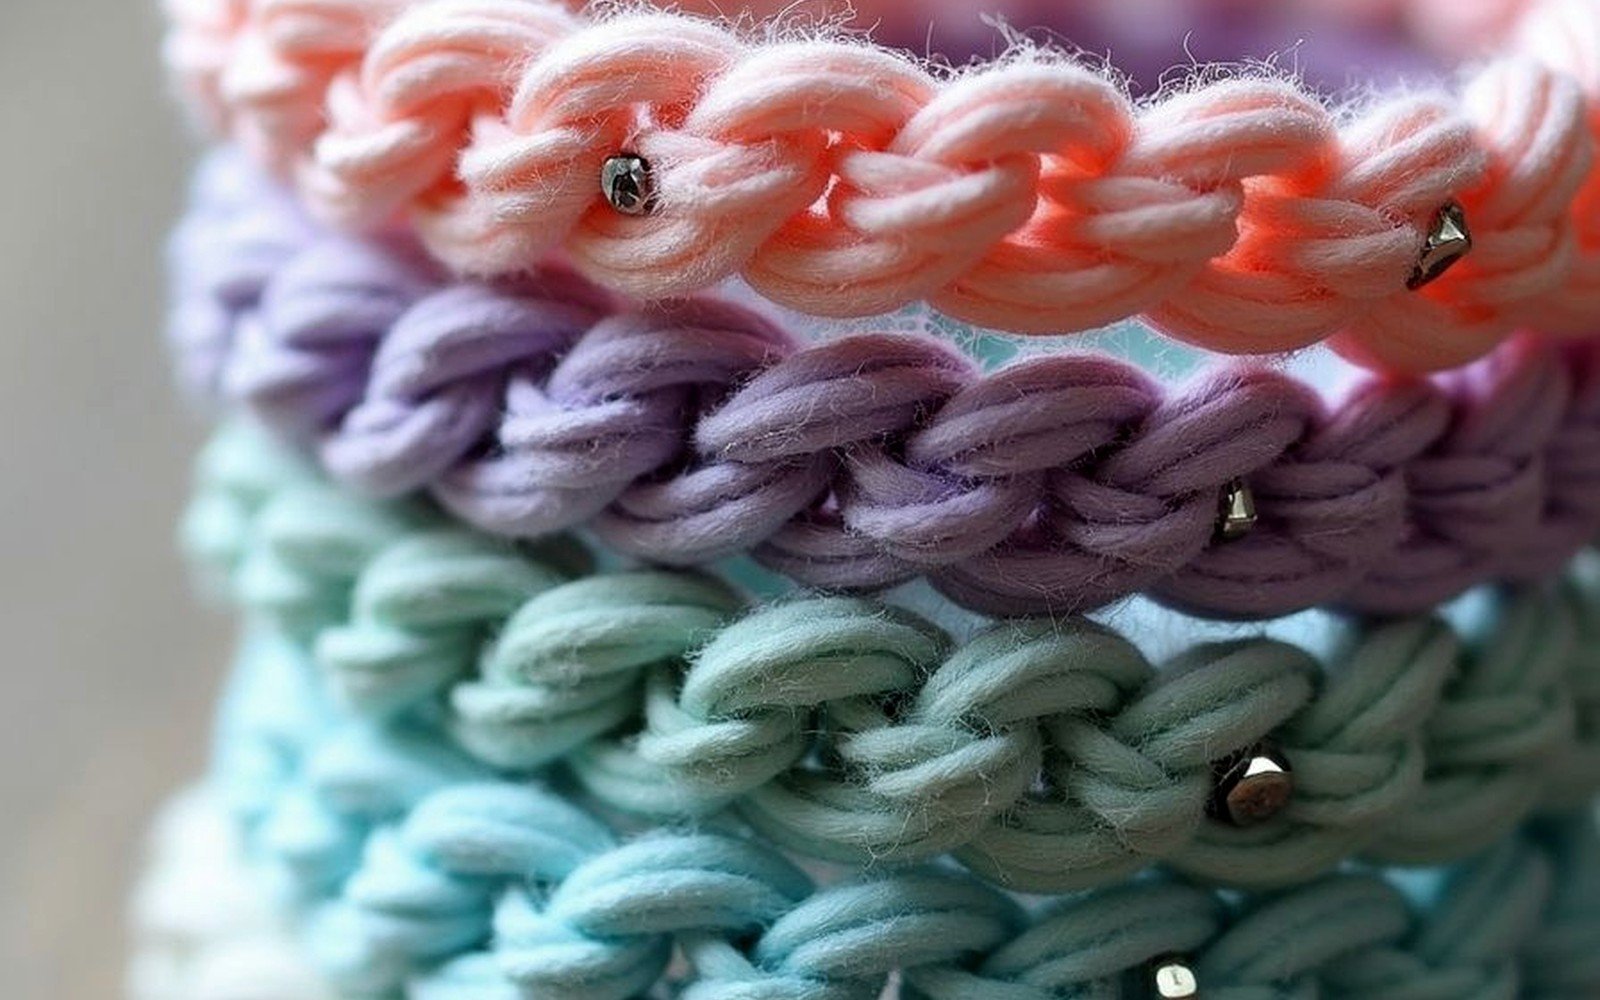
Summer 2024 I made a bunch of these for my sister’s birthday and added beads because the plain ones felt too simple. You have to thread all your beads onto the yarn BEFORE you start crocheting, which seems backwards but that’s how it works. I used size 6/0 seed beads—the bigger ones, not the tiny ones that take forever.
String like 50-60 beads onto your crochet thread. Then make your foundation chain same as before. When you want a bead to show up, you slide it down close to your work, then make your next stitch. The bead sits in front of the stitch. So like: chain, chain, slide bead, chain (bead is now sitting against that chain), chain, chain, slide bead, chain.
You can space them evenly or randomly, whatever looks good to you. My cat kept trying to bat at the beads while I was working which made this take way longer than it should’ve.
Colors and Yarn Choices
The Aunt Lydia’s thread comes in a million colors and it’s pretty cheap. I’ve also used DMC Cebelia which is a little softer but more expensive. Red Heart makes a “Luster Sheen” that has a slight shine to it—that one’s nice for jewelry because it catches light.
Cotton is better than acrylic for bracelets because it doesn’t stretch out as much when you wear it. Acrylic gets kind of limp and sad after a while. I learned this the hard way with a bracelet I made using regular worsted weight acrylic and a bigger hook—it stretched out so much it wouldn’t stay on my wrist anymore.
Embroidery floss works too if you don’t have crochet thread. Use a 2.0mm hook with embroidery floss. The texture is a little different, more matte, but it comes in every color imaginable.
Pattern Variations That Actually Work
Once you get bored of plain bands (which happens fast), here’s some stuff that’s still simple but looks more interesting:
The Granny Stripe Bracelet
This is just a really narrow granny stripe. Chain a multiple of 3, plus 2 extra. So like, chain 35 total. Row 1: dc in 4th chain from hook, dc in next chain, then chain 1, skip 1, and do 3 dc. Keep repeating that pattern. You get these little clusters with spaces between them. Do 2-3 rows, fasten off, add clasps.
I made one of these while watching that show The Bear which was probably not the best choice because the show stressed me out and I kept tensioning my yarn too tight.
Picot Edge Band
Make your basic flat band however wide you want. Then on the last row, instead of regular stitches, you do: sc, then chain 3 and slip stitch back into the same stitch you just made the sc in. That makes a tiny little bump called a picot. Skip a stitch, sc in the next one, make another picot. Continue across.
It gives the edge a decorative bumpy texture that looks fancier than it is. Good for if you’re giving them as gifts and want them to look like you tried harder.
The Tubular/I-Cord Method
This one makes a rounded bracelet instead of flat. Chain 4, slip stitch to form a ring. Then just single crochet around and around in a spiral without joining rows. You’re working in the round continuously. After like 6-7 inches (measure it against your wrist as you go), slip stitch to join and fasten off.

The annoying thing about this method is it wants to twist and curl while you’re making it. You kind of have to wrestle with it. But the finished product is nice and sturdy, more like a bangle style.
You can stuff it lightly with polyfil before you close it up if you want it really firm and rounded. Or leave it unstuffed for a flatter tube.
Attaching Clasps to Tubular Bracelets
This is trickier because there’s no flat edge to sew through. What I do is flatten the end a bit, then use my yarn needle to go through the tube several times, catching the clasp or jump ring in there. Reinforce it a lot because tubular bracelets get pulled on more when you’re putting them on and taking them off.
Troubleshooting Common Problems
If your bracelet is twisting: you’re probably crocheting too tightly or your foundation chain is twisted before you start working into it. Make sure your chain is laying flat and not spiraled before you begin your first row.
If it’s too stiff: go up a hook size or loosen your tension. Crochet thread is already pretty rigid, so if you work it tight it becomes like… almost unwearable, like a strip of cardboard.
If the clasp keeps falling off: you didn’t reinforce it enough. Seriously use way more yarn than you think you need when attaching hardware. Go through those stitches like 8-10 times, not just 2-3.
If you run out of thread before finishing: this happened to me so many times before I started estimating better. For a basic 7-inch bracelet that’s 3-4 rows wide, you need about 15-20 yards of thread. Measure out way more than you think you’ll need. Running out 2 inches from the end is the worst.
Size Adjustments
Measure your wrist with a measuring tape, then subtract about half an inch because you want the bracelet snug enough that it won’t slide off but not tight. So if your wrist is 7 inches around, make your bracelet 6.5 inches from clasp to clasp.
The width is up to you. I usually do 3-5 rows for a thin delicate look, or 7-10 rows for something chunkier. More than 10 rows starts looking more like a cuff than a bracelet, which is also cool but different vibe.
Making Them for Other People
Average adult wrist is like 6-7 inches. Kids are more like 5-6 inches. Men usually 7-8 inches. But honestly everyone’s different so if you can, just ask them to measure or do it adjustable.
Adjustable method: instead of a lobster clasp on one end, do a small button. On the other end, make 2-3 chain loops at different points so the button can go through whichever one fits best. I used this for a bracelet I made for my friend who’s really picky about how things fit and it worked perfectly.
Embellishments Beyond Beads
Charms: you can add those little metal charms they sell in the jewelry section. Attach them to jump rings and hook them onto your bracelet at intervals. I made one with tiny star charms that turned out really cute.
Sequins: thread them on like beads. They’re flatter so they lay differently, more flush against the bracelet.
Different textures: alternate rows of single crochet with rows of double crochet to get a varied texture. Or do a row of front post stitches and back post stitches for a ribbed look.
I experimented with adding those tiny ribbon roses you can buy in packs but honestly they looked kinda tacky, or maybe I just didn’t place them well, anyway I wouldn’t necessarily recommend that unless you’re going for a very specific aesthetic.
Finishing Touches
Always weave in your ends properly. Don’t just cut them short and hope for the best. Thread them onto a needle and weave through at least 5-6 stitches in different directions, then trim close. The clear nail polish thing really does help—just paint it over the woven-in area and it basically glues everything in place.
If your bracelet is a little wavy or not laying flat, you can block it. Get it damp (not soaking), pin it flat to a blocking board or even just a towel on a table, and let it dry completely. This works better with natural fibers than acrylic.
Some people starch their jewelry to make it stiffer. I’ve never tried this with bracelets but I guess you could. Seems like it might get weird and crusty though.
Storage: don’t just throw them in a drawer where they’ll get tangled. I keep mine on a small jewelry tree thing, or you can hang them on hooks, or lay them flat in a jewelry box. The clasps can catch on each other if you’re not careful and then you’ve got a whole mess to untangle.