
Jun
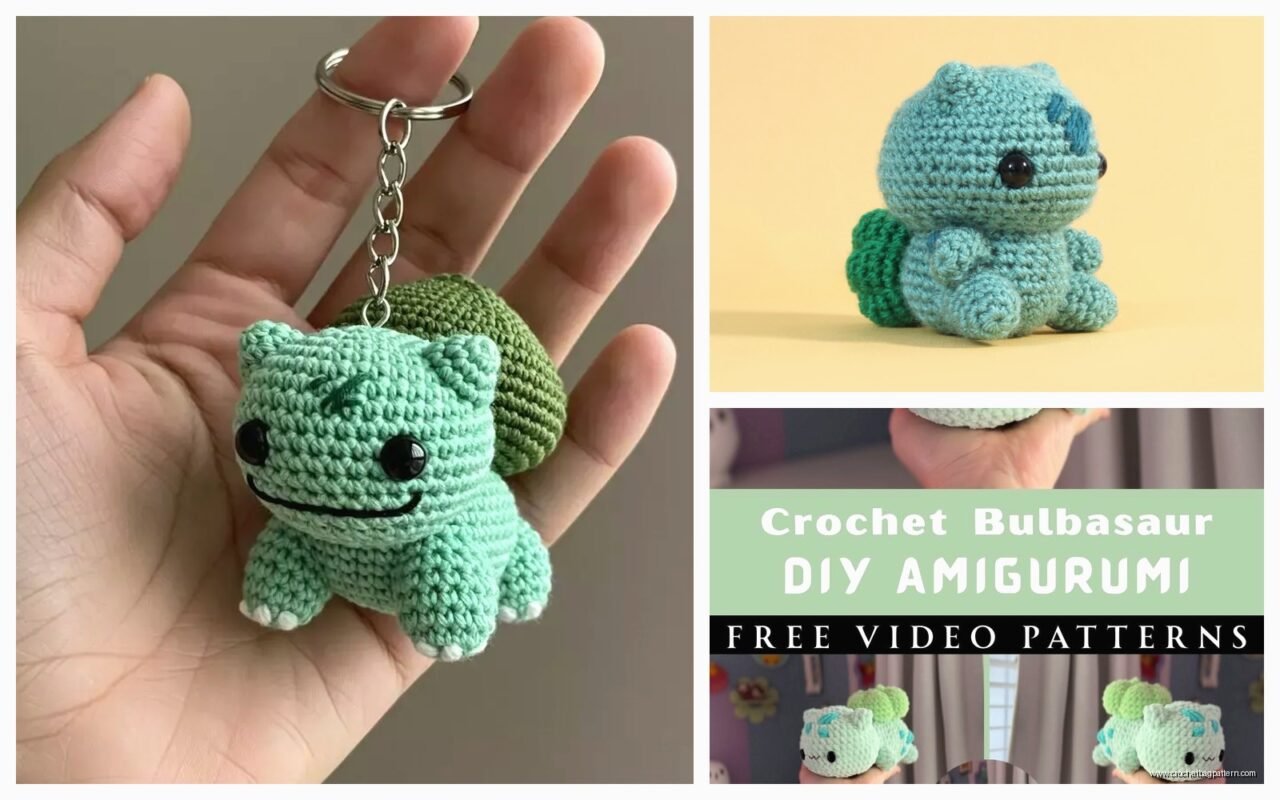
Getting Started With The Bulbasaur Thing
So the yarn situation – I used Red Heart Super Saver in Kelly Green for the body when I made mine back in spring 2022, right after my roommate moved out and I had way too much time on my hands. That stuff is scratchy but honestly it holds up really well and you probably already have some lying around. The turquoise for the spots I think was also Red Heart but in Turquoise, real creative naming there. You’re gonna need white for the eyes and teeth, black for pupils, and then like a dusty teal or seafoam situation for the bulb on the back.
The bulb part honestly annoyed me so much because it kept looking lopsided no matter how carefully I counted my stitches. I frogged it like three times before I just accepted that handmade stuff doesn’t need to be perfect.
What You Actually Need
Worsted weight yarn in those colors I mentioned. A 3.5mm or 4mm hook works fine – I used a 3.75mm Clover Amour hook because that’s what I had. Fiberfill stuffing, those safety eyes in like 12mm or 15mm size, a yarn needle for sewing pieces together, and stitch markers help a ton even though I always forget to use them.
Oh and you need to know basic stitches. Single crochet, increases, decreases, magic ring. If you don’t know magic ring just chain 2 and work into the first chain, it’s fine, no one will know.
The Body Part
Start with the green yarn and a magic ring. You’re basically making a sphere but it’s gonna be slightly egg-shaped because Bulbasaur is kind of a chubby little dude. Round 1 is 6 single crochet into the ring. Pull it tight.
Round 2 you’re increasing in every stitch so that’s 12 stitches total. Round 3 is the pattern of sc, inc repeated around for 18 stitches. This is pretty standard amigurumi increasing if you’ve made like a ball or whatever before.
Keep going with that pattern – Round 4 is sc 2, inc around for 24 stitches. Round 5 is sc 3, inc for 30 stitches. Round 6 is sc 4, inc for 36 stitches. I usually go up to 42 stitches for the widest part which is sc 5, inc on Round 7.
Then you work even – just straight single crochet with no increases or decreases – for like 8-10 rounds depending on how tall you want him. My dog kept trying to steal the stuffing during this part and I had to put her outside, she’s so annoying about fluffy things.
After the even rounds you start decreasing in the same pattern but reversed. So sc 5, dec around, then sc 4, dec, then sc 3, dec, you get it. When you get down to like 18 stitches that’s when you stuff the body really firmly. Add the safety eyes before you close it up completely – they go between rounds 12 and 13 or thereabouts, spaced about 6-7 stitches apart.
Continue decreasing until you have just a few stitches left, then fasten off and weave in the end.
The Spots On The Body
This is where the turquoise comes in. You need three spots and they’re just flat circles basically. Magic ring with 6 sc, then inc all around for 12, then sc, inc around for 18 stitches. Fasten off leaving a long tail for sewing.
Position them on the body in kind of a triangle pattern – two on the sides toward the front and one on top toward the back. Sew them on with the tails, weaving through the stitches so they lay flat. I used a whip stitch I think, or maybe mattress stitch, honestly whatever makes it stay on there.
Legs Situation
Four legs, all the same. Use the green yarn. Magic ring with 6 sc, then inc all around for 12 stitches. Work even for like 4-5 rounds. You can stuff these lightly or leave them unstuffed – I left mine unstuffed because they’re small and it was easier to shape them.
Flatten the opening and sc across to close, or just sew it shut with the yarn tail. Make four of these and position them on the bottom of the body. The front legs go more toward the front obviously and the back legs more toward… I mean you can see where they should go if you look at a picture of Bulbasaur.
Sewing them on securely is important because if you’re making this for a kid they’re gonna pull on the legs. Use the tails to sew through the body multiple times, knotting it inside before weaving in the end.
The Ears Or Whatever They Are
These are like little triangular nubs on top of his head. Green yarn, chain 2, then work 3 sc in the second chain from hook. Chain 1, turn, then 2 sc, inc across. Chain 1, turn, sc across the 4 stitches. Chain 1, turn, sc2tog twice. Fasten off.
That gives you a little triangle ear thing. Make two and sew them on top of the head angled slightly outward. They’re small so they’re kinda fiddly but they go pretty quick.
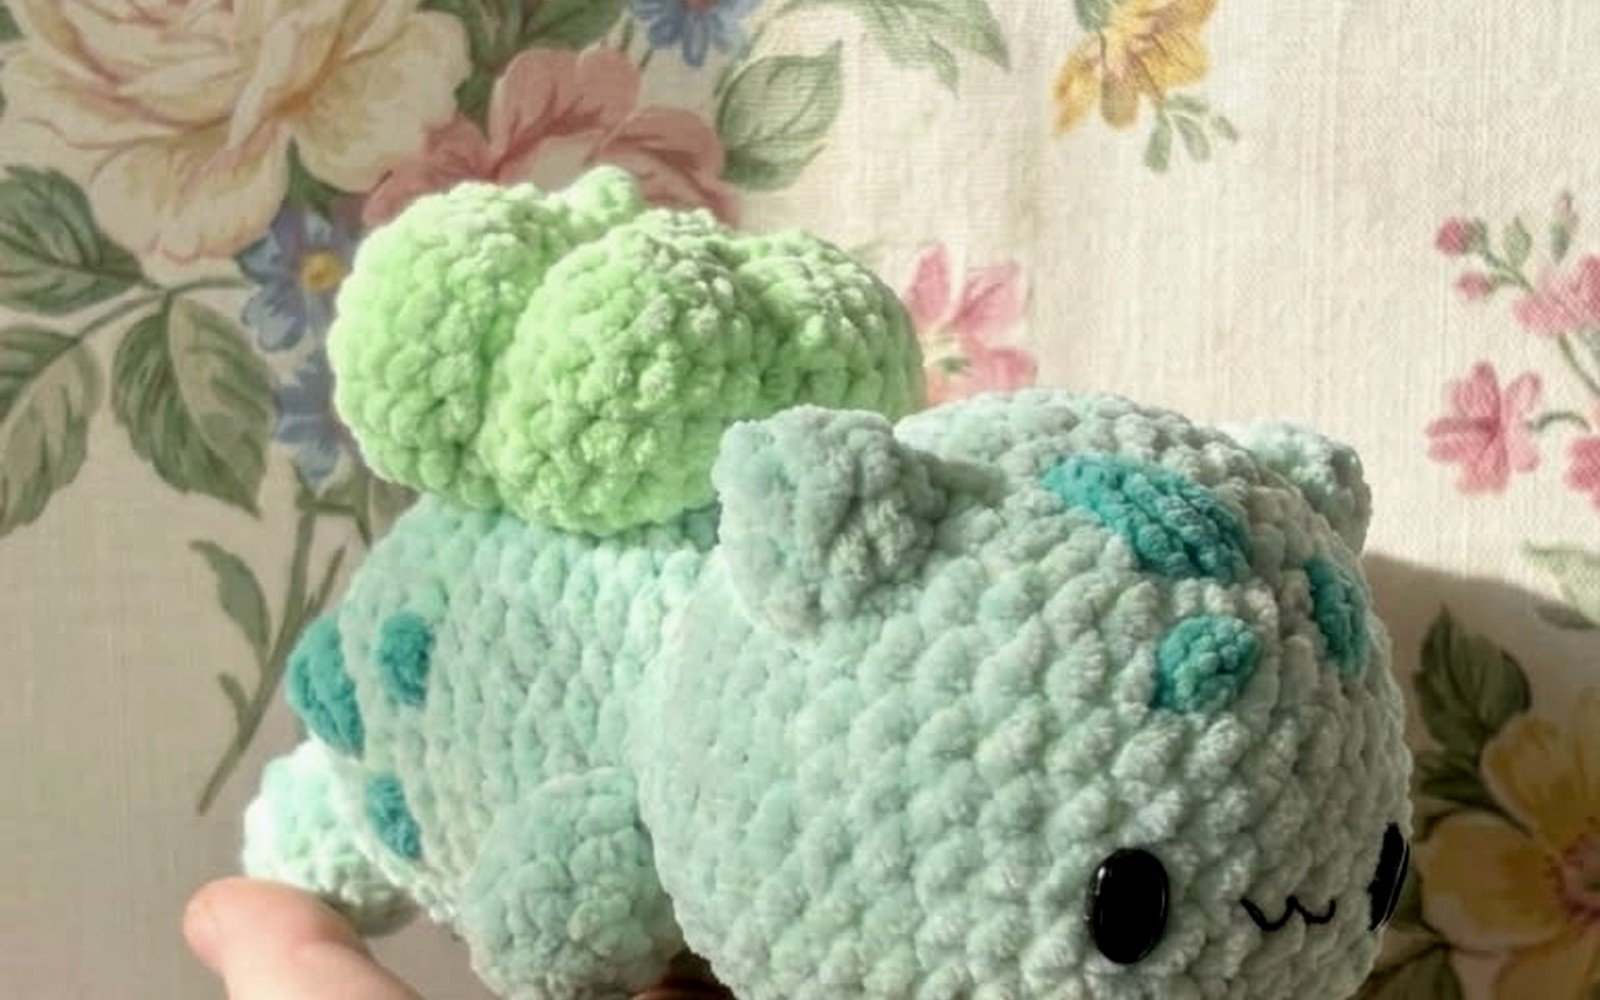
The Bulb Is The Worst Part
Okay so this is the part that made me want to throw the whole project across the room. The bulb on Bulbasaur’s back is like a closed flower bud shape and it needs to look right or the whole thing looks weird.
Start with the dusty teal or seafoam color. Magic ring with 6 sc, then the usual increasing pattern up to about 30 stitches for the base. So inc all around, then sc inc around, then sc 2 inc around, etc. Work even for 2-3 rounds.
Then you start decreasing but not all the way closed – you want it to stay kind of bulb-shaped not completely spherical. Decrease every few rounds, working some even rounds in between so it tapers gradually. When you get to about 12-15 stitches at the top, stuff it firmly and then start the leaves part.
The Leaf Points On The Bulb
This is where I kept messing up. You need to make little leaf triangles that come out of the top of the bulb. I did four of them. In one stitch at the top opening, work like sc, hdc, dc, hdc, sc all in the same stitch to make a little fan shape. Skip a stitch or two, then repeat in the next stitch. Do this four times around the opening.
It’s gonna look weird at first but when you fasten off and weave in the ends it shapes up better. The leaves should point upward and outward slightly. If they’re flopping over you didn’t make the base of the bulb firm enough with stuffing.
Sew the whole bulb onto the back of the body, positioning it slightly toward the top half of the body, centered on the back. This takes some trial and error to get it looking balanced.
Face Details That Matter
The safety eyes are already in but you need to add the white parts around them. With white yarn, make a small flat circle – magic ring with 6 sc, inc all around for 12 stitches, fasten off. Make two. Sew these around the safety eyes so the black eye is in the center of the white circle. It makes him look less creepy.
For the mouth you can embroider it with black yarn in like a little curved smile shape, or you can do what I did and just make it subtle because I’m not great at embroidery. Just a few stitches in a slight curve under where the eyes are.
The teeth are optional but they’re kinda cute. With white yarn, chain 3, sc in second chain from hook, sc in next chain, fasten off. Make two tiny little rectangles like this and sew them at the top of the mouth area so they poke down like little fangs. They’re small and might fall off if a kid chews on this so maybe skip them if this is for someone young.
Random Assembly Tips
When you’re sewing all the pieces on, use the same color yarn as the piece you’re attaching so the stitches blend in better. Like use green yarn to sew green legs onto the green body. Seems obvious but I used black thread once because I couldn’t find my yarn needle and it looked terrible.
Weave in ends as you go if you can stand it, or do what I do and leave them all until the end and spend like an hour just weaving in ends while watching TV. I was rewatching The Office during mine and it made it less boring.
If your Bulbasaur won’t sit up on his own, the legs might be positioned wrong or the body isn’t stuffed firm enough. He should be able to sit without tipping over. Adjust the leg positions before you sew them on permanently – just pin them with regular pins first to test.
Yarn Amounts And Substitutions
You don’t need full skeins of everything. For the green body I used maybe half a skein of the Red Heart Super Saver. The turquoise for spots was barely anything, like 10 yards maybe? The bulb color took maybe a quarter skein. White and black are just scraps really.
If you can’t find Red Heart or don’t want to use acrylic, any worsted weight cotton blend works fine. I’ve seen people use Lily Sugar’n Cream for these which is cotton and comes in good colors, but it’s less stretchy so your tension might be different. Bernat Premium or Big Twist from Joann would work too.
The important thing is keeping the same weight yarn throughout so the proportions don’t get weird. Don’t use bulky yarn for the body and worsted for the bulb or it’ll look off.
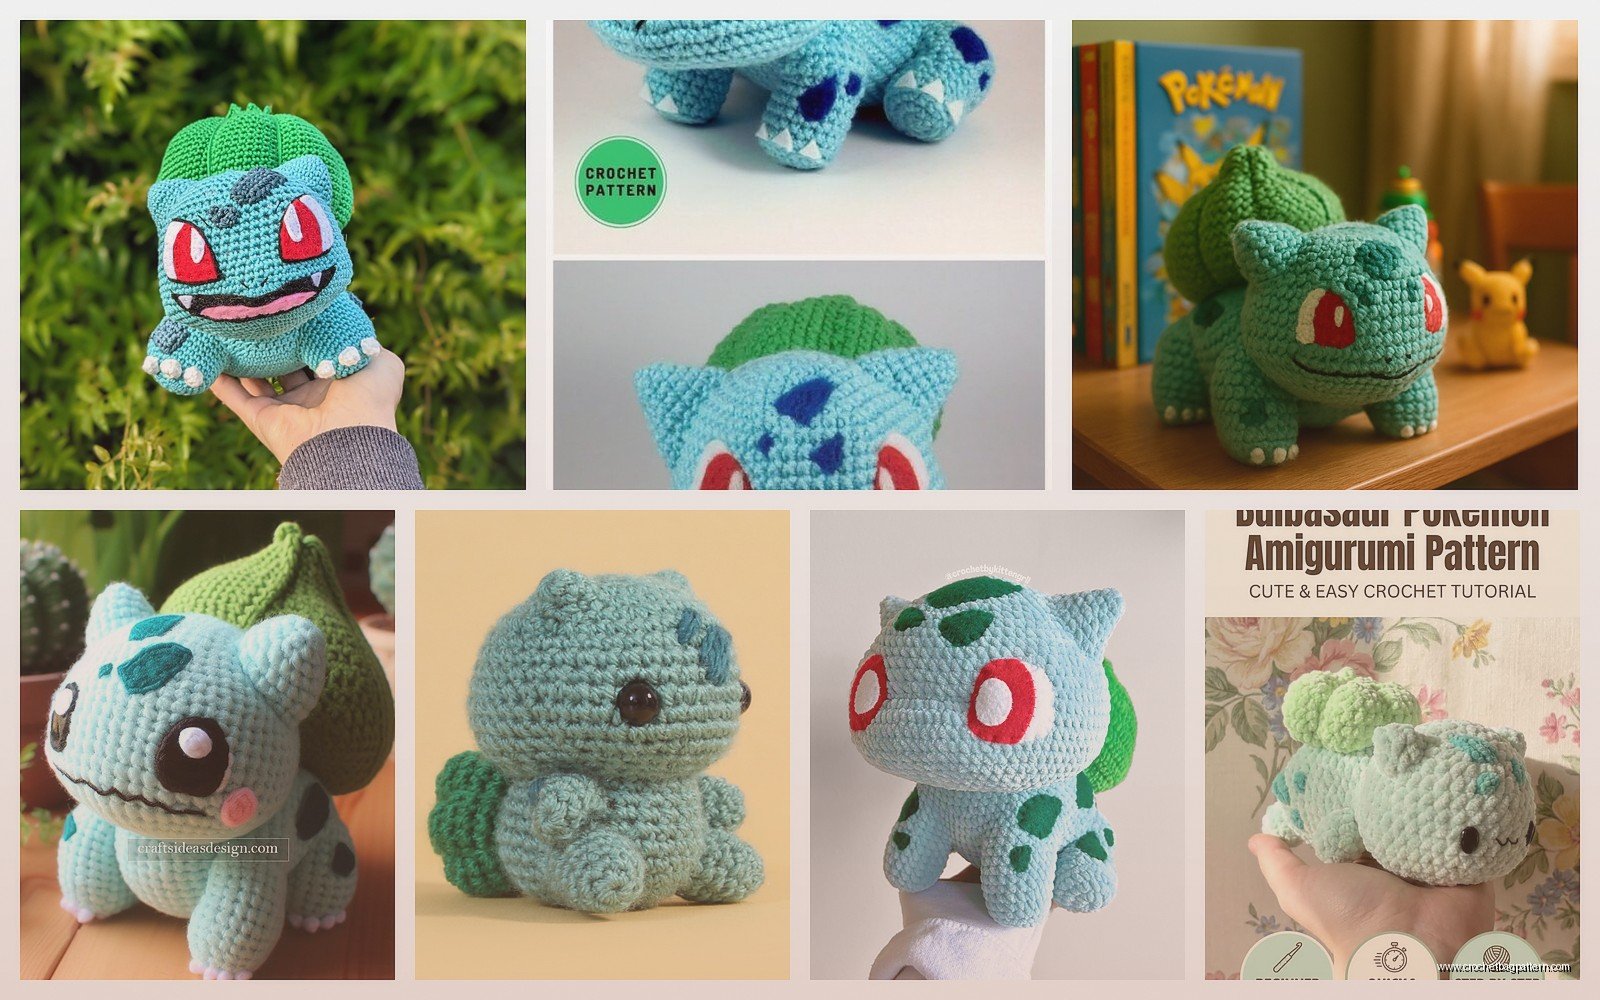
Sizing And Variations
Following this pattern you end up with a Bulbasaur that’s maybe 5-6 inches tall sitting down. If you want him bigger, use a bigger hook and thicker yarn – like a 5mm hook with bulky weight yarn would make him maybe 8-9 inches. Smaller hook and thinner yarn makes a tiny one obviously.
I’ve seen people add wire in the legs so they’re poseable but that seems like a lot of extra work and also might poke through eventually. If you want to try it use pipe cleaners or floral wire wrapped in a little bit of stuffing before you close up the legs.
Some patterns have you make the spots with a different technique where you change colors while crocheting the body, but sewing them on separately gives you more control over placement and honestly is easier if you’re not great at color changes.
Common Problems I Had
The bulb thing I already mentioned. It’s just finicky and you gotta accept that it might not be perfectly symmetrical.
Getting the eyes even is hard. I measure with a ruler now like a nerd but it helps. Count the stitches between them and the rounds down from the top of the head to make sure they’re level.
Sometimes the body ends up more oval than round if your tension is inconsistent – this is fine actually, Bulbasaur is kind of an oval shape anyway. Just make sure you stuff it evenly so there aren’t lumpy parts.
The legs can twist when you sew them on if you’re not paying attention. Make sure the opening you closed is facing toward the body when you attach them, not pointing sideways or forward.
Running out of yarn is annoying but you probably won’t if you have even a partial skein of green. I always buy more than I need anyway because I’m bad at estimating and then I have a million partial skeins everywhere, but that’s a different problem.
What To Do With It After
I mean it’s a stuffed Bulbasaur, you can give it to someone who likes Pokemon or keep it on a shelf. Mine sits on my bookshelf next to a Squirtle I never finished because I lost motivation halfway through. They’re pretty sturdy if you used acrylic yarn and sewed everything securely, so they hold up to being handled or played with.
If you’re selling these be careful about copyright stuff – technically Pokemon is trademarked and you’re not supposed to sell fan-made items but people do it anyway on Etsy. I’m not a lawyer so I don’t know the actual rules but just be aware that’s a thing.
You could make the whole original Pokemon starter trio if you want – Charmander and Squirtle use similar body patterns with different details and colors. The bulb is unique to Bulbasaur though so that’s the only tricky part you won’t repeat.
Anyway that’s basically how you make a crochet Bulbasaur. It takes maybe 4-6 hours total depending on your speed and how much you have to redo parts. The bulb will probably annoy you but just push through it and eventually you’ll have a little green Pokemon guy.