
Mar
Getting Started With Summer Crochet Tops
So the first top I actually finished was back in spring 2022 and honestly I started it because I was bored during this whole situation with my ex and needed something to do with my hands that wasn’t checking my phone every five minutes. Crochet tops seem intimidating but they’re really just rectangles and triangles most of the time if you break them down.
The thing about beach wear specifically is you want something that dries fast and doesn’t get weird and stretched out when it gets wet. Cotton is nice but it takes forever to dry and gets heavy. I learned this the hard way with a crop top I made using Lily Sugar’n Cream yarn which is just… it’s fine for dishcloths but for a beach top it was a mistake. The whole thing sagged down after one swim and never really recovered its shape.
Yarn Choices That Actually Work
You’re gonna want to look at cotton-acrylic blends or straight acrylic that’s got a nice drape to it. I’ve had good luck with Red Heart Soft which sounds basic but it actually works really well for summer tops because it’s light and doesn’t make you sweat like crazy. Caron Simply Soft is another one that’s good for this.
For beach cover-ups specifically I used this bamboo blend yarn once from Lion Brand called LB Collection Organic Wool and it was actually really nice and breezy but kinda pricey if I’m being honest. Like $8 a skein and you need at least 4-5 skeins for a full top depending on your size.
The mesh-style patterns are your friend for summer. They work up faster because you’re basically making a lot of holes on purpose and they let air through. Plus if you mess up a stitch in a mesh pattern nobody can really tell because the whole thing is supposed to look kinda irregular anyway.
Pattern Types That Make Sense
There’s basically a few styles that work well for beach wear and I’ll just run through what I’ve actually made:
- Triangle halter tops – these are good if you’re comfortable with ties because you can adjust the fit
- Granny square tops – sounds weird but if you make the squares small and join them tight it actually looks pretty cool
- Mesh tanks – probably the easiest and most wearable
- Crop tops with straps – cute but you gotta get the length right or it looks off
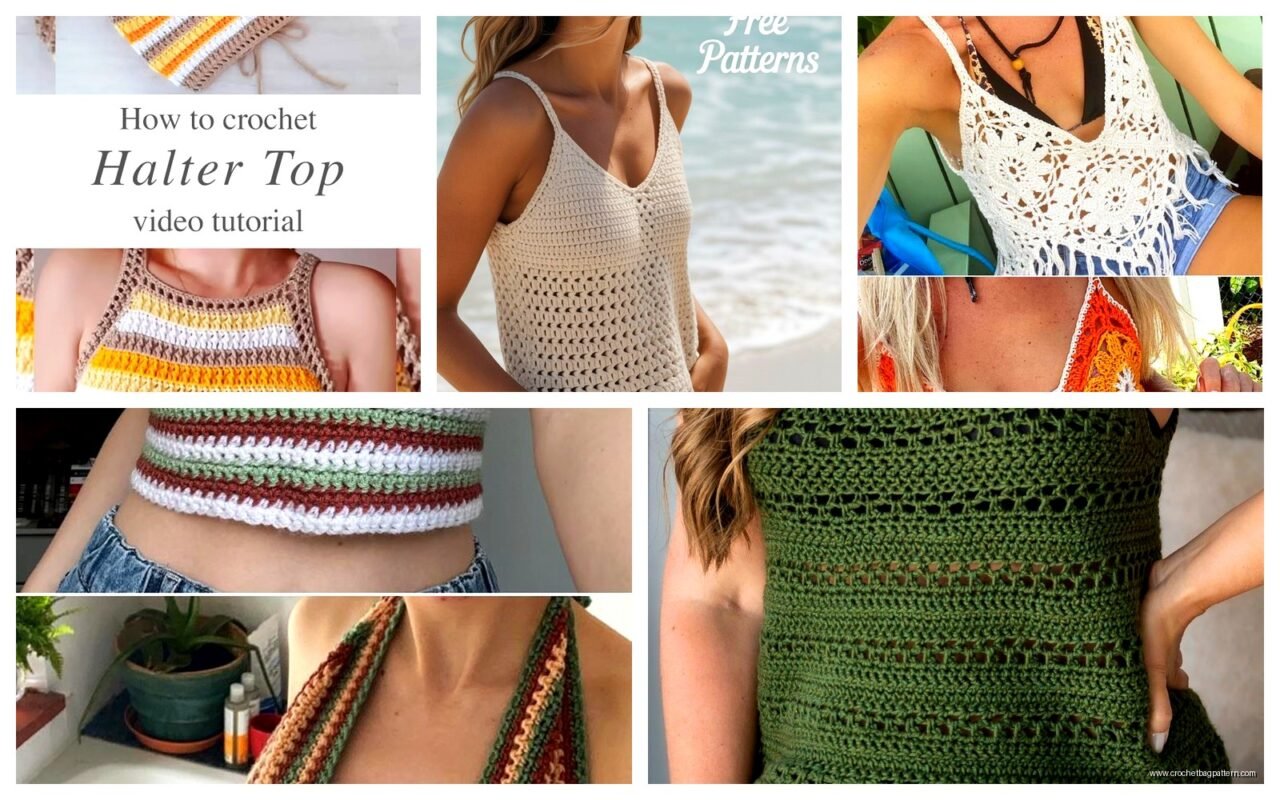
I made a halter top in summer 2024 for a trip to the beach and the pattern I used was just a basic triangle that you start from the top point and work down. You increase on both sides every row until it’s wide enough to cover what needs covering. Then you do another triangle and connect them. The annoying part was figuring out the neck tie because the pattern just said “make a chain long enough” which like… how long is that exactly?

The Halter Top Situation
For the halter I ended up using I Can’t Believe It’s Not Wool yarn in this cream color and it took me maybe 10 hours total spread over a week. My cat kept trying to lay on the yarn while I was working which added time because I had to keep moving him.
The construction is pretty straightforward. You make two triangles starting with like 4 chains, then you work back and forth increasing at the edges. Most patterns tell you to increase 2 stitches per row which makes it grow at a decent rate. When you get to the width you want – I tried it on like every five rows to check – you stop and make ties.
For ties I just did single crochet chains which are sturdy enough. You need four ties total – two for the neck and two for the back. The back ties need to be longer than you think because they have to wrap around and tie. I made mine too short the first time and had to add more chain which you could totally see where I joined it but whatever it was on my back.
Sizing Issues Nobody Talks About
Here’s what annoyed me the most about making crochet tops – the sizing is so weird and patterns never account for like… actual body shapes? They’ll say small medium large but a small in one pattern is completely different from another. And crochet stretches but not always in the ways you want it to.
I measure everything now before I get too far. Width across the bust should be about half your bust measurement because it stretches. Length is trickier because it depends on if you want it cropped or longer. For a crop top I usually do about 12-14 inches from shoulder to hem but that’s for my body and I’m pretty average height.
The other thing is that if you’re making something fitted you need to use a smaller hook than the yarn suggests. Like if the yarn label says use a J hook I’ll go down to an H or even G to make it tighter. Otherwise you end up with something see-through in ways you didn’t plan for.
Mesh Tank Pattern Basics
The mesh tank I made was probably the most successful beach top because it worked as a swimsuit cover and also just as a regular summer top. I used Bernat Handicrafter Cotton for this one in white and it took 3 skeins.
You start with a foundation chain that goes around your bust measurement plus like 2 inches for ease. Then you join it in a circle and work in rounds going up. The mesh pattern I used was just: chain 2, skip 2 stitches, double crochet in next stitch, repeat around. Super simple and it creates this net-like fabric.
Every few rounds you need to decrease if you want it to be fitted at the waist or you can just keep it straight for a boxy look. I did decreases every 4 rounds by skipping the chain-2 space occasionally and just doing double crochets closer together.
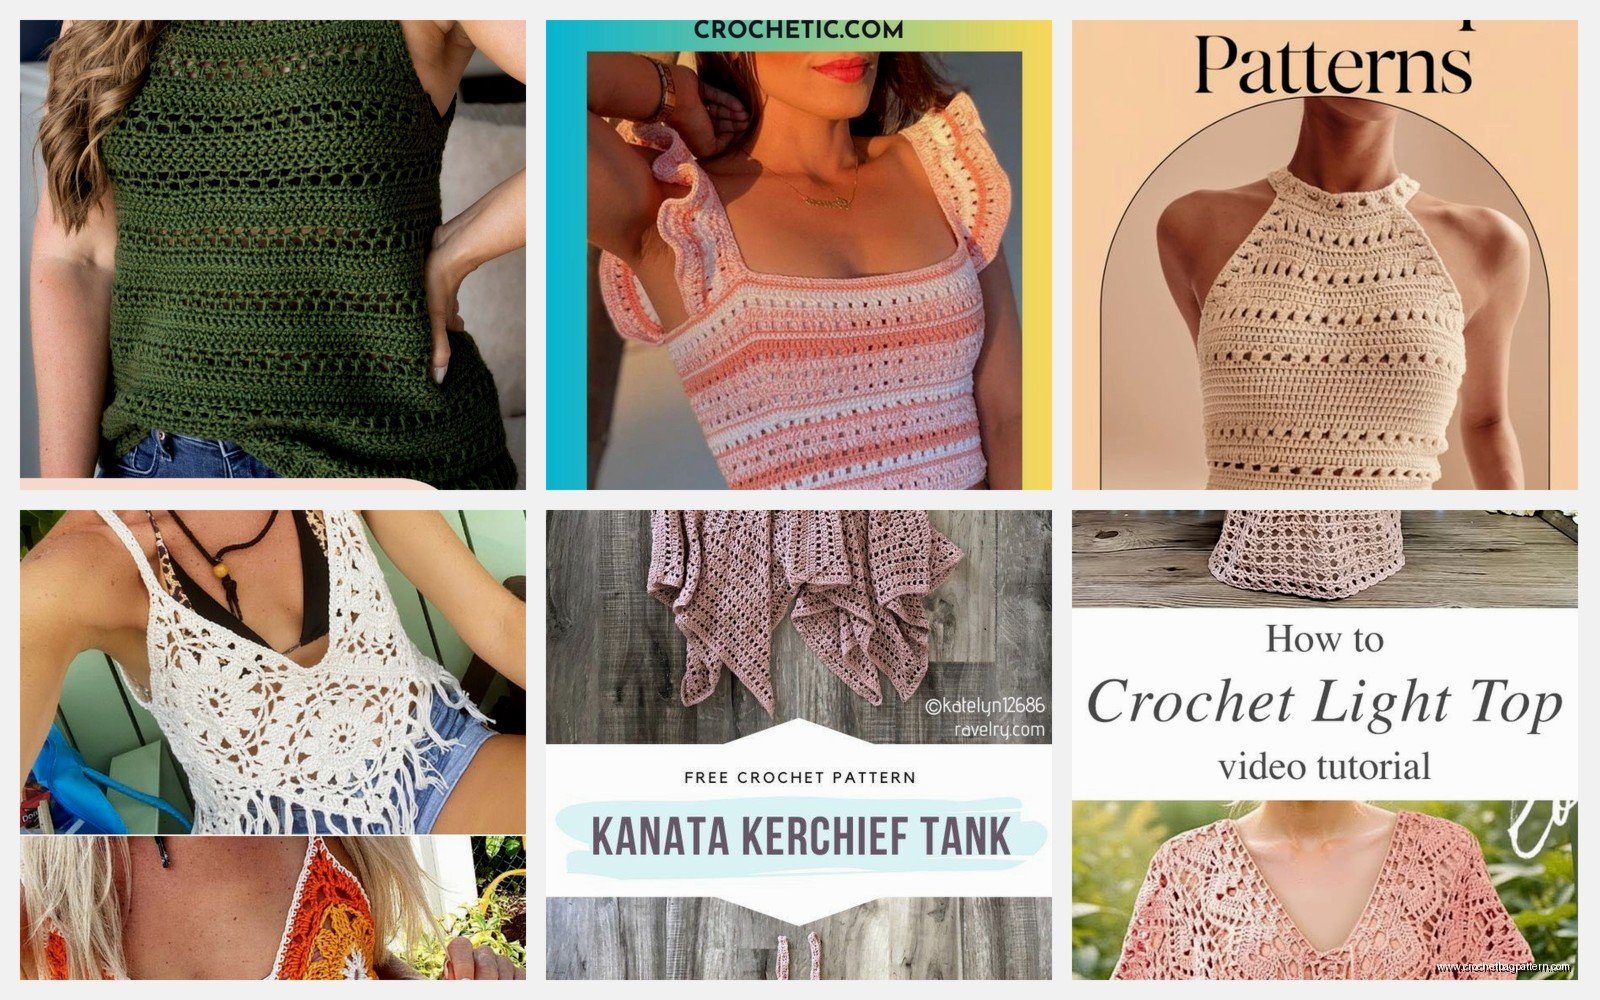
The straps were the hardest part because getting them even is… I still haven’t figured out how to make them exactly the same length. I just make them and then try it on and adjust. One strap always ends up slightly longer and I’ve just accepted this as part of my crochet journey or whatever.
Granny Square Top Experience
I was watching this show called The Bear while making a granny square top last fall and it took me way longer than it should’ve because I kept getting distracted by the episodes. Granny squares are easy individually but joining them is tedious.
For a top you need maybe 20-30 squares depending on the size of the squares and how big you want the top. I made 3-inch squares using a basic granny pattern – chain 4, join, then do rounds of double crochet clusters with chain spaces between. Each square took maybe 15 minutes once I got in a rhythm.
The layout matters more than I thought it would. You want to arrange them so the top part covers appropriately and the bottom part isn’t too short. I laid them out on my bed and moved them around until it looked right, then took a photo so I wouldn’t forget the arrangement.
Joining methods are personal preference but I used slip stitch joining because it’s flat and doesn’t create bulk. Some people like whip stitch but that creates a ridge that I don’t love for clothing. You go through the back loops of both squares and slip stitch them together.
Adding Straps and Finishing
Once all your squares are joined you need straps unless you’re doing a tube top style. I single crocheted along the top edge first to create a stable edge, then attached straps at the corners. For granny square tops I usually do wider straps – like an inch wide – because thin straps look weird with the chunky squares.
You can also add a row of single crochet around the entire bottom hem to keep it from rolling or getting stretched out. This is especially important if you’re using acrylic yarn that has a lot of stretch to it.
Things That Went Wrong
The worst fail I had was making a crop top that ended up being more like a sports bra because I didn’t measure correctly and it was way too short. I tried to add length by attaching more rows at the bottom but you could totally tell where I added them because the tension was different. Eventually I just turned it into a actual sports bra for working out at home.
Another time I made a white top using cheap acrylic yarn and it was see-through in direct sunlight which I didn’t realize until I wore it outside. Had to wear a tank top under it which defeated the purpose of making a summer top. So yeah definitely hold your work up to a window or light while you’re making it to check the opacity.
Yarn splitting is super annoying when you’re working with cotton or cotton blends. Your hook catches on individual plies and splits the yarn and then your stitches look messy. I started using a hook with a more rounded tip which helped but it still happens sometimes. Just gotta pull it out and redo the stitch.
Actual Wearability
The honest truth is that most crochet tops need something underneath unless you’re very confident or the pattern is really dense. I wear bralettes or bandeau tops under mine usually. The halter top works with a triangle bikini top underneath which makes it actually functional for the beach.
Washing is another thing – I hand wash all my crochet tops because I don’t trust the washing machine not to stretch them out or snag them. Just fill a sink with cool water and a little detergent, let it soak for 10 minutes, rinse, then lay flat to dry. Don’t wring them out or hang them wet because they’ll stretch.
Some patterns say you can machine wash but I’ve never risked it with something I spent hours making. Maybe if you put it in a mesh bag and used delicate cycle but… I don’t know seems risky.
Cost Breakdown Reality
Making a crochet top isn’t necessarily cheaper than buying one depending on your yarn choice. If you use the Red Heart Soft it’s like $3-4 per skein and you need 3-4 skeins so maybe $15 total. But if you go for nicer yarn like Pima cotton or bamboo blends you’re looking at $30-40 in materials.
The time investment is significant too. Even a simple mesh tank takes me 8-10 hours and that’s if I already know what I’m doing. Your first one will take longer because you’re figuring stuff out as you go.
But the upside is you get something custom-fitted that nobody else has and you can pick exactly the colors and style you want. Plus it’s satisfying to wear something you made yourself even if it’s not perfect.
Pattern Modifications I’ve Done
Most patterns are just starting points honestly. I’ll follow the basic construction but change the stitch pattern or add sleeves or whatever. For beach wear I added a little ruffle to the bottom of a crop top once by doing a round of shells (5 double crochets in one stitch) and it looked pretty cute.
You can also change necklines pretty easily. If a pattern has a scoop neck but you want a v-neck you just decrease more stitches at the center front. Or add a collar by working extra rows at the neck edge. Crochet is pretty forgiving for modifications because you can see exactly what you’re doing as you work.
I made a tank top longer by adding a peplum-style bottom which was just increasing stitches after the waist to make it flare out. Used Caron Simply Soft in a light blue color and it actually turned out really nice for wearing over swimsuits.
The main thing is understanding increases and decreases and how they affect the shape. Once you get that you can modify pretty much any pattern to fit what you want. Most summer tops are pretty forgiving because they’re meant to be loose and flowy anyway so if your measurements are a little off it usually still works.