
Mar
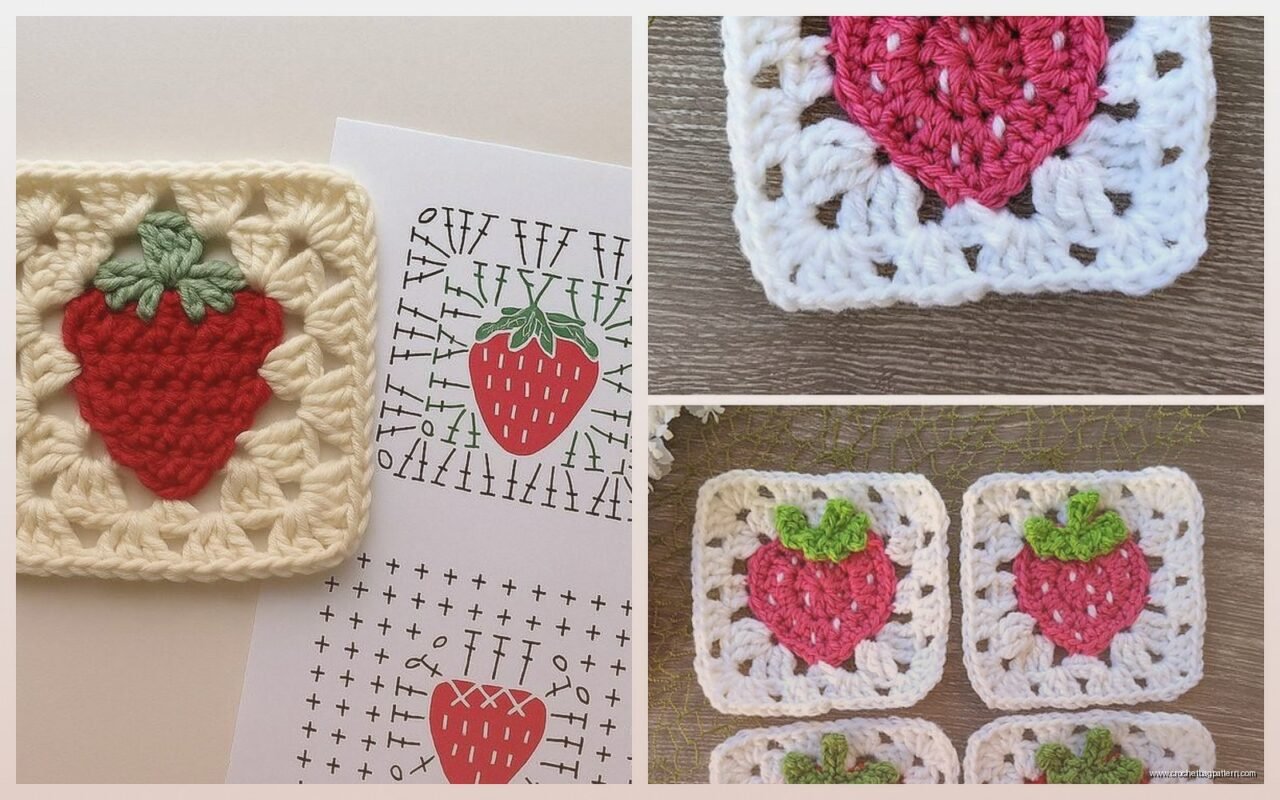
Okay so I made this strawberry granny square last June when it was stupidly hot and my AC was broken, and honestly it turned out way cuter than I expected even though I was basically melting the entire time. The pattern itself is pretty straightforward once you get the color changes down but there’s this one part with the seeds that made me want to throw the whole thing across the room.
You’re gonna need red yarn obviously, some green for the leaves at the top, and then either white or cream for the seeds. I used Red Heart Super Saver in Cherry Red because that’s what I had lying around and it actually worked perfect. The green was some random skein of Caron Simply Soft in like Woodland Green or Forest or something? And then I grabbed white from my scrap bin so no idea what brand that even was.
The basic structure is you start with a standard granny square foundation but then you’re building up this strawberry shape in the middle. First round is your magic ring or chain 4 and join, whatever you prefer for starting circles. I always do magic ring because I hate when there’s that hole in the middle but you do you.
Getting the Shape Right
So the strawberry part sits in the center and you build the square around it. Start with your red yarn and make a circle base, then you’re gonna work in rows or rounds depending on which variation of this pattern you’re doing. There’s like seventeen different versions floating around and honestly they all work fine. The one I did was more of a appliqué style where the strawberry sits on top of a cream or white background square.
Chain about 15 with your red yarn, then you’re working back down the chain to create this elongated oval shape. Single crochet down one side, then when you get to the end you’re gonna work like 3 sc in that last chain to curve around the bottom. Then sc back up the other side. This gives you that strawberry body shape that’s fatter at the bottom and tapers toward the top.
Keep going around this oval, adding rounds until your strawberry is the size you want. Mine ended up being about 3 inches tall which fit nicely in a 6 inch granny square. You increase at the bottom curves to keep it rounded and then decrease as you work toward the top where the green leaves will go.
The Annoying Seed Part
Here’s what drove me insane and I’m still annoyed about it honestly. The little seeds on the strawberry are supposed to be these cute tiny details but getting them evenly spaced is impossible. The pattern I loosely followed said to use French knots with the white yarn and okay sure that sounds simple except French knots in yarn are never as neat as they look in the photos.
I ended up just doing little surface slip stitches instead. You thread your white or cream yarn on a tapestry needle, bring it up from the back of your strawberry, make a tiny stitch, and pull it back through. Do this randomly scattered across the red part. Don’t try to make them perfectly even because strawberries in real life don’t have perfect seed placement anyway and you’ll just make yourself crazy.
Some people do the seeds as they crochet by changing colors for single stitches but that creates so many ends to weave in and I was not about that life, especially in June with no AC and my cat Mango kept sitting directly on my lap like she was trying to make me pass out from heat.
Adding the Leaves
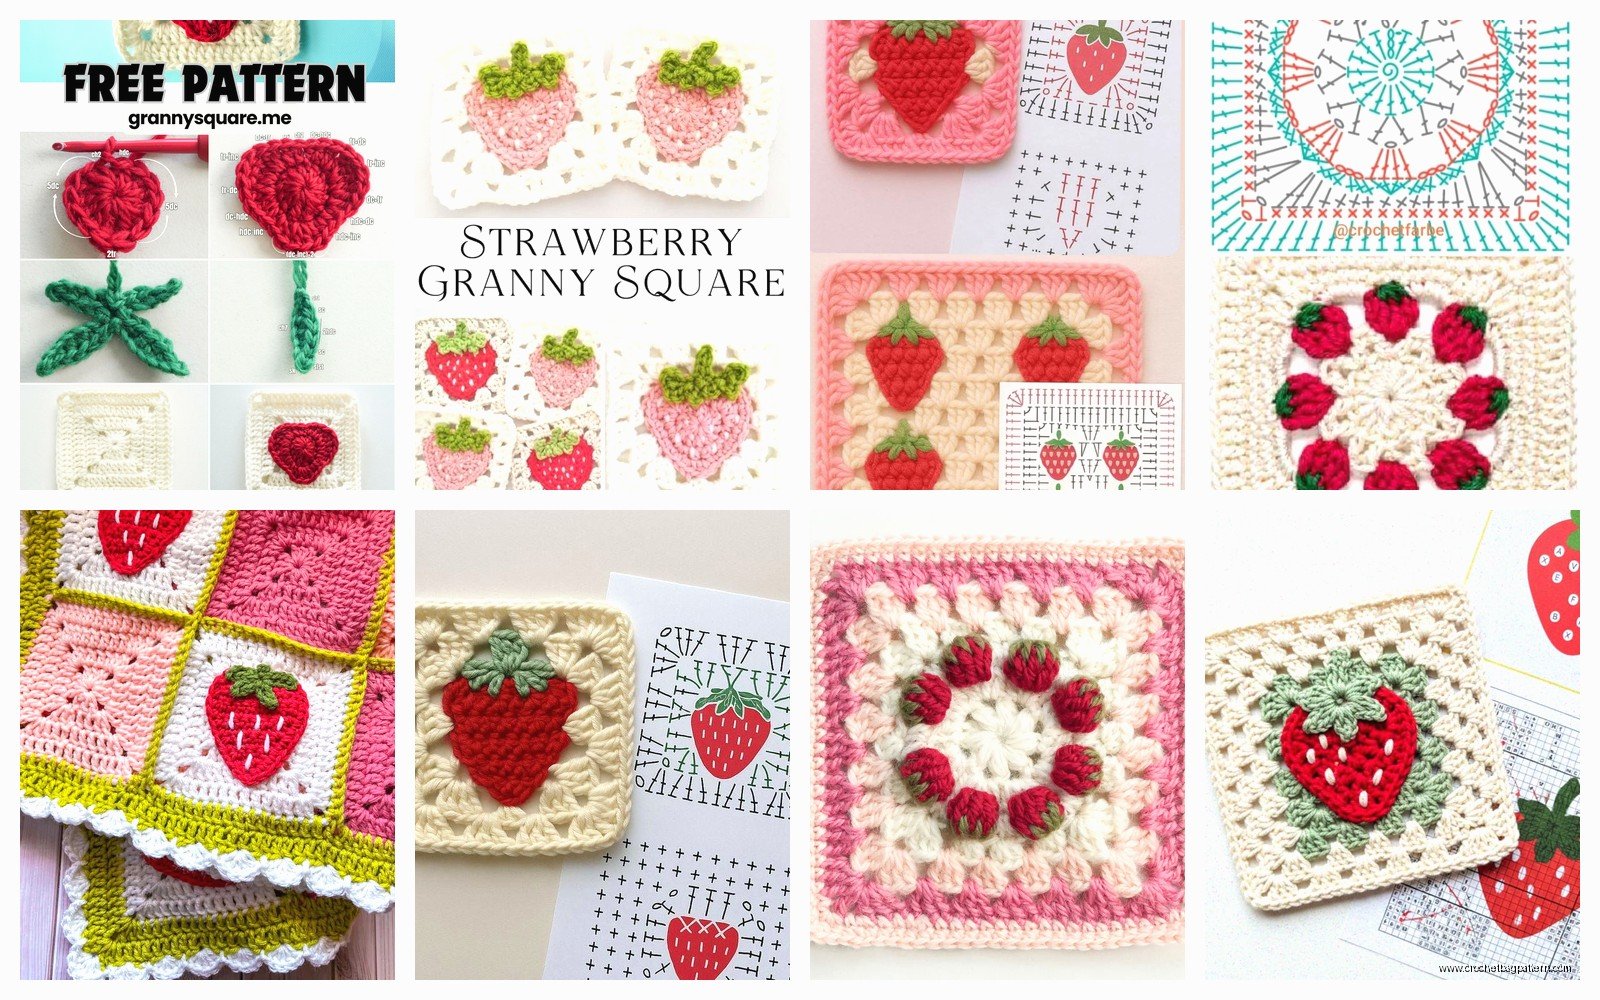
Switch to green yarn for the top. You can either crochet the leaves separately and sew them on or work them directly onto the top of the strawberry. I did separate leaves because I wanted them to be kind of dimensional and floppy.
For each leaf: chain about 8, then work back down with sc, hdc, dc, hdc, sc or something like that to create a pointed leaf shape. Make like 4 or 5 of these. They don’t have to be identical because leaves aren’t identical. Arrange them in a little crown at the top of your strawberry and sew them down at the base but let the tips stick up and out.
If you want to get fancy you can add a little stem too with a couple chains of brown yarn but I skipped that because it felt like overkill and also I couldn’t find brown yarn without going to the store and it was too hot for that.
Turning It Into a Granny Square
Now you’ve got your strawberry appliqué and you need to put it on a square background. Make a basic granny square in whatever size you want. I did mine in cream/off white using I think Bernat Softee Cotton? It was leftover from a blanket I never finished.
Standard granny square is just: magic ring, chain 3 (counts as dc), 2 dc in ring, chain 2, then [3 dc, chain 2] three more times, join to top of starting chain. That’s your first round with four corners.
Round 2: slip stitch to corner space, chain 3, [2 dc, chain 2, 3 dc] in same corner space, chain 1, then in each corner do [3 dc, chain 2, 3 dc], chain 1 between corners, join.
Keep going like that, adding rounds until your square is bigger than your strawberry. I did like 5 rounds I think? Just make sure the strawberry will fit in the middle with some background showing around it.
Attaching the Strawberry
Pin your strawberry to the center of the square. I just used straight pins because I’m lazy but you could baste it with sewing thread if you’re fancy. Then with matching red yarn, whip stitch or slip stitch around the edges of the strawberry to attach it to the background square. Don’t sew the leaves down completely, just at the base, so they have dimension.
The seeds you already added will show through and it looks really cute once it’s all together. Way cuter than I thought it would when I was sweating through the process.
What I Actually Used It For
So I made three of these strawberry squares and then got distracted by other projects and they sat in my WIP basket for like two months. I was watching some reality show about people buying houses they can’t afford and just kept making more squares thinking I’d turn them into a blanket or maybe a tote bag or… I don’t know, I never really decided.
Eventually I sewed them together into a little table runner thing for my kitchen table. Added some plain granny squares in between to make it longer. It’s not fancy but it’s summery and people always comment on it when they come over.
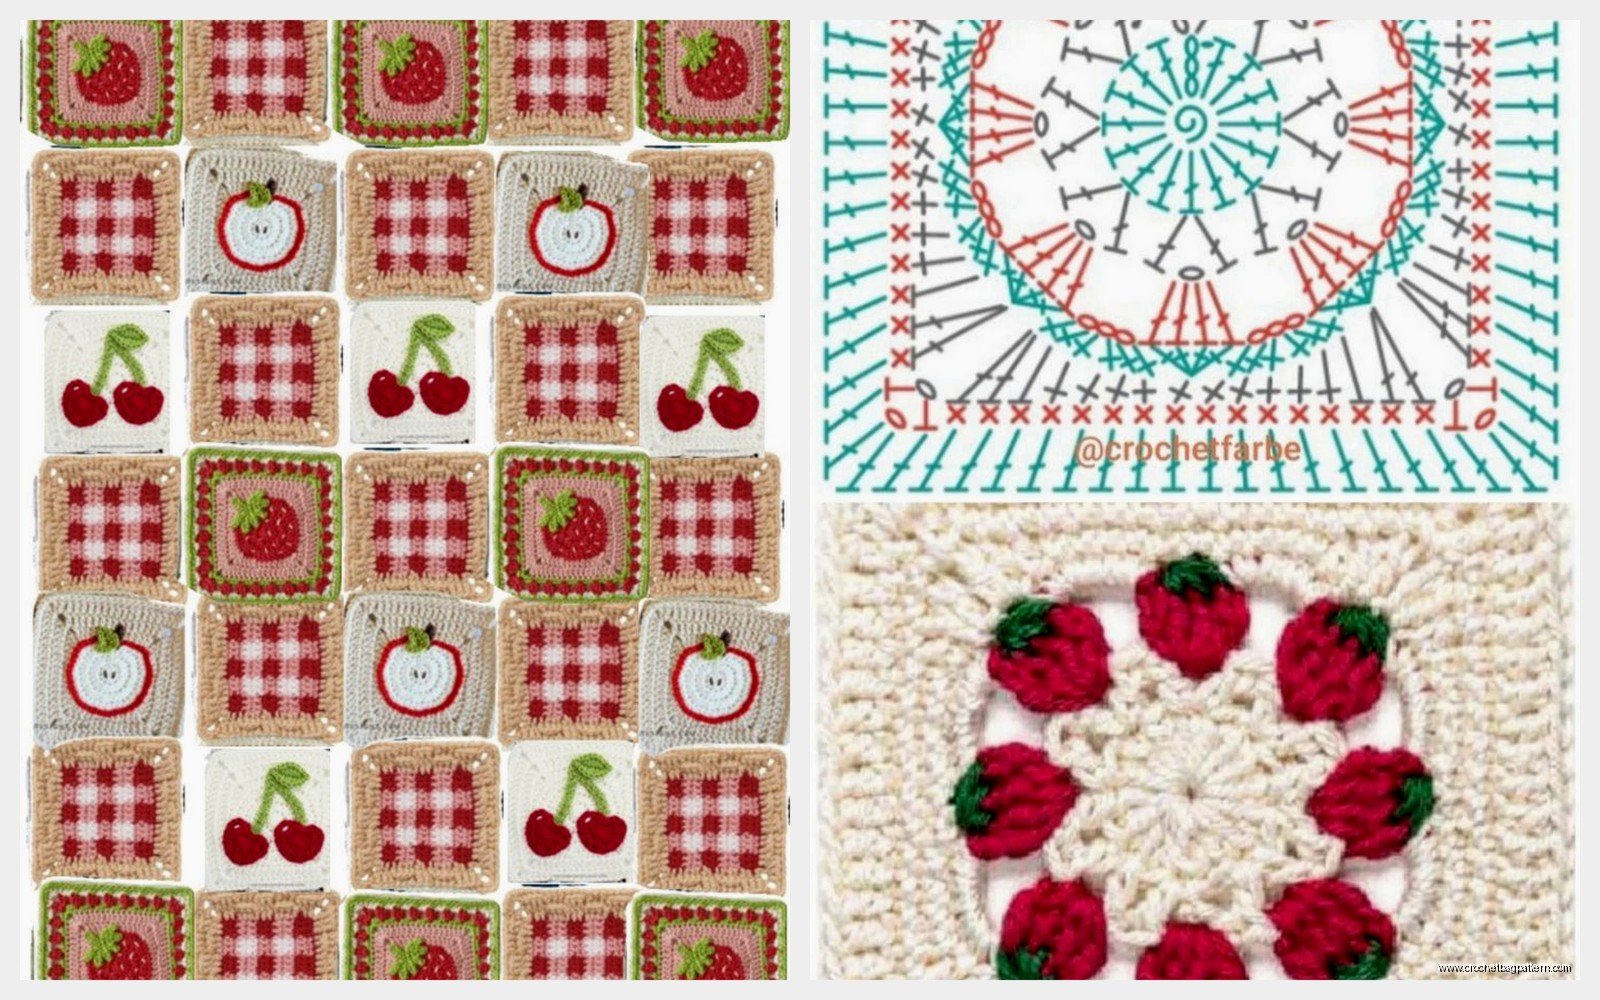
You could also make just one square and turn it into a potholder or a dishcloth I guess, though using Red Heart for something that touches dishes seems weird. Or make a bunch and do a produce themed blanket with other fruit squares. I’ve seen people do that with lemons and watermelon slices and oranges.
Sizing and Tension Stuff
I used a 5mm hook (H hook) for everything which gave me a pretty tight fabric. If you want it more drapey go up to a 5.5mm or 6mm but then your seeds might look weird because the stitches will be more open. For something like a blanket square you want it fairly tight anyway so it holds its shape.
The whole square took me maybe an hour? Not counting the part where I ripped out the seeds twice because I hated how they looked. So realistically like two hours with my perfectionist nonsense. If you’re making multiples for a blanket just assembly line it… do all the strawberry bodies first, then all the leaves, then all the squares, then attach everything. Way faster than doing one complete square at a time.
Color Variations
You don’t have to stick with realistic strawberry colors either. I saw someone on Instagram do pastel versions with baby pink strawberries on lavender backgrounds and it was actually really cute in a weird way. Or you could do dark red almost burgundy for a more fall vibe instead of summer.
The green leaves could be darker or lighter depending on what you have. I’ve even seen people use variegated green yarn which gives the leaves some dimension without extra work. Just make sure whatever colors you pick have enough contrast so the strawberry doesn’t disappear into the background.
Common Problems
If your strawberry comes out lopsided it’s probably because you’re not increasing evenly at the bottom. Count your stitches on each side to make sure they match. Or don’t, if you’re going for a rustic handmade look then lopsided is charming.
If the leaves won’t stay in position and keep flopping weird, add a tiny stitch in the middle of each leaf to tack it down slightly. Not all the way flat but just enough to control where it points.
If your granny square is wavy or ruffled you’re probably working too loose or adding too many stitches somewhere. Check that you’re doing 3 dc, chain 2, 3 dc in every corner and only chain 1 between the corner groups.
The white seeds showing up on red can be tricky if your red yarn is really dark. You might need to double up the white or use a slightly thicker yarn for the seeds so they pop more. I didn’t have this problem with the Cherry Red but I imagine with a burgundy or dark wine color it could be an issue.
Yarn Amount
For one square you need barely any yarn honestly. Maybe 20 yards of red, 10 yards of green, tiny bit of white. If you’re making a whole blanket though calculate like 25-30 yards per square to be safe and then buy extra because you always need extra and also dye lots are a thing.
I probably used half a skein of the red total for my three squares plus a few plain squares I made. The green was just scraps. This is a good project for using up odds and ends from your stash if you’ve got random amounts of colors lying around.
Making It Your Own
Once you get the basic strawberry shape down you can mess with it however you want. Make the strawberry bigger or smaller. Add more or fewer leaves. Skip the seeds entirely if they’re annoying you too much. Add a little embroidered flower at the base of the leaves if you’re into that.
You could also do the whole thing in different stitch patterns instead of just single crochet for the strawberry. Like half double crochet would work up faster and give it more texture. Or alternate rows of sc and hdc for a ribbed effect I guess? I haven’t tried that but it might look cool.
The granny square background doesn’t have to be solid either. You could do stripes or use variegated yarn or even do a different square pattern entirely and just appliqué the strawberry on top. Like a solid square or a half double crochet square instead of the traditional granny cluster pattern.
Anyway that’s basically how I did it. The pattern is flexible enough that you can’t really mess it up too bad and even if it’s not perfect it still reads as a strawberry which is the whole point. Just don’t overthink the seeds because that way lies madness and a pile of frogged work sitting next to your couch while you question your life choices.