
Feb
So You Actually Want to Make One of These
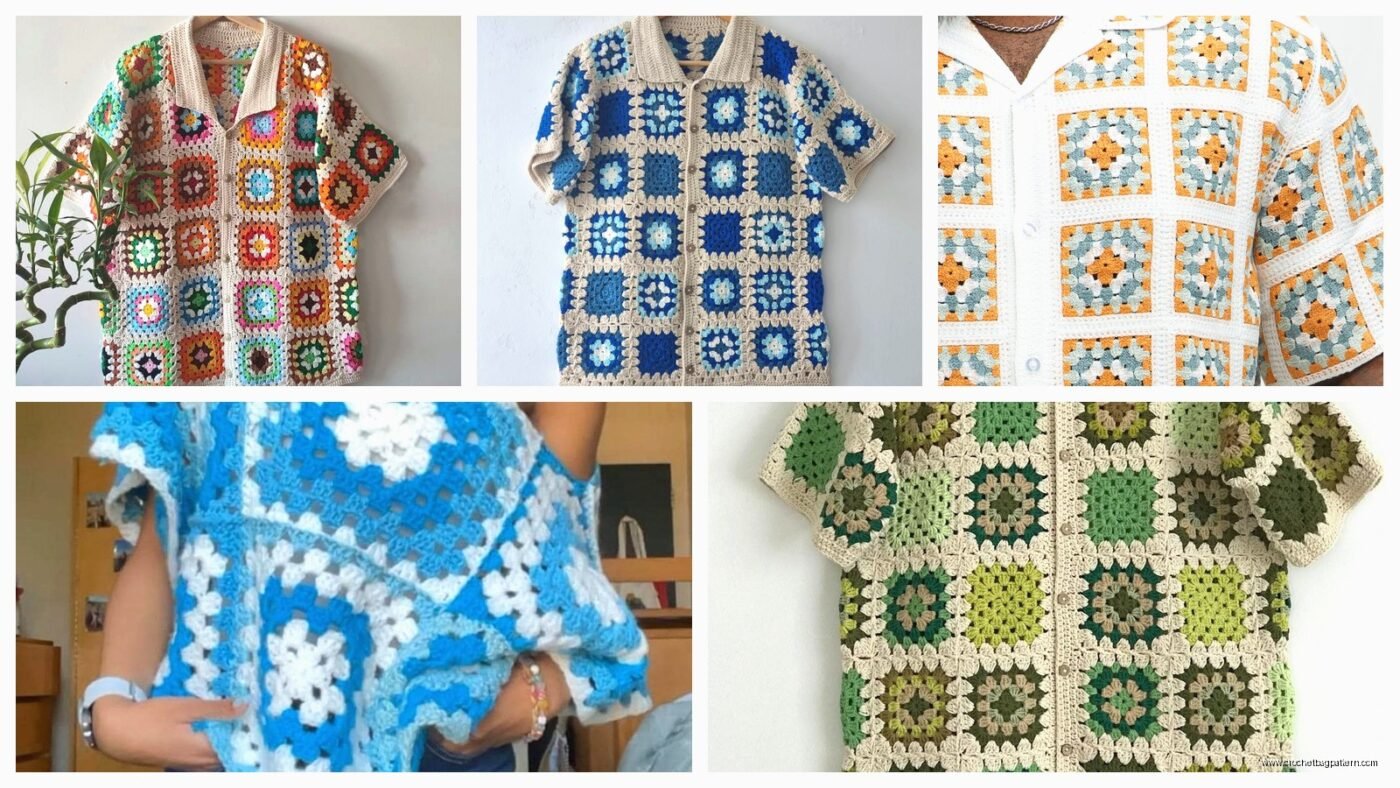
Okay so last April I made this granny square tank top and honestly it turned out better than I thought it would but the piecing together part was absolutely mind-numbing. I was watching The Bear while doing it which helped because I needed something to keep my brain occupied while I wove in what felt like 8 million ends.
The Basic Construction Thing
You’re basically making a bunch of squares and then connecting them. That’s it. That’s the whole concept. But the devil is in the details because you need to actually plan where everything goes unless you want armholes in weird places or a neckline that chokes you.
I used Red Heart Super Saver for my first one because I wasn’t about to spend $80 on yarn for something that might look terrible. The color was called Honey and it was this nice neutral yellow. For the second one I did in 2024 I splurged a bit and got Lion Brand 24/7 Cotton which is way softer but also way more expensive and I’m still not sure it was worth—anyway the cotton one does wash better.
Planning Your Squares
This is where I messed up the first time. You gotta actually measure yourself. I just eyeballed it and ended up with something that fit like a potato sack. Here’s what you need:
- Bust measurement
- Length from shoulder to where you want it to end
- Armhole depth
- Shoulder width
Make ONE square first. Measure it. Then do math. If your square is 4 inches and you need 16 inches across your bust, that’s 4 squares. Simple except when you forget to account for seaming and everything ends up tight.
Actually Making the Squares
The traditional granny square is just chain 4, join, then chain 3 and do clusters of double crochets with chain spaces between them. Round and round until it’s the size you want. There are like a thousand YouTube videos on basic granny squares so I’m not gonna write out the whole pattern here.
What I will say is KEEP THEM ALL THE SAME SIZE. I got lazy around square number 30 and stopped counting rounds on a few of them and had to redo three squares because they were noticeably smaller. So annoying.
How Many Squares You Need
For a basic tank top you’re looking at:
- Front panel: anywhere from 12-20 squares depending on size
- Back panel: same amount as front
- Straps: 2-4 squares each strap, or you can just crochet regular straps which is what I ended up doing the second time
My cat kept sitting on my pile of finished squares which didn’t help with keeping count. I had to keep moving him and he was very offended about it.
The Layout Part
Lay all your squares out on your bed or the floor in the shape you want. Take a picture with your phone because you WILL forget the arrangement. I didn’t do this and had to figure it out again after I swept them all into a bag.
For a tank top you basically want:
Front: A rectangle that’s wider at the bottom and maybe tapers slightly at the top for the neckline. You can leave out squares for the armholes or add them later as edging.
Back: Usually the same as front but you can make the neckline higher if you want.
Joining Methods That Don’t Make You Want to Quit
There are several ways to join granny squares and I’ve tried most of them:
Whip stitch: Fast but looks kinda messy on the right side. Good if you’re making something where the seams will be on the inside but for a shirt where everything shows it’s not my favorite.
Slip stitch join: This is what I used. You basically slip stitch through both loops of both squares as you go. It creates a little ridge but it’s sturdy and goes pretty quick once you get in a rhythm.
Join as you go: Some people swear by this method where you join each square to the previous ones as you’re making the last round. I tried it once and hated it because I like to make all my squares while watching TV and not thinking too hard.
The Actual Assembly
Join your squares into rows first, then join the rows together. It’s easier than trying to do it all at once. Trust me on this.
For the shoulders, you’re gonna join the front and back panels together but leave space for the neckline and armholes. I usually join about 3-4 squares worth on each shoulder depending on how wide your shoulders are.
The armholes were the most annoying part for me. You want them deep enough that you can move your arms but not so deep that your bra shows (unless that’s the look you’re going for, no judgment). I had to undo and redo one armhole because it was too tight and I couldn’t lift my arm above shoulder height without the whole thing riding up.
Straps or No Straps
My first shirt I made straps out of granny squares and they were so heavy and kept falling off my shoulders. For the second one I just did simple chain straps with single crochet worked over them to make them thicker. Way better. You could also do braided straps or use ribbon if you want to get fancy.
Edging Everything
Once it’s all assembled you need to add edging or it looks unfinished. I did single crochet around all the edges – neckline, armholes, and bottom hem. Some people do shells or picots but honestly single crochet is clean and doesn’t take forever.
For the neckline specifically, you might need to skip stitches or add decreases in the corners to make it lay flat. My first neckline was all wavy and weird because I just crocheted one stitch in every space without thinking about the curves.
Sizing Issues Nobody Talks About
Granny square tops stretch. A lot. Especially if you use acrylic yarn. My first top fit perfectly when I tried it on right after finishing and then after wearing it for like two hours it had grown about 3 inches longer and was hanging off me weird.
Solutions:
- Use cotton yarn which doesn’t stretch as much
- Make it slightly smaller than you think you need
- Add a ribbon or elastic at the waist to cinch it in
- Just accept that it’s gonna be a bit oversized and flowy
Yarn Choices That Matter
I already mentioned Red Heart Super Saver and Lion Brand 24/7 Cotton but here are other options:
Caron Simply Soft: Nice and soft, decent price, but it does stretch over time.
Bernat Handicrafter Cotton: Good budget cotton option, comes in lots of colors.
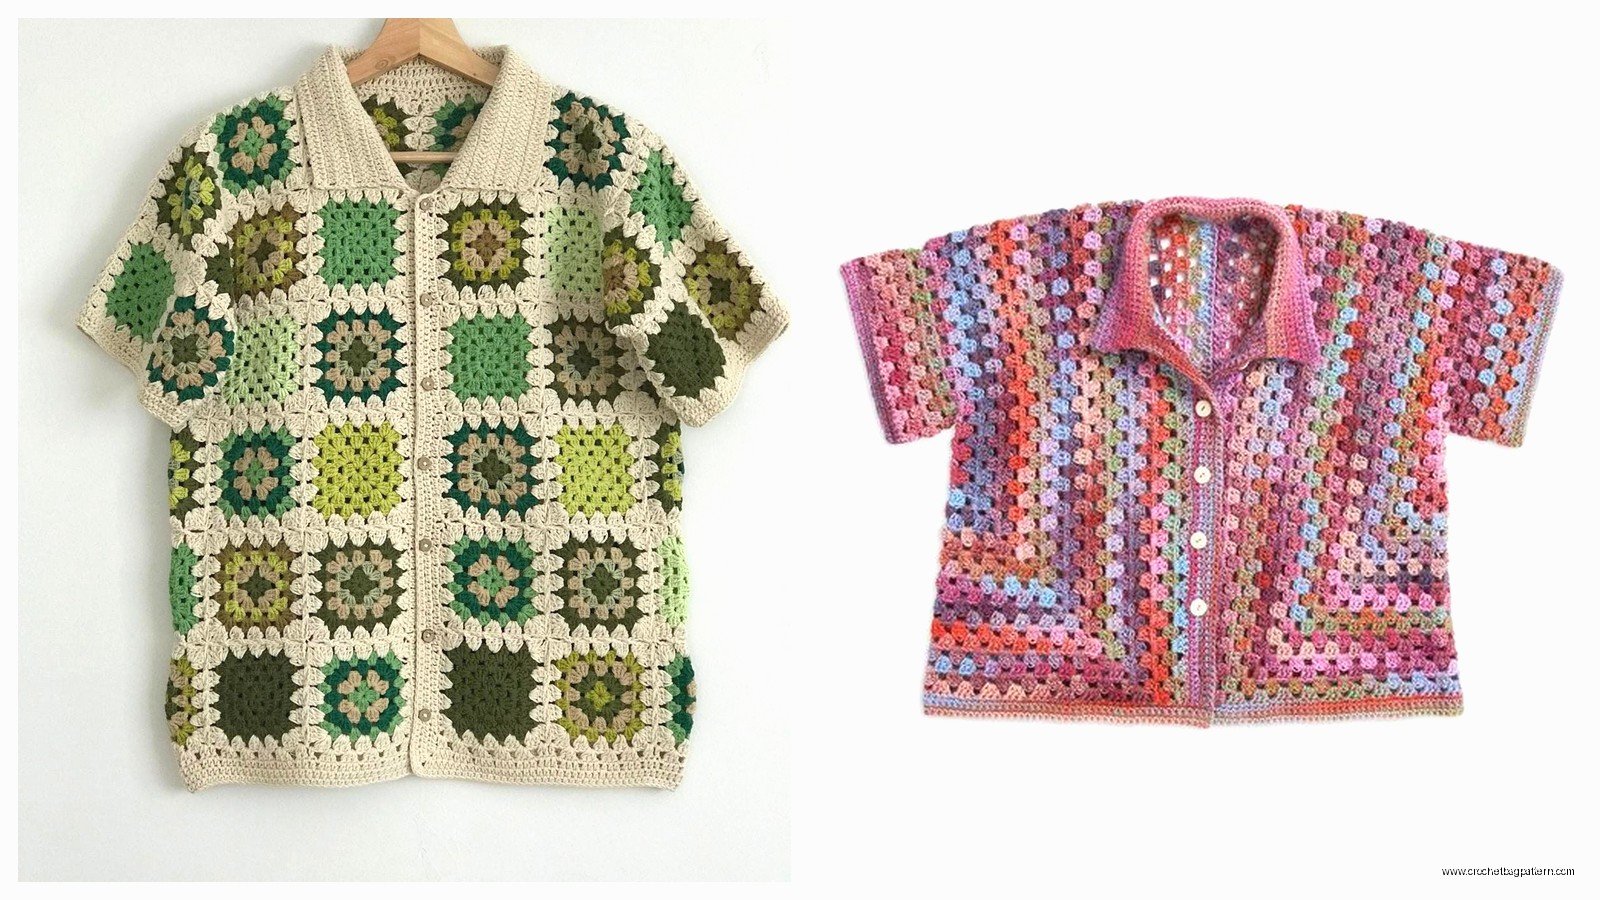
Hobbii Rainbow Cotton: If you order online this one is really nice and not too expensive. I used it for a granny square cardigan and loved it.
Whatever you use, buy extra. You’ll need more than you think, especially if you’re bad at keeping tension consistent like I am. My gauge always gets looser as I go which means my later squares use more yarn.
Color Combinations
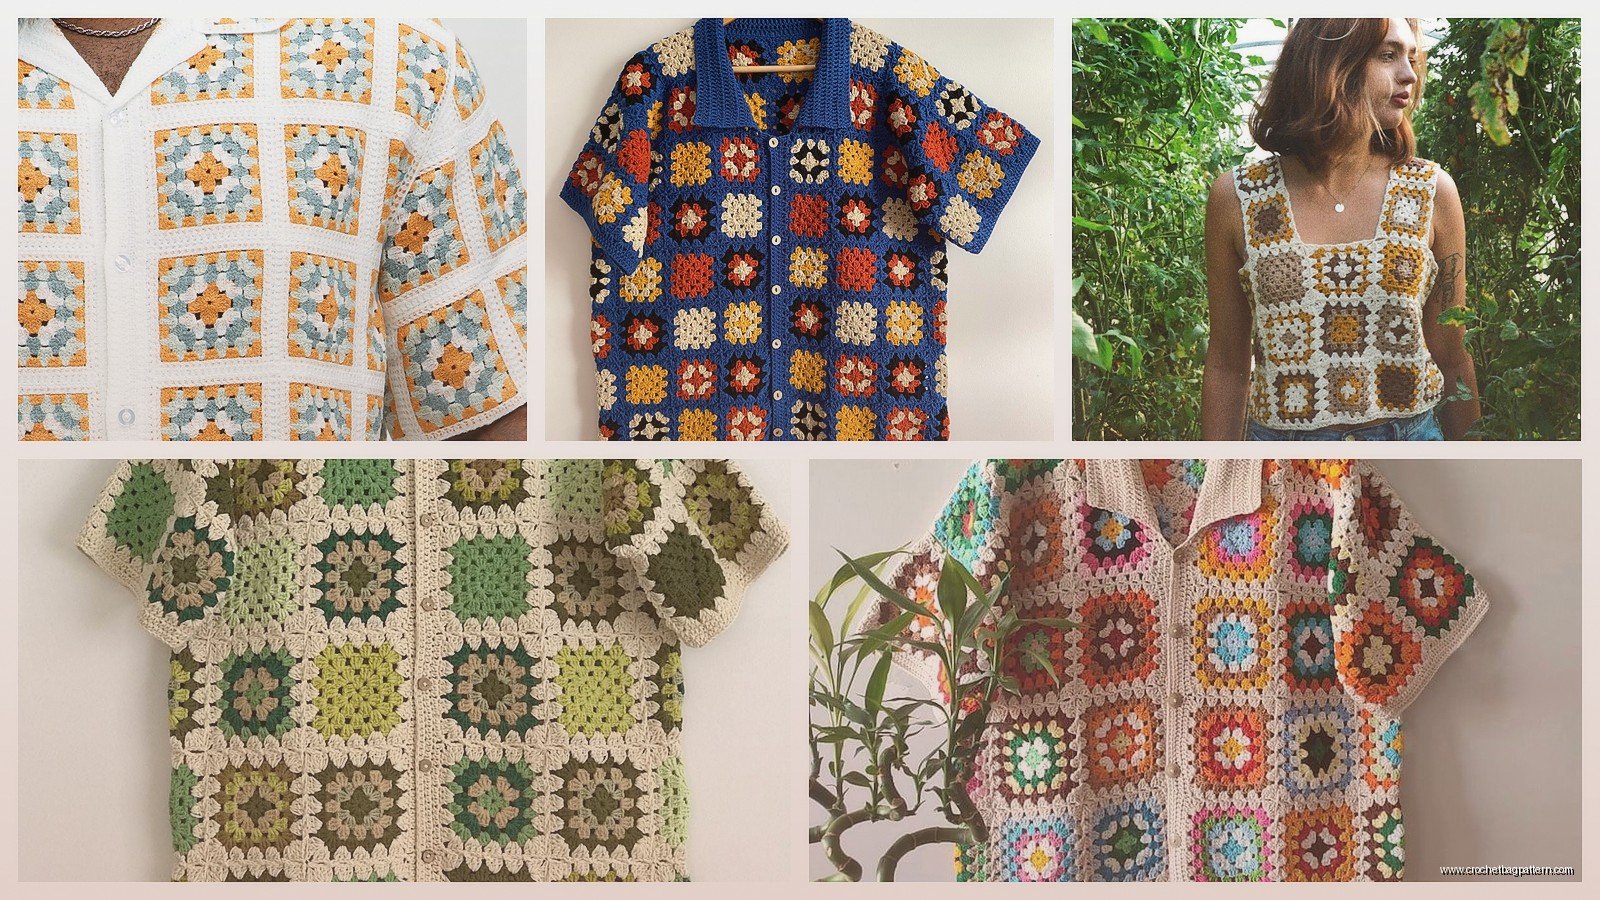
You can do solid color, rainbow, ombre, whatever. My summer 2024 top was three colors – cream, sage green, and dusty pink. I arranged them in a pattern where the colors spiraled out from the center which looked cooler than I expected.
If you’re doing multiple colors, weigh your yarn before you start so you know you have enough of each color. I ran out of the pink halfway through and had to order more and of course the dye lot was slightly different so there’s a few squares that don’t quite match. You can’t really tell unless I point it out but I know they’re there.
Wearability Real Talk
These tops are not gonna be your everyday shirt unless you layer them. They’re see-through. Even if you make the squares small and tight, there are holes. That’s literally the nature of granny squares.
I wear mine over a tank top or bralette. Some people line them with fabric but that seems like a lot of work and also defeats the purpose of making a breezy crochet top.
They’re perfect for summer festivals or beach coverups or just like, artsy coffee shop vibes. I wore mine to a farmer’s market and got so many compliments and also questions about whether I actually made it myself.
Washing and Care
Hand wash or delicate cycle in a garment bag. Lay flat to dry. If you throw it in the dryer it will stretch even more and might get wonky shaped.
The ends you wove in might start poking out after a few washes. I just trim them or tuck them back in. Not the end of the world but slightly annoying.
Variations You Could Try
Once you make one basic tank you can modify the pattern pretty easily:
Crop top version: Just make it shorter. Stop at your natural waist or wherever you want.
Long sleeve: Add sleeves by making rectangles of granny squares and seaming them to the armholes. I haven’t done this yet but it’s on my list for fall.
Different square patterns: You don’t have to use traditional granny squares. Solid squares, sunburst squares, flower squares – all of those work too. Just keep the size consistent.
Asymmetric hem: Make the back longer than the front, or do a diagonal hem. I’ve seen people do this and it looks really cool.
Time Investment
My first top took me about three weeks of casual evening crocheting. Maybe 20-25 hours total? The squares themselves go pretty fast but the assembly and weaving in ends takes forever. The second one I made faster because I knew what I was doing, probably closer to 15 hours.
If you’re a fast crocheter or you make really small squares it could take less time. If you’re a perfectionist who froggs everything ten times it’ll take longer.
Common Problems I Had
Uneven edges: My squares weren’t perfectly square because I’m not great at keeping even tension. I had to block them with pins and spray starch to get them to lay flat before joining.
Running out of yarn mid-square: So frustrating. Now I always weigh the yarn before starting a new square to make sure I have enough to finish it.
The back riding up: This happened because I made the back armholes too small. Had to add a row of single crochet around them and skip some stitches to make them wider.
Pointy squares: If your last round of double crochets is too tight, the corners get really pointy and pronounced. I started doing my last round in half double crochet instead which rounded them out a bit.
Is It Worth It
Honestly yeah. Despite all the annoying parts, I wear both of my granny square tops regularly and I’m planning to make another one in navy and white for next summer. They’re unique, they’re fun to make once you get into the groove, and people always ask about them.
Just go in knowing it’s gonna take a while and you’re gonna get tired of weaving in ends. But the finished product is pretty rewarding, especially when someone asks where you bought it and you get to say you made it.