
Apr
Making Your First Granny Square Bag
So basically you just start with regular granny squares right, like the basic ones everyone knows. I made my first actual bag back in spring 2022 when I was stuck at home with nothing to do and I’d been making these squares for like two years but never actually turned them into anything useful. Just had bags of random squares sitting around.
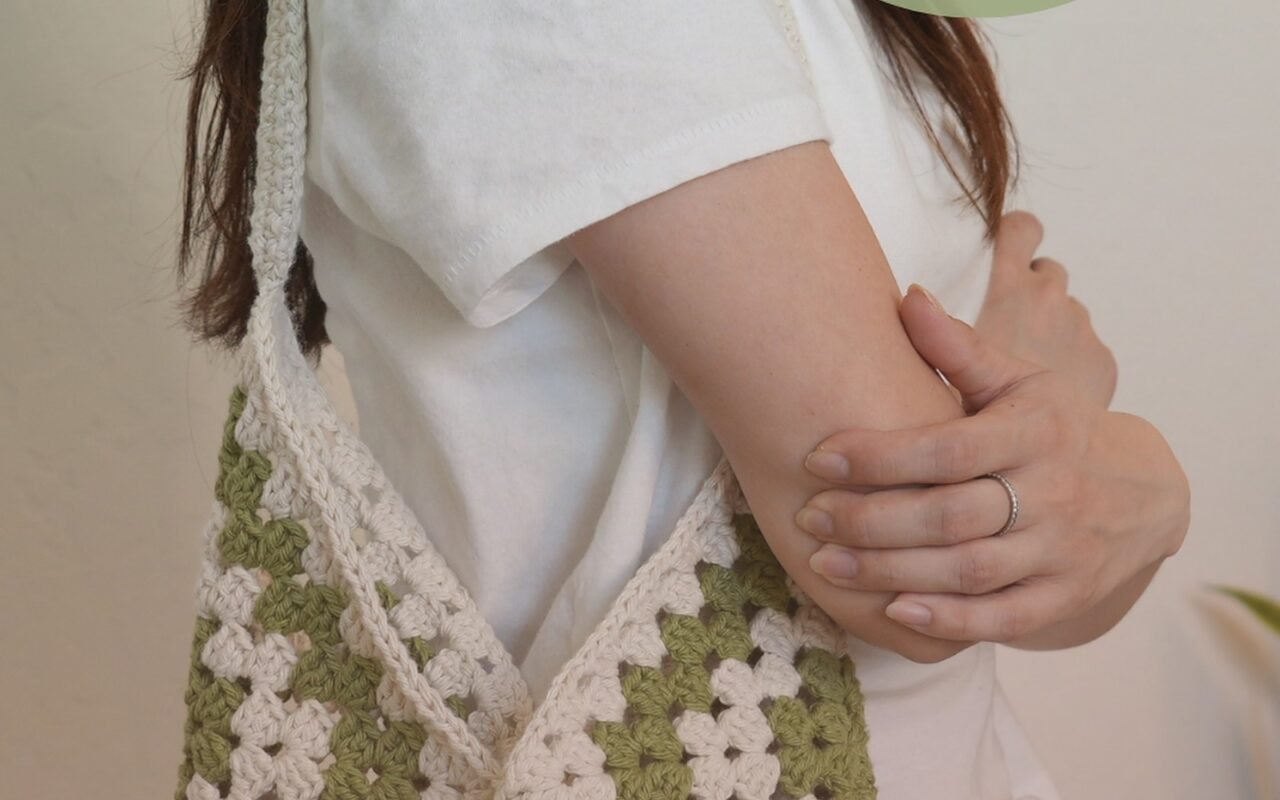
The thing about granny square bags is you can either make them structured or slouchy and that choice matters way more than people tell you upfront. I went slouchy because I didn’t wanna deal with interfacing or lining at first, which was probably the right call for a first timer.
What You Actually Need
Okay so yarn wise, I used Red Heart Super Saver for my first one because I had a ton of it laying around. The cornmeal color I think? Something yellowish. People talk trash about Red Heart but honestly it holds up really well for bags because you want something sturdy that won’t stretch out when you put your phone and wallet and whatever else in there. I’ve also used Caron Simply Soft which is nicer to work with but it’s a bit stretchier so your bag might get saggy over time.
For a basic tote size you need about 12-16 squares depending on how big you make each one. I do mine usually around 5 inches square because that’s just what feels natural to me, but you could go bigger or smaller. Bigger squares mean less sewing later which is definitely a plus.
Hook size matters but also like… not as much as you’d think? I use a 5mm for worsted weight yarn and it works fine. Some patterns tell you to go up a size for bags so they’re less stiff but I actually like them a bit stiff.
The Basic Construction Method
You’re gonna make two panels for the front and back, then either make side panels or just sew the front and back together directly. The direct method is easier but you get a really flat bag that doesn’t hold much. Side panels give you actual depth.
For a simple tote I did 3 squares wide by 4 squares tall for each panel. That’s 6 squares per side, so 12 total for front and back. Then I made a bottom panel that was 3 squares by 2 squares, so 6 more squares. That’s 18 squares total before handles.
The annoying thing and honestly this almost made me quit the whole project was joining the squares. Everyone has their favorite method and they all swear theirs is the best but they’re all kind of tedious. I tried the whip stitch first and it looked messy. Then I tried slip stitching them together as I went and that was better but my tension was all over the place so some seams were tight and some were loose.
What finally worked was just single crocheting them together with the wrong sides facing each other so the seam shows on the outside. It looks intentional that way, almost like a design element. Plus it’s faster and I was watching The Great British Baking Show at the time and just wanted to get through it.
Handle Options That Actually Work
Handles are their own whole thing. You can crochet them or buy them or use rope or whatever. I’ve tried a bunch of different ways.
First attempt I just chained a long chain and then went back and single crocheted over it to make it thicker. This works okay for a light bag but if you put anything heavy in there it digs into your shoulder like crazy. Not comfortable at all.
Better option is to make a wider strap. I usually do about 10-12 chains wide and then single crochet back and forth until it’s as long as I want. For a shoulder bag you want probably 24-30 inches depending on how you like to carry it. For a shorter handle that you carry in your hand more like 12-15 inches.
You can also buy wooden handles or plastic ones from craft stores. Joann’s has them, Hobby Lobby too. They have holes in them and you just sew your bag top into the holes. This looks more polished and professional but also more… I dunno, grandma-ish? Not in a bad way just in a specific aesthetic way.
I made one bag in summer 2024 with rope handles and that’s probably my favorite method now. Just buy cotton rope from the hardware store, cut two pieces however long you want, and sew them onto the bag. You can wrap the ends with yarn to make it look finished. Super sturdy and comfortable and it gives the bag more of a modern look somehow.
Sizing and Proportions
This is where it gets tricky because there’s no like, standard granny square bag size. It depends on your square size and your yarn weight and how tight you crochet.
For a small purse you could do 2 squares wide by 3 squares tall. That gives you something roughly 10 inches by 15 inches if your squares are 5 inches each. Good for just essentials.
Medium tote is what I usually make, 3 by 4 squares, comes out around 15 by 20 inches. Fits a water bottle, book, small laptop maybe.
Big tote would be 4 by 5 or even 5 by 5 squares. That’s getting into beach bag territory, like 20+ inches in each direction. I’ve only made one that big and it was kinda awkward honestly, too floppy without structure.
The Lining Question
So people always ask about lining and here’s the truth: you don’t technically need it but your bag will be way more functional with it.
Without lining, small things fall through the gaps between stitches. Not like your phone obviously but chapstick, coins, hair ties, all that stuff just slides right through. Also the bag stretches more over time without lining to support it.
I avoided lining for a long time because I don’t really sew fabric, I just crochet. But it’s actually not that hard. You just measure your bag panels, cut fabric to match (add seam allowance though or it won’t fit), sew the fabric pieces together to make a bag shape, and then hand sew it into your crochet bag.
I use cotton fabric usually, whatever’s cheap at the fabric store. Quilting cotton works great. You want something medium weight, not too thin or it won’t add any structure, not too thick or it’s bulky and hard to work with.
The sewing part is really just a running stitch around the top edge where the lining meets the crochet. Takes maybe 20 minutes once you get the hang of it. My cat kept trying to lay on the fabric while I was working which was annoying but also kind of funny.
Color Combinations and Patterns
This is where granny squares really shine because you can do literally whatever color combo you want. I’ve done solid color bags where every square is the same, ombre bags where the colors gradually shift, random scrap bags with every square different.
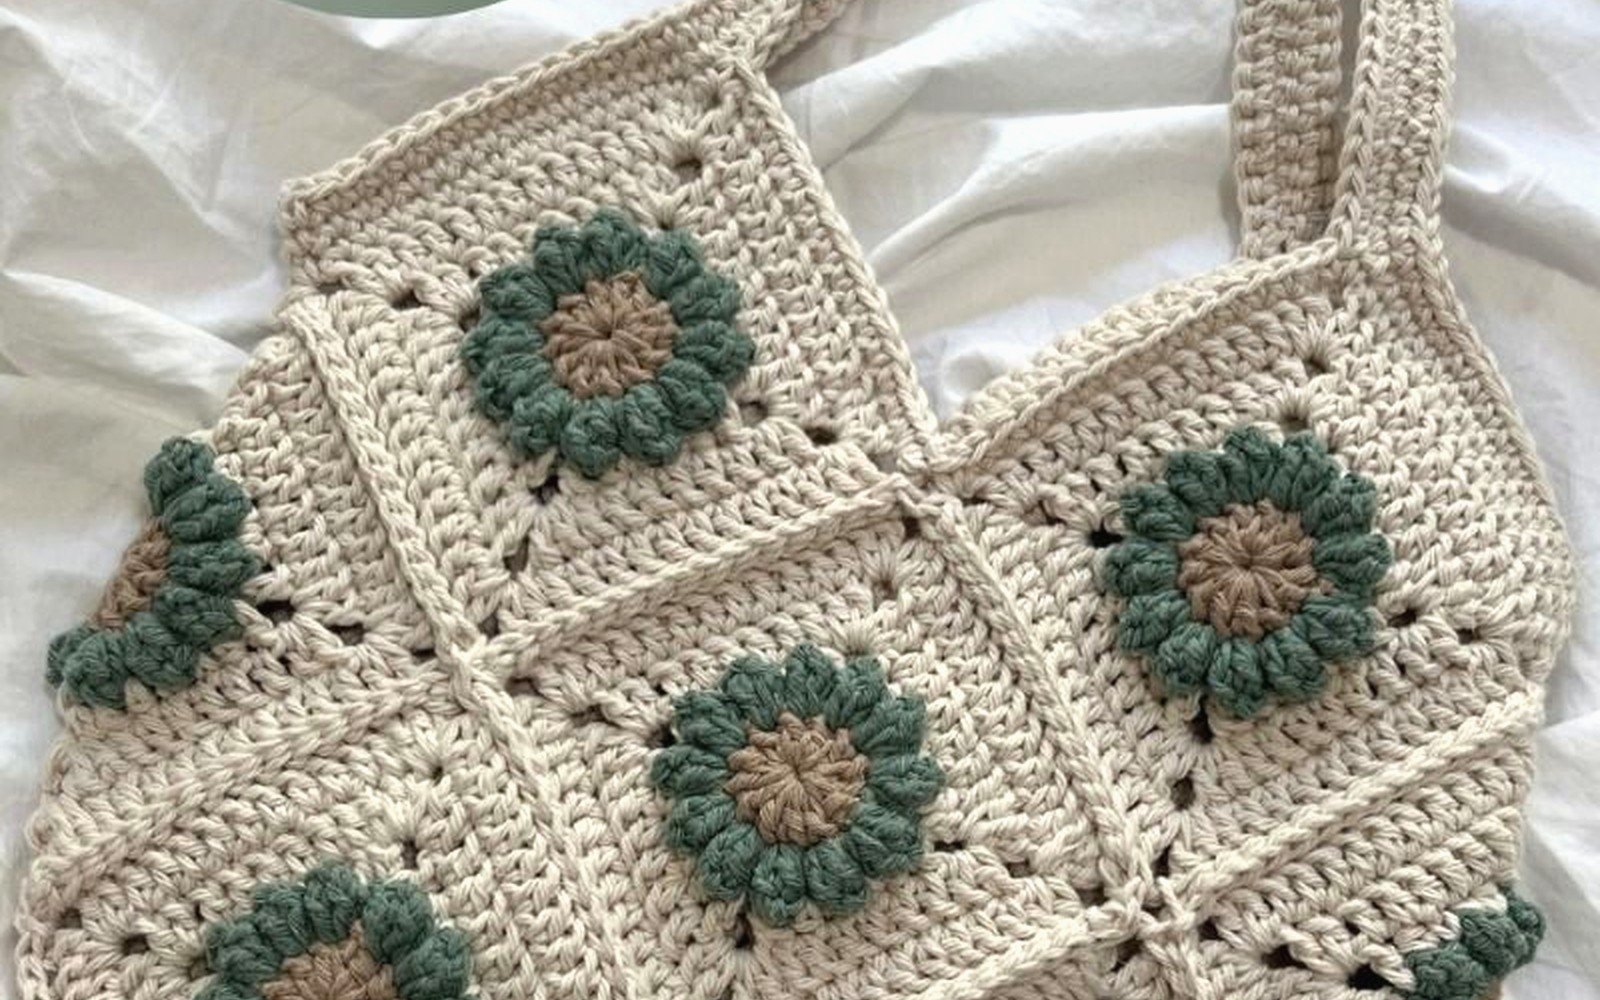
The classic granny square has that flower center look with different colored rounds. For bags I usually do 3 or 4 rounds per square max because more than that and they get too big and you need fewer of them which somehow makes the project feel longer? I know that doesn’t make sense but it’s true.
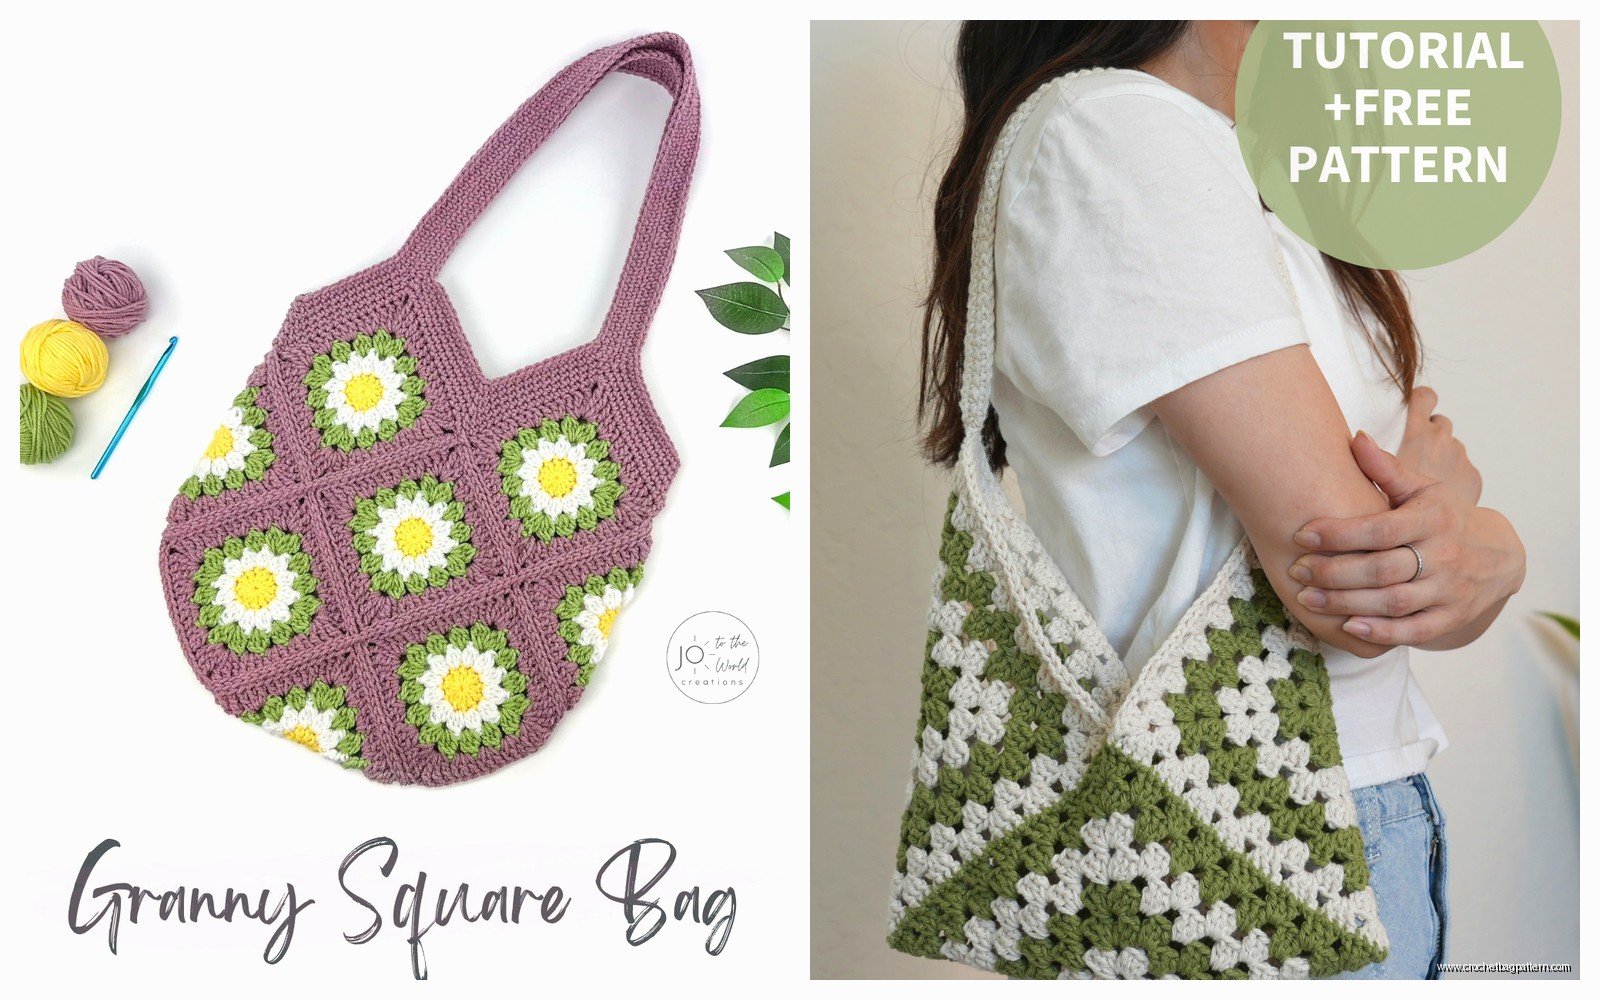
One combo I really liked was cream center, sage green second round, cream third round, sage green fourth round. Very neutral and goes with everything. I used Bernat Softee Chunky for that one I think, or maybe it was Big Twist… definitely something chunky weight.
Another good one was all blues, like navy center, medium blue, light blue, then navy again. Ocean vibes without being too literal about it.
Random scrap bags are fun too but they can look messy if you’re not careful. Works best if you stick to a color family or at least a consistent value like all brights or all pastels. Mixing like, neon yellow with burgundy and baby pink usually looks chaotic unless that’s specifically what you’re going for.
Construction Order That Makes Sense
I learned this the hard way but there’s a better order to do things than what seems obvious.
Make all your squares first, obviously. But before you join them, block them if you’re gonna block them. I usually don’t for bags because they’re gonna stretch and shift with use anyway but if your squares are different sizes blocking helps even them out.
Join your squares into panels. Front panel, back panel, bottom panel if you’re doing one, side panels if you’re doing those.
Then and this is the part I messed up the first time, attach your handles BEFORE you sew the panels together into a bag. It’s so much easier to sew handles onto a flat panel than trying to reach inside a bag and attach them. Trust me on this.
After handles are on, sew your panels together. I go bottom to front first, then bottom to back, then sides if there are sides, then up the side seams. Leaves the top open.
If you’re adding lining, do it last after the bag is fully assembled. Make your fabric lining separate, then insert it and hand sew around the top.
Some people do a border around the top opening and honestly that does look nice and more finished. Just single crochet or slip stitch around the entire top edge. You can do multiple rounds if you want it really sturdy.
Yarn Weight Considerations
I’ve made bags with everything from worsted weight to super bulky and they all work but they’re different.
Worsted weight is probably the sweet spot. It’s what most people have around, it works up at a good pace not too fast or too slow, and the finished bag is sturdy without being stiff. Red Heart Super Saver, Caron One Pound, I Love This Yarn from Hobby Lobby, all good options.
Bulky or chunky yarn makes the project go faster which is tempting but the bag ends up really thick and heavy even when it’s empty. Plus the gaps between stitches are bigger so stuff falls out easier. I made one with Bernat Blanket yarn and it was like carrying around a stuffed animal, very soft but not practical.
DK or light worsted can work for a more delicate looking bag but you need smaller squares and more of them so it takes longer. Better for a small purse than a tote.
Cotton yarn is actually really good for bags even though I usually use acrylic. Cotton doesn’t stretch as much and it’s sturdy. Lily Sugar n Cream is cheap and comes in good colors. The downside is it’s not as soft and it can be splitty to work with which is annoying.
Practical Modifications
Once you’ve made a basic bag you can start changing things up.
Pockets are useful. Either make a small panel of squares and sew it onto the inside of the bag for an interior pocket, or add one to the outside. I usually do inside because outside pockets can look bulky depending on how you do it.
A zipper is possible but honestly kind of a pain. You have to hand sew it in and get the length exactly right. I’ve only done it once and probably won’t again unless someone specifically requests it. Most of my bags just stay open at the top or I add a snap closure.
Snap closures are easy, just buy sew-on snaps from the craft store and put one in the center of the opening or one on each side. Magnetic snaps are even better because they’re stronger but they’re a little harder to install.
You could also do a drawstring top by leaving gaps in the top row and threading cord or ribbon through. That works better for a bucket bag shape though than a flat tote.
Adding a base with plastic canvas makes the bottom sturdier so it doesn’t sag. Just cut plastic canvas to fit the bottom panel and either sew it in or sandwich it between the crochet and the lining. Makes a huge difference for bags you’re gonna load up with heavy stuff.
Common Problems and Fixes
Bag is too stretchy: use a smaller hook next time, try cotton yarn instead of acrylic, or add lining and/or plastic canvas base.
Squares won’t lay flat: probably tension issues or you’re not doing the corners right. Each corner should have like chain 2 or chain 3 depending on the pattern, and you need to actually work into that corner space not just skip over it.
Seams look messy: honestly just embrace it or hide them on the inside. Or do the single crochet seam method where the seam is on the outside and looks intentional.
Handles are uncomfortable: make them wider or add padding. You can wrap the handles with extra yarn or even wrap them with fabric strips. Or just buy padded handles.
Bag is lopsided: your squares are probably different sizes or your seaming tension is inconsistent. Block the squares before joining them and try to keep your joining tension the same throughout.
How Long This Actually Takes
People always wanna know time estimates and it’s hard because everyone works at different speeds but I can give you rough numbers based on my experience.
Each 5-inch granny square takes me maybe 15-20 minutes. Some people are faster, some slower. For a 18-square bag that’s like 5-6 hours just making squares. I usually do this over several days while watching TV or whatever, not all at once.
Joining them takes another 1-2 hours depending on your method and how fussy you are about it.
Handles maybe an hour total for both.
Lining if you’re doing it, maybe another hour for someone who doesn’t sew much.
So you’re looking at probably 8-10 hours total for a complete lined bag with handles. Could be less if you’re fast or skip the lining, could be more if you’re new to this or making something complicated.
I usually spread it over a week or two, working on it here and there when I feel like it. It’s not a quick project but it’s not like a massive time commitment either.