
Feb
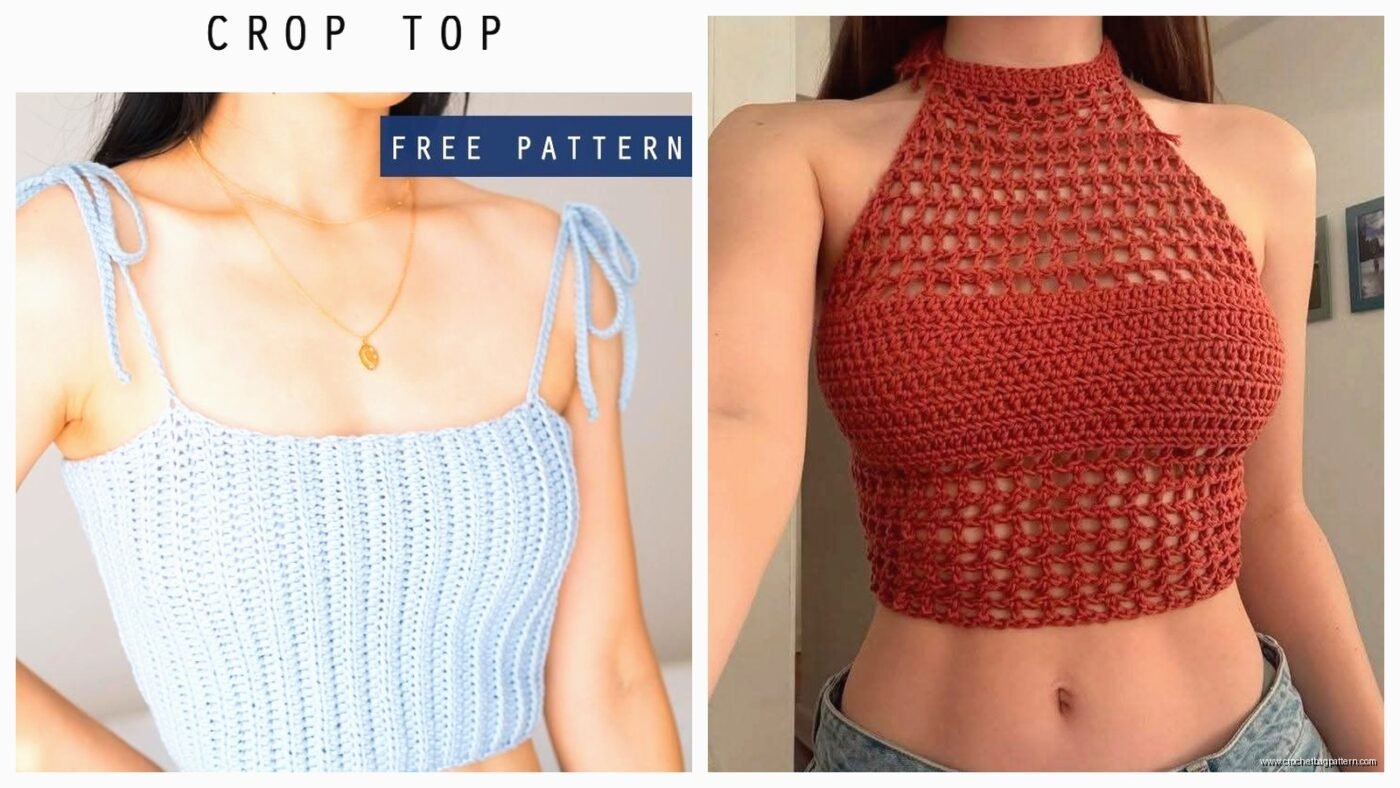
Start With a Basic Mesh Top Because It’s Actually Forgiving
So I made my first real wearable top in July 2023 when it was like 95 degrees and I refused to turn on the AC because my electricity bill was already insane. I used this cheap Red Heart Super Saver in some color called “Iced Aqua” or something, and honestly the stiffness of acrylic worked fine for a summer top because it held its shape. You want something that isn’t gonna stretch out weird after one wear.
The mesh style is basically just chain stitches and double crochets in a repeating pattern. You chain like 100 or whatever fits around your bust measurement, join it in a round, then you’re doing chain-3, skip 2 stitches, double crochet, repeat forever. It makes those little holes that let air through which is the whole point of a summer top.
Getting Your Gauge Right (Or Close Enough)
Here’s what annoyed me SO much about making that first top – everyone talks about gauge like it’s this precise science but nobody tells you that your tension changes when you’re working in the round versus flat. I made my gauge swatch flat, obviously, because that’s what you do. Then I started working the body in the round and it came out way tighter. Had to rip out like six rows because the thing wouldn’t even fit over my head.
Just make your gauge swatch in the round if you’re planning to work in the round. Chain extra so you have enough to join comfortably, work a few rounds, measure. It takes longer but you’re not gonna waste three hours on something unwearable.
The Cropped Rectangle Top Thing
This is probably the actual easiest beginner top. You’re making two rectangles and seaming them. That’s it. I used Lion Brand 24/7 Cotton for one of these because it was on sale at Michaels and cotton breathes better than acrylic obviously.
You measure from under your arm to wherever you want the bottom to hit – let’s say 12 inches for a cropped look. Then measure across your front from armpit to armpit, maybe 16 inches depending on your size. Make a rectangle that’s 16 inches wide and 12 inches tall. Make another one exactly the same. Seam the shoulders leaving space for your head, seam the sides leaving space for arms. Done.
The annoying part is figuring out how much shoulder to seam versus how much to leave open for your neck. I usually do like 4 inches seamed on each shoulder which leaves 8 inches for the neck opening in the middle. But if you have a bigger head you might need… wait no, you’d need LESS seamed. You’d seam like 3 inches on each side. Math is weird.

Strap Situations
For the rectangle top you gotta add straps or it’s just gonna fall down. I chain stitched straps which looked fine but they twisted constantly. My cat kept trying to bite them while I was sewing them on which didn’t help. Better option is to single crochet a strap that’s like 4 or 5 stitches wide and however long you need it. They lay flat and don’t twist.
Or you can do the halter style where both straps connect at the back of your neck. That uses less yarn and you don’t have to worry about them sliding off your shoulders.
Granny Square Tops Are Actually Summer-Appropriate
I know granny squares sound like your grandmother’s afghan but they work for summer tops because of all the holes. Plus you can make a bunch of squares while watching TV or whatever and then assemble them later. I made one while binging that show about the chef in Chicago, the stressful one, and I think the chaotic energy transferred into my tension being all over the place.
You need like 12-15 squares depending on size. Make them all the same size, maybe 5 inches each. Arrange them – usually it’s 3 squares across the front, 3 across the back, 2 on each side under the arms. Join them with slip stitches or whip stitch or whatever method doesn’t make you want to throw the project across the room.
Use Caron Simply Soft or something with drape. I used some scratchy Hobby Lobby house brand once and it was unwearable, just sat in my closet until I finally unraveled it and used the yarn for a bag.
The Joining Problem
Joining granny squares is tedious and your fingers will hurt. I use the join-as-you-go method now where you connect them during the last round of each square, but when I started I didn’t know that existed so I made all 15 squares separately and then had to seam them all. Took forever. My fingers were sore for like two days after.
Just search “join as you go granny square” and use that method. You’ll thank me.
V-Neck Style With Increases
This one requires understanding increases which isn’t hard but it’s more thinking than the rectangle method. You start at the bottom with a chain that fits around your waist or hips or wherever you want it to sit. Work in rows back and forth, and every few rows you decrease on the sides to bring it in as you go up toward your bust.
Then at armpit level you split for the front and back – basically you work each side separately. For the V-neck you decrease at the center front every row or every other row to make that V shape. The back you can keep straight across or do a slight scoop.
I made this style in winter 2024 actually, not summer, because I wanted to layer it over a long-sleeve shirt. Used some Bernat Softee Cotton in gray. It worked but the V ended up way deeper than I meant because I got carried away with the decreases and didn’t try it on until I was already past the point of no return with weaving in ends and stuff.

Try it on as you go. Every few rows just hold it up to yourself in the mirror. You can’t really undo that stuff easily once you’ve committed.
Sleeve Caps Are Optional But Nice
Some people add little sleeve caps which are just like 2-3 inches of fabric extending past the shoulder seam. They make it look more finished I guess? I never bother because it’s more seaming and I hate seaming. But if you’re into that polished look, you can single crochet small rectangles and attach them at the armholes.
Yarn Weight Actually Matters Here
Use worsted weight or DK weight for tops. Anything bulkier looks weird and adds volume where you probably don’t want it. Anything thinner takes forever and might be too delicate for a garment you’re gonna actually wear and wash.
I tried making a summer top with size 10 crochet thread once because I thought it would be elegant or whatever. It took 40 hours and looked like a doily. Never again. Stick with category 3 or 4 yarn, the labels will tell you.
Also cotton or cotton blends are really the best for summer. Acrylic doesn’t breathe and you’ll be sweaty. Bamboo is nice if you can find it on sale. Linen has great drape but it splits while you’re working with it which made me want to scream when I tried it.
The Fit Issues Nobody Warns You About
Crochet fabric doesn’t have the same stretch as knit fabric so your tops will fit differently than store-bought shirts. Make them a little bigger than you think you need, especially around the bust and armholes. You can always take them in with seaming adjustments but adding fabric after the fact is basically impossible without it looking weird.
I made a halter top that fit perfectly when I finished it, but after wearing it for like three hours the straps stretched out and the whole thing was sagging. That’s just gonna happen with some yarns and there’s not much you can do except maybe reinforce the straps with elastic thread or make them shorter to begin with anticipating the stretch.
Washing These Things
Hand wash cold and lay flat to dry. I know everyone says that but it’s actually important with crochet garments because they can stretch out weird in the washing machine. I’ve thrown them in on delicate cycle before and it was fine but I don’t recommend it for your first one that you actually care about.
Cotton can shrink a little in hot water so definitely cold water only. And don’t wring it out, just press the water out gently and lay it on a towel.
Fixing Mistakes Without Unraveling Everything
If you mess up a stitch somewhere in the middle of the project, you can sometimes just work around it or hide it in a seam. Not everything needs to be perfect. One of my tops has a weird spot where I accidentally skipped a stitch like eight rows down and I just… left it. You can’t tell unless you’re looking for it.
But if the sizing is off or the neck hole is too small, you gotta frog it. There’s no way around that. I’ve tried to convince myself I could fix major structural issues without unraveling and it never works. Just accept it and start over, you’ll work faster the second time anyway because you already know what you’re doing.