
Feb
Why I Even Started Making These Things
So last February I was basically living under three blankets because my heating bill was insane and I remembered I had this old hot water bottle from like five years ago. The rubber was still good but it looked tragic, just this plain red thing, and I thought why not crochet something for it. I was rewatching The Office for the millionth time and needed a project that didn’t require too much brain power.
The Basic Concept You Need to Understand
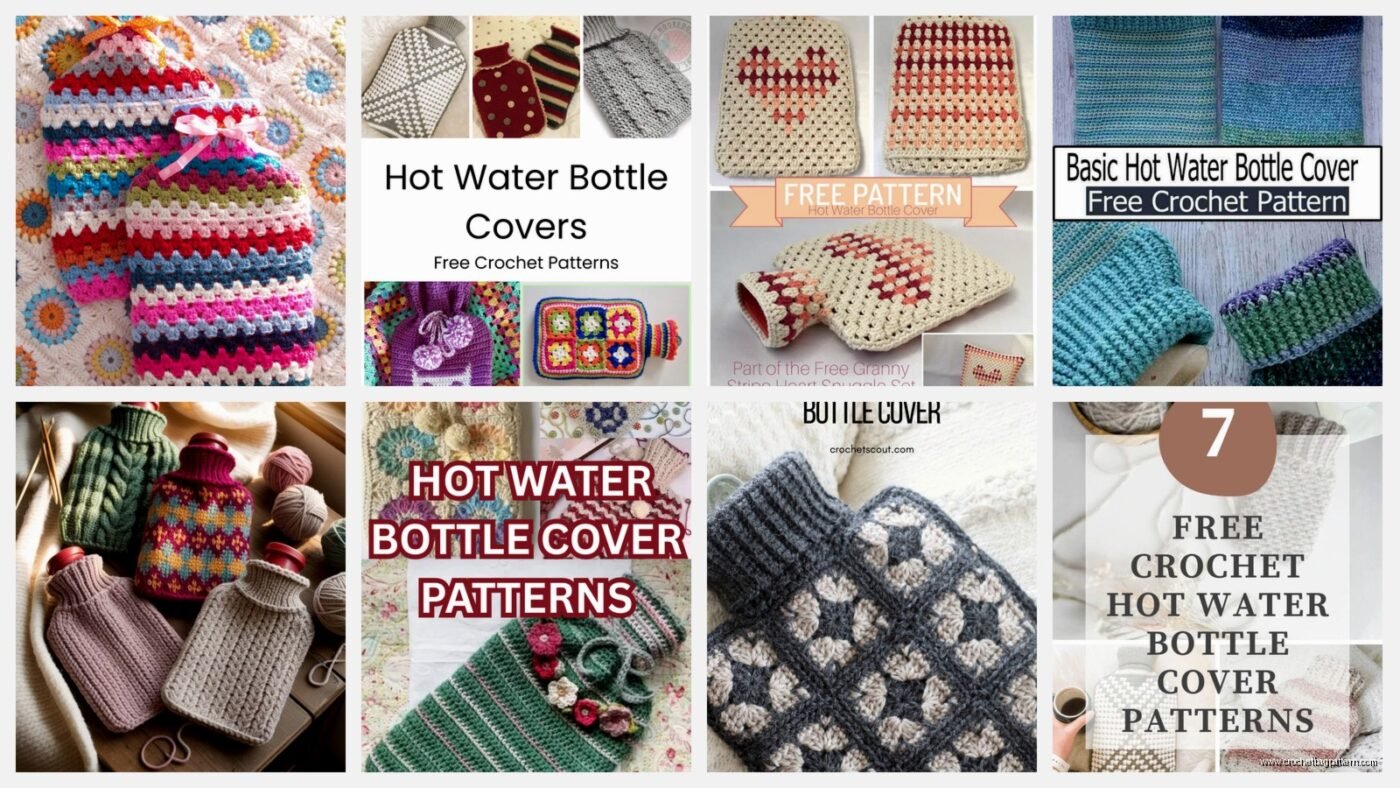
A hot water bottle cover is basically just a rectangle or a pouch. You’re not building a spaceship. The goal is to make something that fits around the bottle, keeps the heat in a bit longer, and doesn’t feel like you’re holding a rubber fire hazard directly against your skin. Some people make them with fancy cables or granny squares but honestly when I first did this I just used half double crochet because it’s thick and… well, I know how to do it consistently.
You measure your bottle first. Mine was about 12 inches tall and 8 inches wide at the widest part. Write that down because you’re gonna forget it three minutes later when you’re trying to find where you put your good scissors.
Yarn Choices That Actually Matter
I used Lion Brand Wool-Ease for my first one, the thick and quick version I think? It was this burgundy color that was on sale at Joann’s. The thing about yarn for hot water bottles is you want something that’s soft but also has some structure. I tried making one with Red Heart Super Saver once and it was fine but felt kind of plasticky against my skin.
Wool blends are good because they’re warm and they have that cozy factor without being so precious that you can’t throw the cover in the wash. Because trust me, you’re gonna spill tea on it or your cat is gonna sit on it with muddy paws. My cat destroyed the first one I made by using it as a scratching post alternative, which was super annoying but also my fault for leaving it on the couch.
For the hook size I used a 6mm with the Wool-Ease. You want it tight enough that it’s not all holey and loose, but not so tight that you’re fighting every stitch. My hands were already sore from crocheting like four beanies the week before for no reason.
The Actual Pattern I Figured Out
Chain enough to match the width of your bottle. For mine that was like 32 chains I think? Then you just work back and forth in rows of half double crochet until you have a piece that wraps around the bottle. I didn’t write down the exact number of rows because I’m not that organized, I just held it up to the bottle every few rows to check.
The annoying thing about this process is the seaming. I hate seaming so much. You make this nice flat piece and then you gotta sew up the sides and suddenly all your slightly uneven tension shows up and mocks you. I used a whip stitch to seam mine because that’s the only seaming method that makes sense to my brain.
Leave the top open obviously, unless you want to trap your hot water bottle forever. Some patterns have you make a button closure or a drawstring but my first one I just left it open and tucked the bottle in. Worked fine.
If You Want to Get Fancy
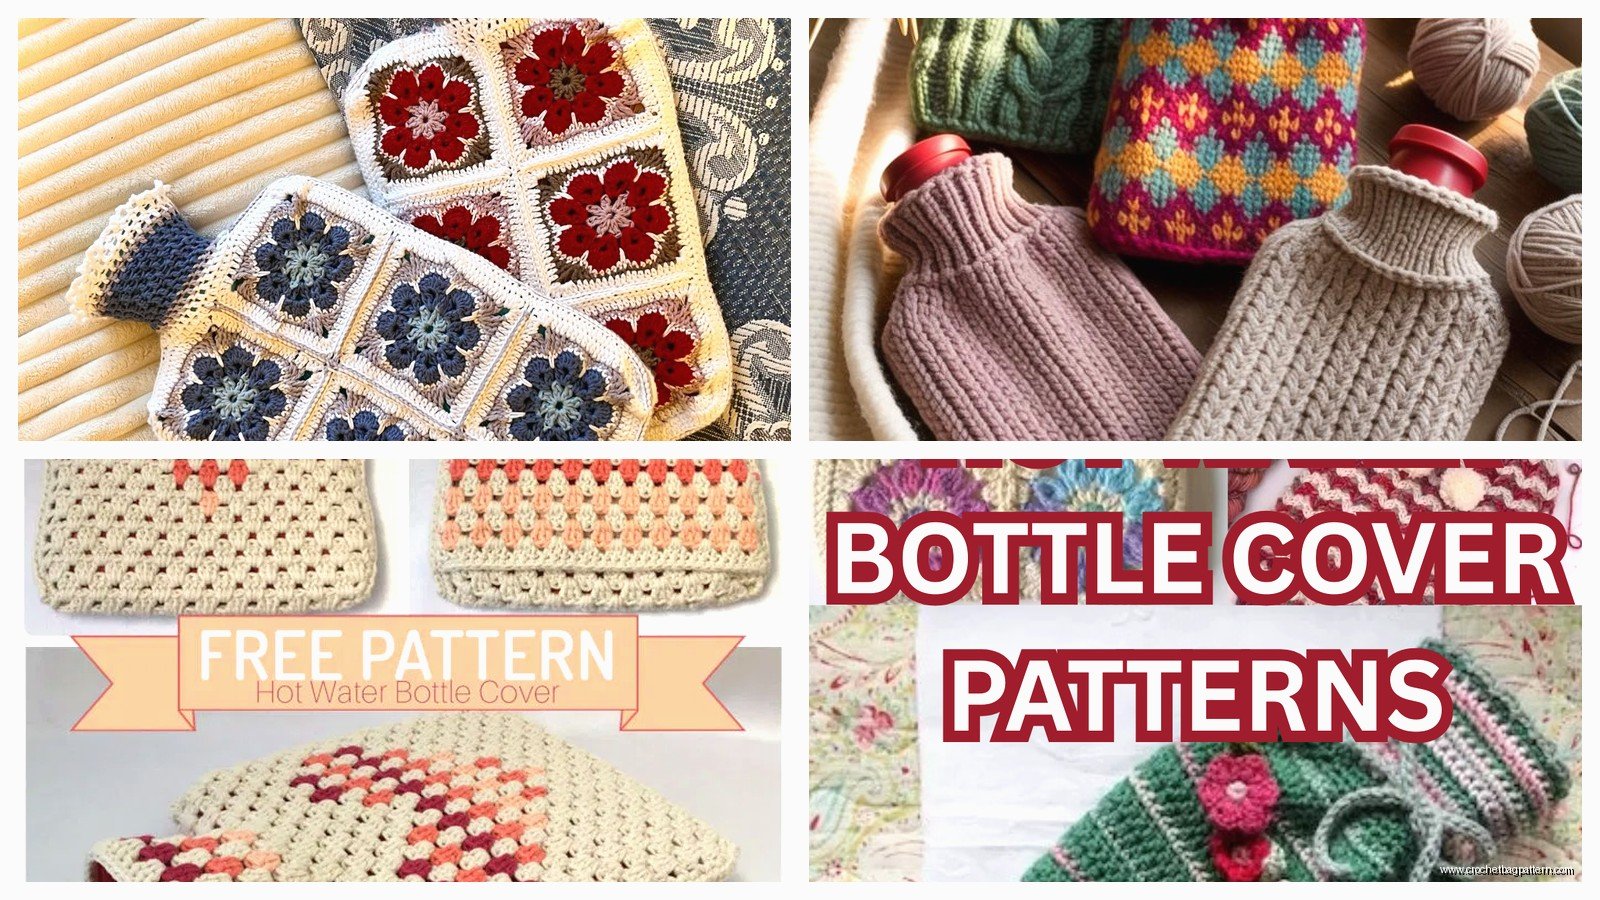
After I made that basic one I tried doing a granny square version. I used Bernat Blanket yarn for that one, the purple color that’s really soft and chunky. You make a bunch of granny squares in whatever size works for your bottle dimensions, then join them together. This sounds cute in theory but joining granny squares makes seaming look fun in comparison.
I made six squares that were about 4 inches each, arranged them in a 2×3 layout for the front, same for the back. Then seamed the sides. It looked pretty good actually but took way longer than the basic rectangle method.
The Envelope Style That’s Easier Than You Think
The envelope style is actually my favorite now that I’ve made like four of these things for various people who saw mine and decided they needed one. You make a long rectangle, longer than the basic pouch style, and fold it up like an envelope.
Chain your width, do your rows of whatever stitch you want until you have a piece that’s about 1.5 times the height of your bottle. Fold the bottom up to create a pocket, seam the sides, and the top part folds down over the opening. You can add a button if you want to feel accomplished or just leave it as a flap.
I made one with Caron Simply Soft in that grey color, it’s called… grey heather maybe? And added a big wooden button I found in my button jar that I’ve had since before I really knew what I was doing with crochet. The button was probably from a coat or something but it looked intentional on the hot water bottle cover.
Texture Stitches If You’re Bored
Half double crochet is reliable but after a while you might want some texture. Bobble stitches make it look fancy without being complicated. You just do a bunch of double crochets in the same stitch and pull them together at the top. Makes these little bumps that look decorative and also add extra insulation probably.
I tried doing one with the moss stitch which is just alternating single crochet and chains, and it created this nice bumpy texture that felt good to hold. Used some random acrylic yarn from my stash for that one, no idea what brand because I’d already thrown away the label like an idiot.
Cable stitches look impressive but they’re actually just front post and back post double crochets arranged in a pattern. I watched a YouTube video while making one with cables and it turned out decent. That was with Hobby Lobby’s I Love This Yarn in navy blue. The cables made it really thick which was good for heat retention but also made it bulky.

Sizing Issues Nobody Warns You About
Hot water bottles aren’t all the same size and this is something I didn’t realize until I made a cover that fit my bottle perfectly and then tried to give one as a gift. My friend’s bottle was wider and shorter than mine. The cover I made looked stupid on hers, all stretched out and too long.
So now I ask people to measure their bottle before I make them one, or I make it slightly bigger with some stretch. Acrylic yarn has more give than wool usually, so that’s something to consider if you’re making one as a gift and don’t have access to their actual bottle.
Straps or Handles Are Optional But Useful
I added a strap to one cover just to see if it was useful and honestly yeah, it was nice to carry it around. Just chain a long piece, attach it to the sides of the cover. Nothing complicated. You can use the same yarn or a contrasting color if you wanna be all matchy-matchy or deliberately not matchy.
Color Choices and Why Mine Were Weird
My first one was burgundy like I said, then I made a grey one, a navy one, and then I made one with this variegated yarn that shifted between orange and pink and yellow. That last one was Lion Brand Mandala in some sunset colorway. It looked kind of chaotic but also kind of cool? My sister said it looked like a sunset threw up on my hot water bottle but she still uses the one I made her so.
Stripes are easy if you wanna use up yarn scraps. Just change colors every few rows. I did one with three different shades of blue that were all leftovers from other projects and it looked intentional even though it was really just me trying to clear out my yarn bin.
What Actually Went Wrong
The thing that annoyed me most was when I finished my second cover and realized I’d made it inside out. Like I’d been working with the wrong side facing me the whole time and all the little bumps and texture were on the inside against the bottle instead of the outside where you could see them. I almost ripped it out but then I decided it didn’t matter that much and just flipped it inside out when I seamed it. You couldn’t really tell unless you knew what you were looking for.
Also gauge matters more than I thought it would. I made one cover while watching TV and not paying attention, and my tension was all over the place. Some rows were tight, some were loose, and the whole thing looked drunk. It still functioned as a hot water bottle cover but it wasn’t pretty.
Washing These Things
I throw mine in the washing machine on delicate with cold water and lay it flat to dry. The Wool-Ease one has held up fine, same with the Simply Soft ones. The Bernat Blanket one got a little fuzzy after a few washes but still works. Just don’t put them in the dryer unless you want them to shrink or get weird.
Other Random Stuff That Might Help
If you’re adding embellishments like buttons or embroidery, do it before you seam the sides. Way easier to work with a flat piece than trying to manipulate a finished cover.
You can line these with fleece if you want extra insulation. Just cut a piece of fleece the same size as your crochet piece, sew or crochet it to the inside. I did this once with some fleece scraps I had from… I don’t even remember what project, maybe I was gonna make a blanket? Anyway it worked and made the cover extra warm but also made it harder to wash.
Someone asked me once if you could make these with cotton yarn and I guess you could but it wouldn’t be as warm. Cotton doesn’t insulate the same way wool or acrylic does. But if you’re making one for looks and not function, cotton would be fine.
The drawstring closure is pretty straightforward if you wanna try it. Just leave some holes near the top by doing chain stitches instead of regular stitches, then thread a cord or a chain through the holes. I used a braided cord from some old hoodie that I’d cut the cord out of because the hoodie was garbage but the cord was still good.