
Feb
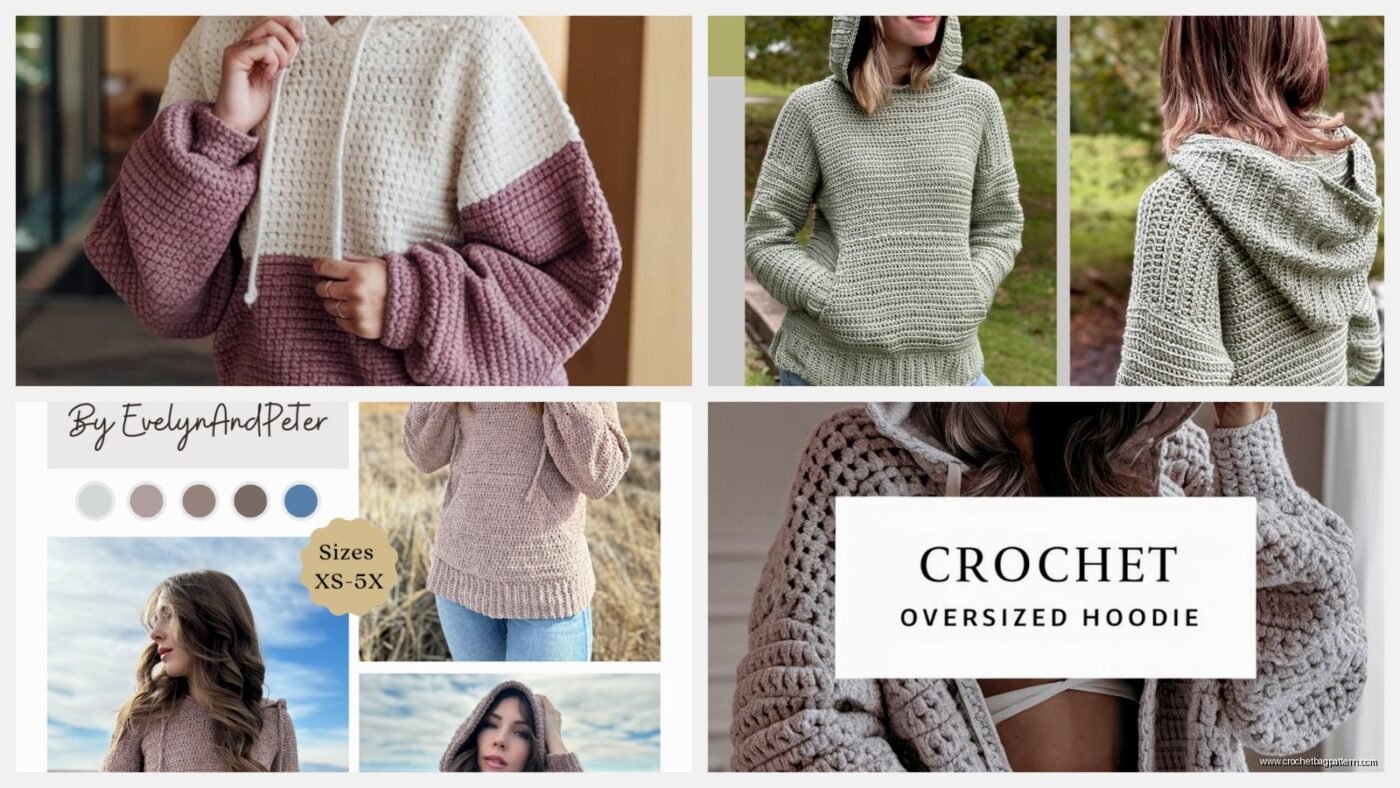
When I Actually Made My First Hoodie
So back in March 2023 I decided to make a crochet hoodie because I kept seeing them everywhere on Instagram and honestly I was just tired of buying expensive sweaters that pilled after like three washes. I was also binge-watching The Last of Us at the time and needed something to do with my hands during the slow parts.
The thing about crochet hoodies is they’re not as scary as they look but you gotta understand they take forever. Like I’m talking weeks if you’re working on it casually. My first one took me about three weeks of crocheting maybe 2-3 hours most evenings.
Picking Your Yarn and Getting Started
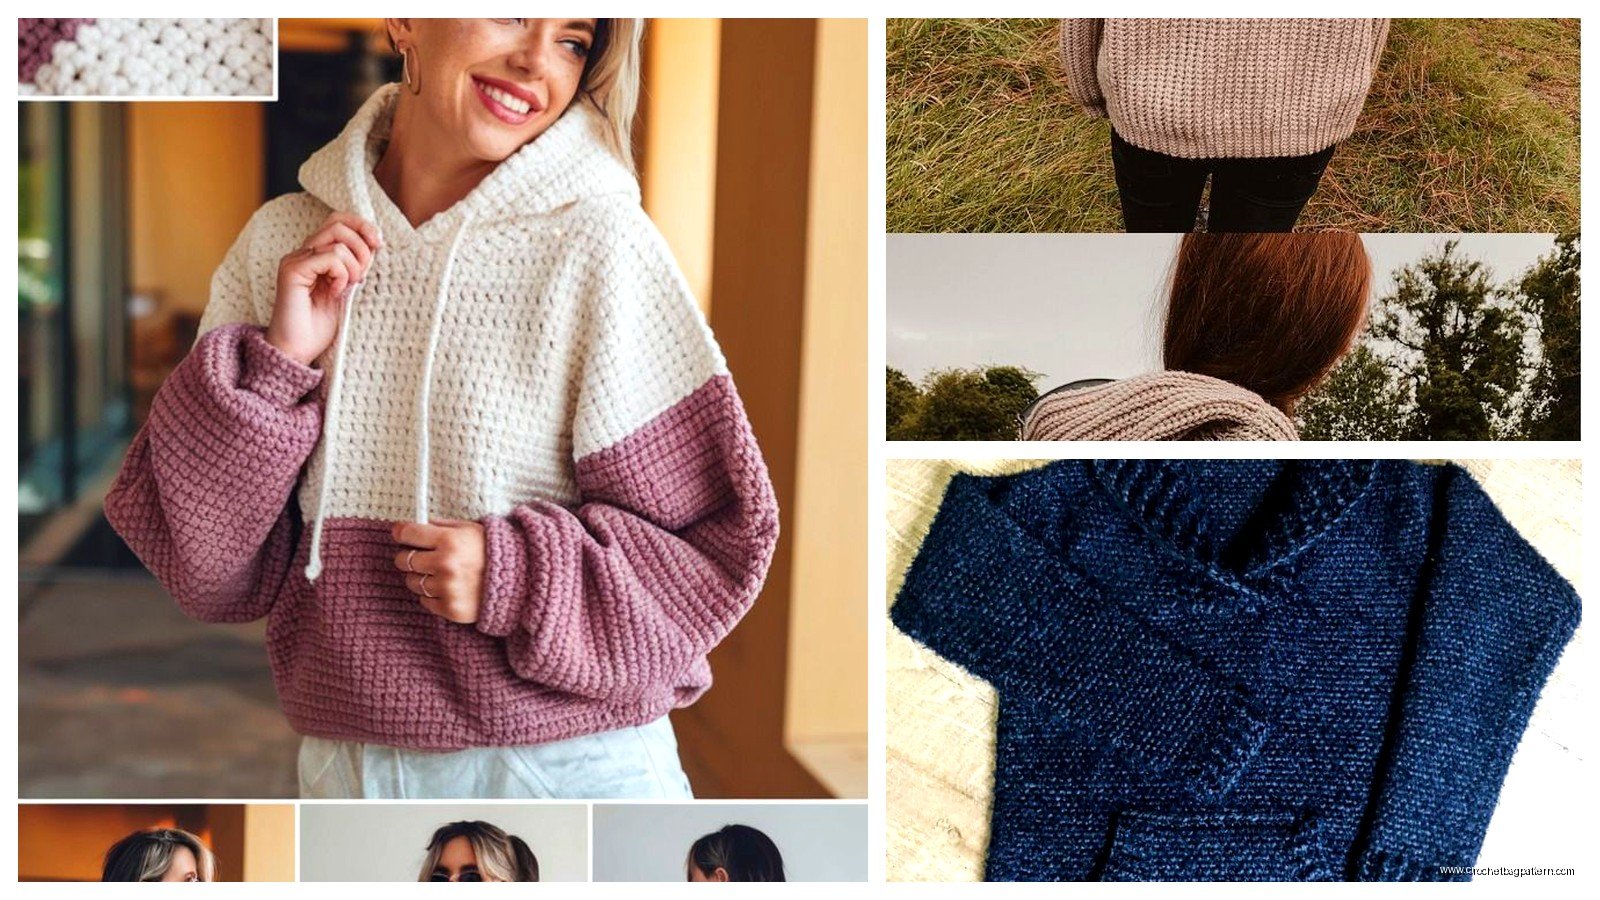
I used Lion Brand Wool-Ease Thick & Quick for my first hoodie in that dusty rose color because it was on sale at Michaels and I had a coupon. You need like 6-8 skeins depending on your size which seems like a lot but hoodies are big projects. The chunky weight yarn works up faster than the regular stuff which is the only reason I finished it honestly.
You can also use Bernat Blanket yarn which a lot of people swear by but I found it splits too easily when you’re trying to—actually nevermind I’ll get to that later.
First thing is you need to measure yourself properly. I just used a fabric tape measure and wrote down my bust, length from shoulder to where I wanted it to end, and arm length. Don’t skip this part because I’ve seen people make hoodies that are like three sizes too big because they just guessed.
The Basic Construction Method I Use
Most crochet hoodies are made in panels that you sew together later. You’ll make:
- Front panel (sometimes this is two pieces if you want a zipper)
- Back panel
- Two sleeves
- Hood piece
I start with the back panel because it’s the biggest and if I mess up or hate the yarn I haven’t wasted time on all the other pieces yet. Smart right?

Working the Back Panel
Chain enough to match your bust measurement. For me that was like 80 chains with the thick yarn. Then I just did rows of half double crochet because it has a nice texture that’s not too holey. Some people do double crochet to make it faster but then you can see through it which defeats the purpose of a sweater.
Keep going until it measures from your shoulder to hip or wherever you want the hoodie to end. I made mine hip-length which used about 2 skeins of the Wool-Ease.
The annoying thing about this whole process is seaming everything together at the end. I absolutely hate seaming. It takes forever and you have to be careful to line everything up or your hoodie will be crooked and you’ll look ridiculous. I used a yarn needle and did a whip stitch which is basically just—you know what there are videos that show it better than I can explain.
Front Panels and Neckline
For the front I made two separate panels instead of one big one because I wanted to add a zipper. Each panel is half the width of the back panel. So instead of 80 chains I did 40 for each side.
The tricky part is shaping the neckline. About three-quarters of the way up you need to start decreasing stitches on the inner edge to create that V-shape for the neck. I decreased one stitch every other row for about 6 rows. This is the part where you kinda have to eyeball it honestly.
If you want a pullover style instead you make one front panel the same size as the back and then you need to create a neck opening which is actually more complicated than just doing the zipper version in my opinion.
Sleeves Are Actually Easier Than You Think
Sleeves sound intimidating but they’re just rectangles that you sew into tubes. Measure around your upper arm and chain that many stitches. Then measure from your armpit to your wrist for the length.
I made mine with the same half double crochet stitch to match everything else. Used about one skein per sleeve.
Some people do fitted sleeves that taper at the wrist but I didn’t bother with that for my first hoodie. Just made straight tubes and called it a day.
The Hood Construction
The hood is basically a big rectangle that you fold and seam in a specific way. I made mine about 24 inches wide and 13 inches tall. You fold it in half and seam the top edge to create that rounded hood shape.
Then you attach it to the neckline going all the way around. This part was frustrating because I had to keep trying it on to make sure it sat right on my shoulders. My cat kept trying to lay on the pieces while I was working too which didn’t help.
I used Red Heart Super Saver for my second hoodie in the fall of 2023 and it was stiffer than the Wool-Ease but held its shape better after washing. That one I made in a charcoal gray color.
Putting It All Together
Once you have all your panels you gotta lay everything out on the floor or a bed to figure out what connects where. Seam the shoulders first—connect the front panels to the back panel at the shoulder seams.
Then attach the sleeves to the armholes. This is where I always get confused about which edge goes where but basically you’re matching the center of the sleeve to the shoulder seam and working your way down on both sides.
After sleeves are attached you seam up the sides of the body and the underside of the sleeves all in one continuous line from the bottom hem up to the wrist.
Finally attach the hood to the neckline. Start at one front edge and work your way around the back of the neck to the other front edge.
Adding the Zipper or Finishing Touches
If you did the two-panel front like me you need to add a zipper. I bought a 22-inch separating zipper from Joann Fabrics and hand-sewed it in with regular thread. You can also do a crochet edge along the front and skip the zipper but then you need buttons or frogs or something to keep it closed.
I did a single crochet border around all the edges—bottom hem, cuffs, front opening, and around the hood. It makes everything look more finished and professional.
What I’d Do Differently Next Time
The gauge matters more than I thought it would. My first hoodie stretched out after wearing it a few times because I was crocheting too loosely. Go down a hook size from what the yarn label recommends or really watch your tension.
Also wish I had made the hood bigger. It fits but it’s not super roomy and cozy like I wanted. I’d add another 3-4 inches to the height if I made that pattern again.
Weight of the yarn makes a huge difference in how long this takes. Bulky or super bulky weight is gonna work up way faster than worsted weight. But worsted weight looks more like a store-bought sweater if that’s what you’re going for.
Washing and Care
I wash mine in cold water on delicate cycle inside a mesh bag and lay flat to dry. The Wool-Ease one has held up really well after like 15 washes. The Red Heart one pilled a little bit under the arms but nothing terrible.
Don’t put them in the dryer unless you want a hoodie for a toddler.
The whole project used about 1200 yards of yarn total give or take. Cost me around 35 dollars in yarn plus the zipper. Way cheaper than buying a similar hoodie from like Urban Outfitters or wherever.