
May
okay so small crochet flowers
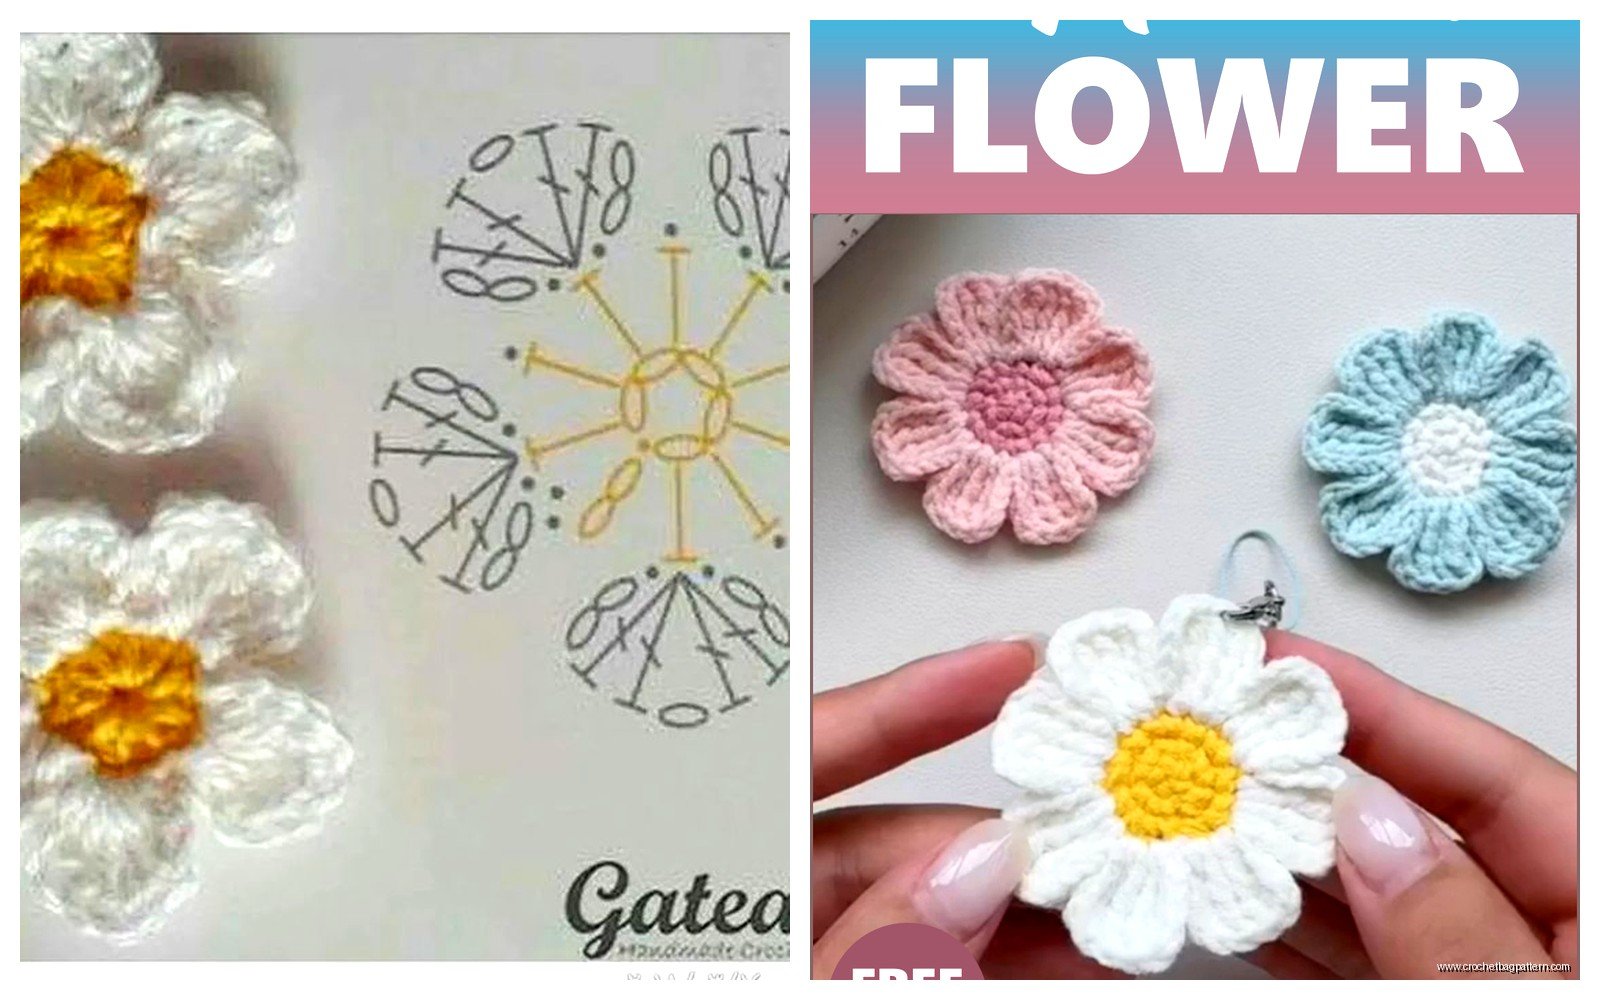
Right so the first time I actually made a tiny flower that didn’t look completely tragic was spring 2022 when I was supposed to be cleaning out my closet but obviously got distracted. I was using this Red Heart Super Saver in that really bright yellow that’s kinda harsh but also perfect for little flowers because you want them to pop, right? And I just started with a magic ring because that’s literally the only way to start these things without having a weird hole in the middle.
The magic ring is gonna be your foundation for pretty much every small flower. You wrap the yarn around your fingers twice, pull through, chain one or two depending on the pattern you’re going for, and then work your first round into that ring. For the most basic tiny flower you’re doing like 5 or 6 single crochets into the ring, pull it tight, and that’s your center.
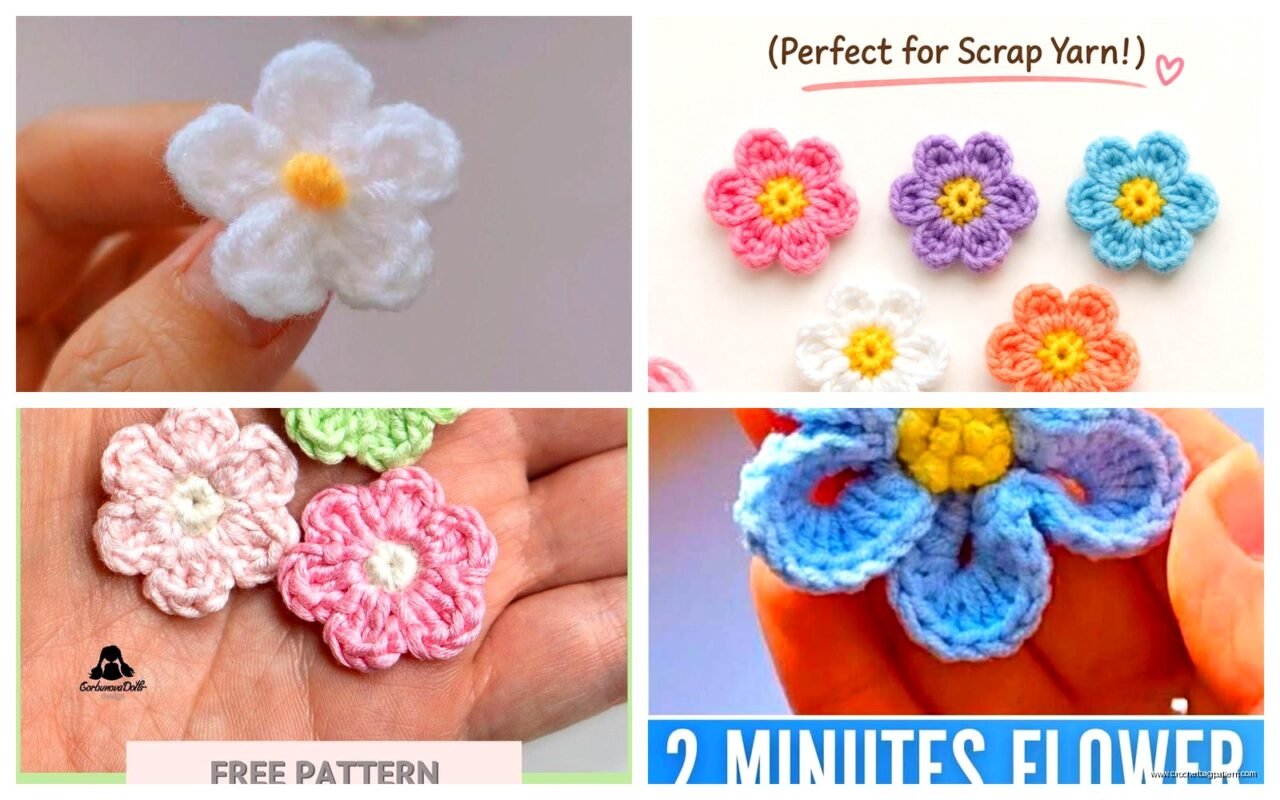
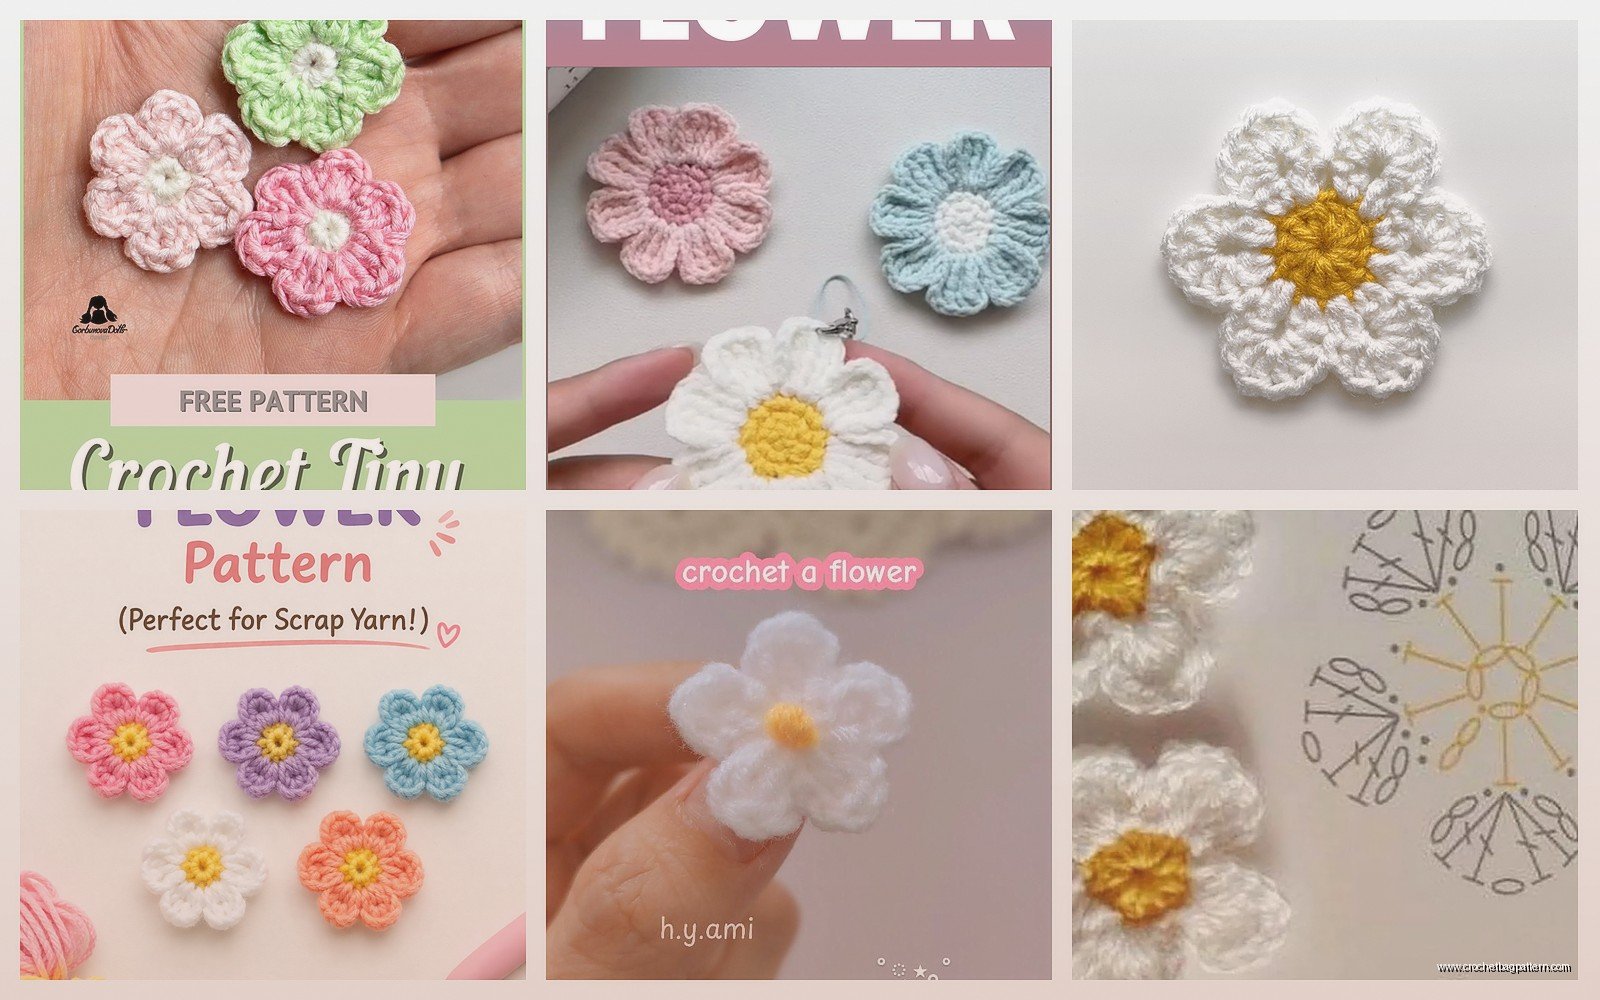
the basic five petal situation
So for a really simple five petal flower you chain up after your center round. I usually do chain 3, then work a double crochet or two into the same stitch, chain 3 again, and slip stitch into the next stitch. That makes one petal. Then you just repeat that four more times around and you’ve got your basic flower shape. The thing that annoyed me SO much when I was figuring this out was that my petals would twist or curl backward and look demented, and it’s because I was pulling my tension too tight on those chain spaces.
You gotta keep the chains loose enough that they can curve nicely into a petal shape. If you pull them tight they’ll just make these sad pointy things that flip the wrong direction. I probably made like fifteen flowers before I figured that out and I was ready to just… anyway.
size variations that actually matter
The hook size changes everything with these mini flowers. I’ve used a 2.5mm hook with embroidery floss to make flowers that are literally smaller than a quarter, and I’ve used a 4mm hook with Lily Sugar’n Cream cotton yarn to make ones that are maybe two inches across. The pattern can be exactly the same but the finished size is completely different.
For the really tiny ones I like using crochet thread. Aunt Lydia’s Classic Crochet Thread is pretty cheap and comes in a million colors. Size 10 thread with a steel hook around 1.5mm or 1.75mm makes these delicate little flowers that are good for jewelry or cards or whatever. But working with thread is annoying because you can’t really see what you’re doing as easily and my eyes start hurting after like twenty minutes.
different petal styles you can do
The basic chain-3-dc-chain-3 petal is fine but it gets boring. You can make rounder petals by doing like chain 2, then 3 double crochets in the same stitch, chain 2, slip stitch. That makes a fuller petal that looks more substantial. Or if you want pointy petals you can do chain 4, treble crochet, chain 4, slip stitch.
I made a bunch of flowers last summer (2024) when I was watching that show about the bear restaurant or whatever it’s called, and I was experimenting with layered petals. You make your first round of petals normally, then you work a second round of longer petals behind them by slip stitching into the back loops of your center round. It creates this dimensional effect that looks complicated but really isn’t.
the two layer flower method
Okay so for a two layer flower you start the same way with your magic ring and center. Let’s say you do 6 single crochets in the center. Then your first petal round is small petals, maybe just chain 2, double crochet, chain 2, slip stitch into each stitch around. That gives you six small petals.
Now here’s the thing – instead of fastening off, you slip stitch into the back loop or the base of one of your center stitches, somewhere behind that first petal layer. Then you chain longer, like chain 4, work two treble crochets, chain 4, and slip stitch into the next back loop or between petals. Do that around and you’ve got bigger petals sticking out behind the small ones. The first time I did this I couldn’t figure out where to anchor those second-layer petals and they were just floating weird or pulling the whole flower into a cone shape.
The trick is to really pay attention to where you’re slip stitching between the second-layer petals. You need to catch the actual fabric of the first layer, not just random spots.
adding centers that don’t look stupid
A lot of small flower patterns look unfinished without something in the center. The easiest thing is to just sew a bead or a button in the middle. I have this jar of yellow and white beads that I got from… I don’t even remember, some craft store, and I just stitch one on with regular sewing thread after the flower is done.
You can also crochet a little center by fastening a different color yarn to the middle of your flower and doing like 5 or 6 single crochets really tight into the center hole, then fasten off. That makes a little bump of color. I used Caron Simply Soft for this once and it worked fine, that yarn is pretty smooth so it doesn’t get fuzzy in the middle.
Or you can do french knots if you’re into embroidery stuff. I’m not really, it feels fiddly, but some people like that look.
the rose bud version
There’s this one small rose pattern that’s different from the flat flowers and it’s actually easier in some ways. You chain like 15 or 20, then you work a row of double crochets back along the chain, and then you just roll it up and stitch the bottom closed. It makes this spiral rose bud thing that’s really cute.
I was making these during a breakup in fall 2022 and I made probably forty of them because it’s mindless and you can do it while crying or watching TV or whatever. The rolling part is the key – you gotta roll it tight at the beginning for the center, then looser as you go so it looks like petals opening up. If you roll the whole thing tight it just looks like a yarn burrito.
For these I liked using Bernat Satin because it has that sheen that makes it look more rose-like, but honestly any worsted weight works. The Hobby Lobby I Love This Yarn brand is cheap and has good colors for roses.
what to actually do with tiny flowers
So once you have all these little flowers you need to do something with them or they just pile up in a bag. I’ve sewn them onto headbands, glued them to bobby pins with hot glue, stitched them onto canvas tote bags, used them as gift wrap decoration instead of bows. You can sew a pin back on them and make brooches.
One thing I did that turned out cute was making a whole bunch in different sizes and colors and stitching them onto a pillow cover in a random scattered pattern. It took forever because you have to stitch each one on individually and make sure they’re secure, but it looked pretty good.
You can also string them together to make a garland. Just leave long tails when you fasten off and use those to tie them onto a length of yarn or string. My cat destroyed one of these by the way, she thought it was a toy and just went insane pulling all the flowers off.
yarn choices that actually matter
Cotton yarn makes flowers that hold their shape better than acrylic. The Red Heart Super Saver I mentioned earlier works fine but it’s kinda floppy, whereas Lily Sugar’n Cream or Bernat Handicrafter Cotton makes flowers that are stiffer and stay put better when you attach them to stuff.
If you want really stiff flowers you can use fabric stiffener after you make them. Just dip them in the stuff, shape them how you want, and let them dry. I’ve never actually done this because I don’t wanna deal with the mess but I’ve seen people do it.
For fuzzy flowers that look more like daisies or dandelions or something, you can use a textured yarn. I tried this with some Lion Brand Homespun once and it was a disaster because that yarn splits like crazy and working tiny stitches with it is horrible, but a less splitty fuzzy yarn would probably work.
the actual stitches you need to know
You really only need to know a few stitches for basic small flowers. Magic ring obviously, chain, slip stitch, single crochet, double crochet, and maybe treble crochet if you want longer petals. That’s it. You don’t need to know anything fancy.
The slip stitch is what you use to attach petals and move around without adding height. A lot of people skip over learning slip stitches properly and then their flowers look lumpy because they’re accidentally adding extra stitches or bulk where they shouldn’t.
When you slip stitch you’re literally just pulling a loop through both the stitch and the loop on your hook in one motion. It shouldn’t add any height or width to your work. If your slip stitches are visible or making bumps, you’re doing something wrong or pulling too tight.
the picot petal thing
There’s a variation where you make picot edging on your petals and it looks fancy but it’s just chain 3, slip stitch back into the first chain of that 3. You do this at the tip of each petal and it makes little points. So your petal would be like: chain 3, double crochet, double crochet, picot (chain 3, slip stitch into first chain), double crochet, chain 3, slip stitch to close the petal.
I thought this looked stupid the first time I tried it because my picots were huge and floppy, but if you keep them tight they’re actually cute. Makes the flower look more detailed without actually being harder.
fixing mistakes because you will make them
The most common mistake is losing count of your petals or stitches and ending up with uneven flowers. I still do this all the time because I get distracted or don’t use stitch markers. For tiny flowers you can use a small safety pin or just a different color yarn woven through as a marker for where your round starts.
If you mess up a petal it’s usually easier to just rip it out and redo it than to try to fix it. These flowers are small enough that frogging back doesn’t waste much time. I know people say to embrace imperfection or whatever but a wonky petal on a tiny flower is really obvious and bugs me.
Another thing that happens is the center hole doesn’t close all the way even when you pull the magic ring tight. You can either sew it closed with a yarn needle afterward, or you can weave the tail through the back of the center stitches to cinch it tighter before you weave in the end.
color combinations I’ve tried
White with yellow center is classic and looks like a daisy. Pink with dark pink center looks like a cherry blossom or something. Purple with yellow center is kinda weird but I like it. Red with white center didn’t look as good as I thought it would, kinda looked like a target.
Variegated yarn can be cool for flowers because each petal ends up slightly different colors, but it can also look chaotic if the color changes are too drastic. I used some Red Heart Unforgettable for flowers once and they looked okay, the color shifts were subtle enough that it worked.
Ombre effects are cool if you make multiple flowers in graduating shades and arrange them together. I did this with like five different shades of blue from light to dark and stitched them onto a denim jacket. Took forever but looked good.
the actual patterns I use most
I don’t really follow written patterns anymore, I just kinda know the structure, but when I was starting out I would literally write down what I was doing like: magic ring, 6 sc, then in each stitch: ch 3, dc, ch 3, sl st. That’s a complete simple flower pattern right there.
For a slightly more complex one: magic ring, 8 sc in ring, then in each stitch: ch 2, 3 dc, ch 2, sl st. That makes fuller rounder petals.
For a really frilly flower: magic ring, 12 sc in ring, then *skip 1 st, in next st work (sl st, ch 3, 4 dc, ch 3, sl st)*, repeat around. That makes six big frilly petals with gaps between them.
You can modify any of these by changing the number of chains, the number of double crochets, or the number of petals. Like if you want eight petals instead of six, start with 8 sc in your ring instead of 6. It’s all just math kind of.
how long these actually take
A basic tiny flower takes me maybe five minutes now that I’ve made a million of them. When I was learning it would take fifteen or twenty minutes because I’d have to think about each step. The layered ones take longer, maybe ten or fifteen minutes because you’re essentially making two flowers.
The rose bud ones are fast, like three minutes, because it’s just one row and then rolling.
If you’re making a bunch for a project, like if you need twenty flowers for something, just plan on it taking a couple hours. You can do them while watching TV or whatever, they don’t require tons of concentration once you have the pattern down.
I made a set of twelve flowers for my friend’s wedding gift last spring and it took me maybe two hours total, but I was also eating dinner and half watching something so I wasn’t focused the whole time.
thread weight versus yarn weight
This matters more than you’d think. Thread makes delicate detailed flowers but they’re tiny and hard to see the stitches. Worsted weight yarn makes chunky obvious flowers that work up fast but might look too bulky for some projects. Sport or DK weight is a good middle ground – still easy to see what you’re doing but the flowers don’t look huge.
I keep Red Heart Super Saver in worsted, some Caron Simply Soft in worsted, Lily Sugar’n Cream in worsted cotton, and then some Aunt Lydia’s thread around for variety. That covers most flower sizes I’d want to make without having to buy new stuff every time.
The cotton vs acrylic thing also affects how the flowers drape or stand up. Cotton is heavier and stiffer, acrylic is lighter and floppier. For flowers you want to attach to stuff I prefer cotton because they don’t go all limp and sad looking.
Anyway that’s pretty much the main stuff about making small crochet flowers. You can get way more complicated with like three-dimensional flowers that have stems and leaves and whatever, but for basic mini flowers this covers it. Just start with a magic ring, make some petals, and see what happens. Most of learning this stuff is just making a bunch until you figure out what works.