
May
Making Plarn Is Honestly Easier Than It Sounds
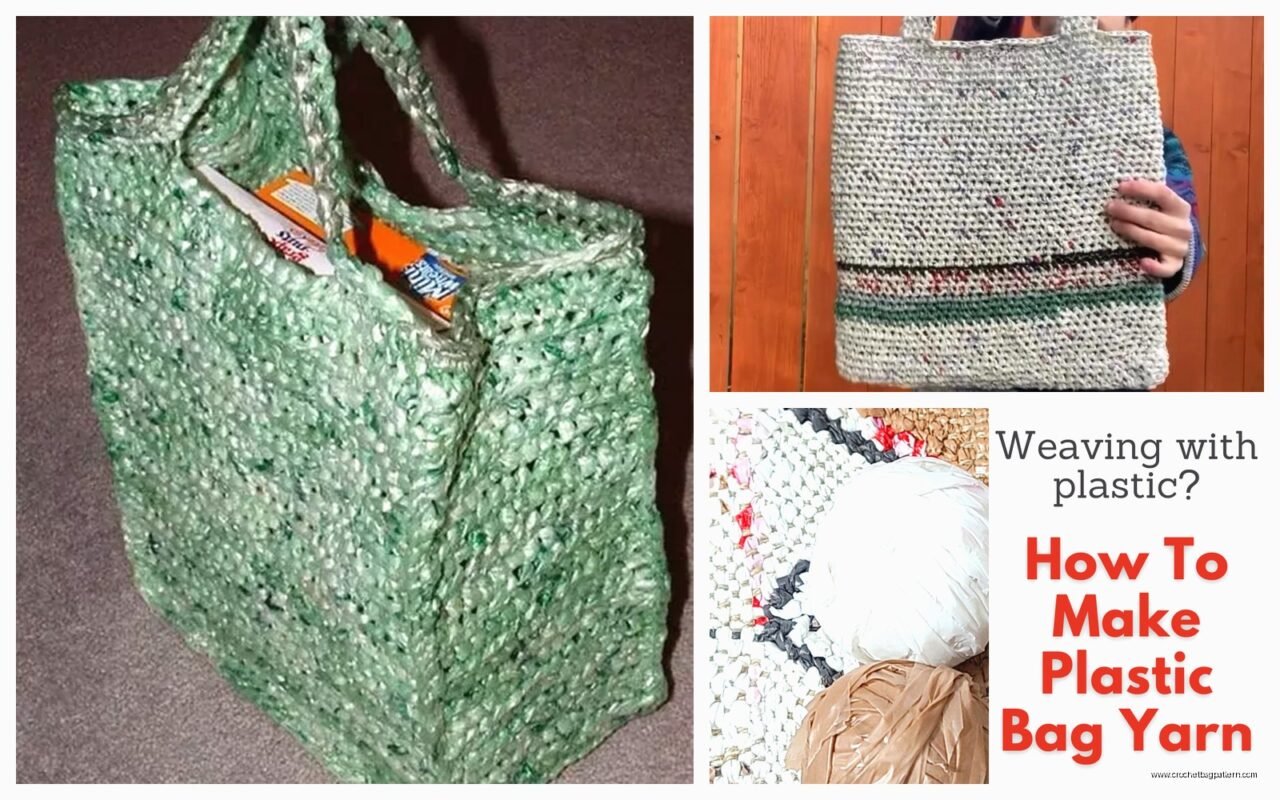
So plastic bag yarn or “plarn” whatever you wanna call it, it’s basically just cutting up plastic grocery bags and turning them into something you can crochet with. I made a beach tote in summer 2023 because I kept forgetting my reusable bags at the store and had like 50 plastic bags shoved under my sink and my roommate was getting annoyed about it.
First thing is you need a LOT of bags. Like way more than you think. I thought maybe 20 bags would make a decent tote and nope, used probably 60 or 70. The bags need to be clean obviously, no gross stuff stuck to them. I just wiped mine down with a damp cloth if they looked weird.
Cutting the Bags Into Strips
Okay so flatten your bag out on a table. Cut off the handles first, then cut off the bottom seam. You’re left with a tube basically. Now you’re gonna cut loops across the bag, like 1-2 inches wide. I did mine about 1.5 inches because thinner strips make flimsier plarn and thicker is just harder to work with.
Some people measure with rulers but honestly I just eyeballed it and the inconsistency doesn’t really matter that much in the final project. You end up with these loops of plastic. Don’t unfold them yet, just stack them up.
The annoying part and this drove me CRAZY was connecting all the loops together. There’s this thing where you’re supposed to loop them through each other, like you take loop A and pull loop B through it, then pull loop C through loop B, and so on. It works but my hands got so tired after like 20 bags worth. My cat kept trying to attack the plastic strips too which didn’t help.
Connecting the Loops
So you take one loop and lay it flat. Take a second loop and lay it on top, overlapping just a bit. Then you fold the end of the bottom loop up and through both loops, then pull the other end of that same loop through the fold you just made. It sounds confusing but once you do it twice you’ll get it. Pull it tight and it creates this little knot thing.

You can also just tie them together with regular knots but that creates bumps in your plarn and those bumps show up in your finished project which looks kinda messy. The loop method is cleaner.
Wind your connected plarn into a ball as you go. It’s slippery and will slide everywhere if you don’t. I used an empty coffee container to hold my ball while I worked because it kept rolling off my couch.
What Hook Size to Use
This depends on how thick your strips are but I used a 10mm hook (N/P size I think?) and it worked fine. Some people go bigger like 12mm or even 15mm. The thicker your hook the looser and more flexible your project will be. Thinner hooks make stiffer denser fabric.
You can’t really use regular yarn hooks like a 5mm or whatever because the plastic doesn’t have the same give that actual yarn does. It’ll just frustrate you trying to pull it through with a small hook. Trust me I tried with like a H hook first because that’s what I always used for regular projects and it was impossible.
Basic Stitches Work Best
Single crochet is your friend here. The plastic is already kinda stiff so you don’t need fancy stitches to give structure. I did my whole tote in single crochet and it holds its shape great. Double crochet works too if you want something with more drape or holes in it like a market bag.
Starting chain is the same as regular crochet. Make a slip knot, chain however many you need. For my tote I chained 25 for the base. Then I just worked in rows, turning at the end of each row, until I had a rectangle about 12 inches long. Then I seamed up the sides and added handles.
The handles were just chains, like chain 40 or so, then I attached them to the top edges of the bag. You could do actual crocheted handles with more rows of single crochet if you want them sturdier but chains worked fine for me.
Tension Is Weird with Plastic
Your tension is gonna feel different than with regular yarn. The plastic doesn’t stretch so if you pull too tight your stitches will be really hard to work into on the next row. I had to consciously keep my tension looser than normal. It felt wrong at first because I’m so used to—wait actually I learned crochet from my neighbor who showed me basics but never really explained tension properly so I’ve always just done what felt right.
Anyway keep it loose. Your stitches should slide around a bit on the hook. If they’re stuck you’re going too tight.
Pattern Ideas That Actually Work
Bags are the obvious choice. Totes, grocery bags, beach bags, whatever. They’re waterproof which is the big advantage of plarn. I’ve seen people make doormats which seems smart, they’d be easy to hose off.
Coasters work if you do them tight and stiff. Placemats too. Basically anything that benefits from being waterproof and wipeable. I wouldn’t make clothing with it because it doesn’t breathe at all and would be super sweaty.
For a basic tote you can literally just make two rectangles and sew them together on three sides. Or do it in the round if you know how to do that. I’m not great at circular stuff so I stick with flat pieces.
Someone told me you can make outdoor rugs but I haven’t tried that. Seems like it would take forever and like a thousand bags.
Color Sorting Is Up to You
I didn’t sort my bags by color for my first project and it came out kinda random looking, white bags and random colored ones all mixed together. It had a chaotic vibe but honestly I didn’t hate it. If you want something more intentional you gotta sort your bags first.
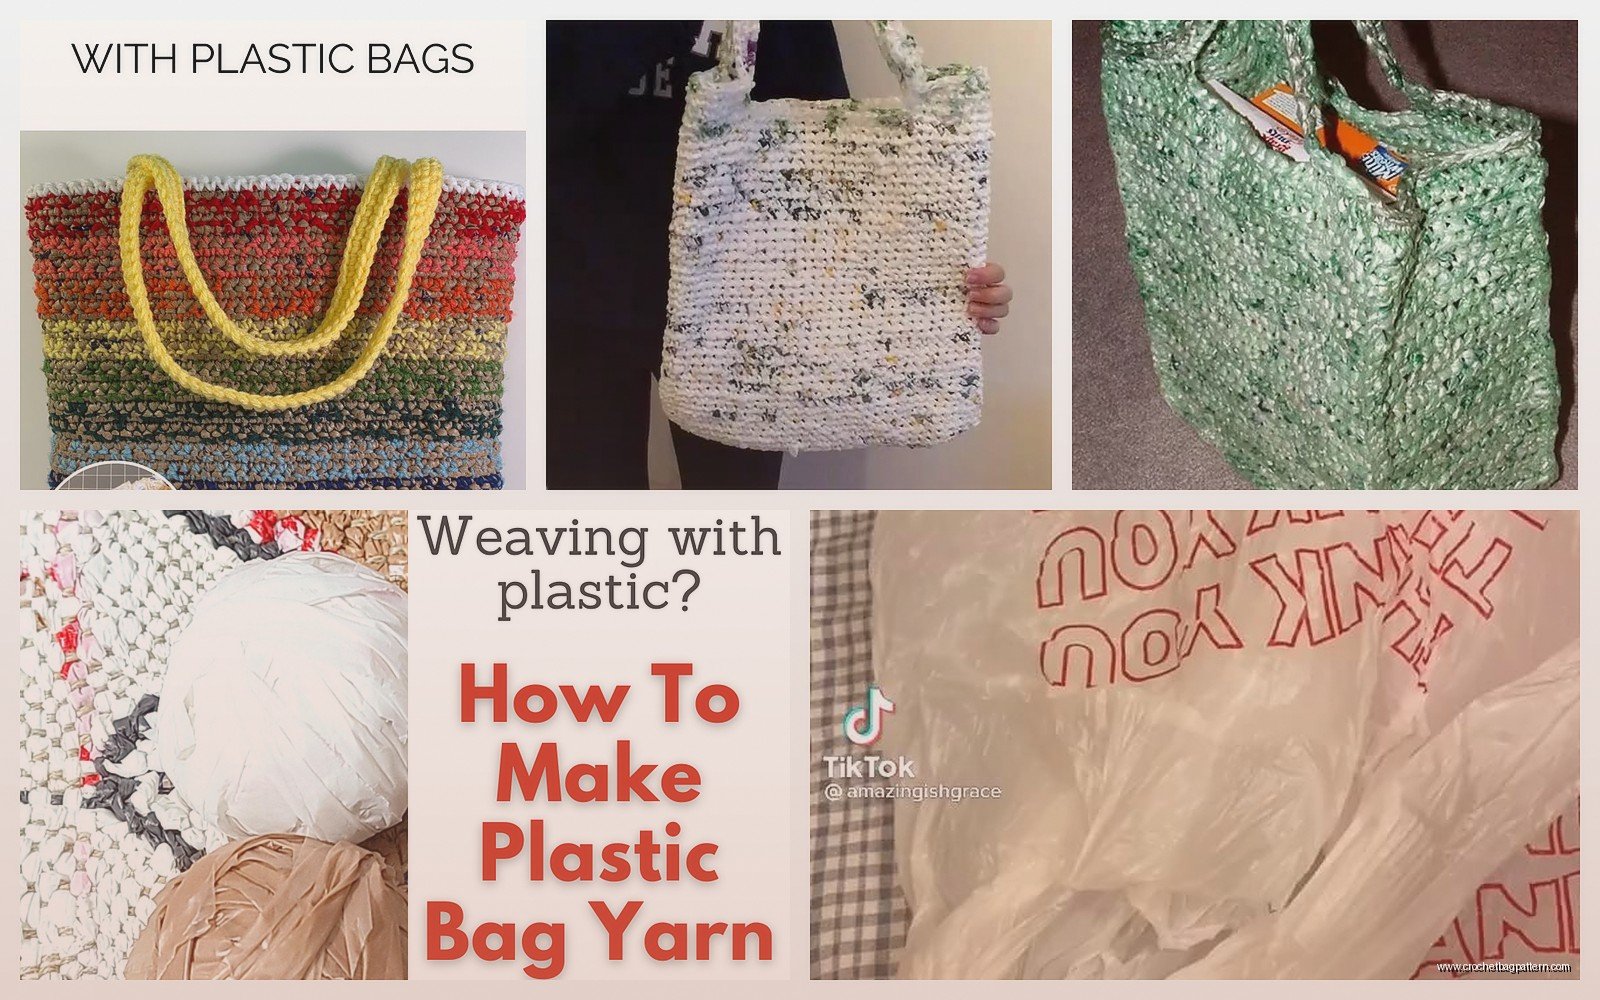
White bags are most common obviously. Then random colors from different stores, Target bags are red, Walmart is blue, whatever. You could do stripes if you had enough of each color. I’ve seen people do ombre effects by gradually mixing in different colored bags.
Black bags would be cool for a more sleek look but I never seem to have black plastic bags? Not sure where those even come from.
The Texture Thing
Plarn projects have this crinkly texture that’s kinda satisfying honestly. It’s not soft like regular crochet but it has substance to it. The tote I made can stand up on its own when empty which regular cotton yarn totes don’t really do.
It does make noise though. Like crinkling plastic noise. Which is fine for a bag you’re carrying groceries in but might be annoying for other things. Just something to keep in mind.
Washing and Durability
You can’t really wash plarn projects in a washing machine, the agitation might tear the plastic. But you can wipe them down or rinse them in a sink. The waterproof thing means they dry super fast which is nice.
Durability wise they hold up pretty well. My tote from 2023 is still in good shape, I use it for beach stuff mostly. The handles have stretched out a tiny bit but nothing major. I did have one section where the plastic tore but that was my fault for overstuffing it with like 20 pounds of groceries.
If a section breaks you can just cut out that piece and tie in a new strip of plarn. It’s pretty forgiving that way.
Environmental Thoughts I Guess
People always ask if this is actually eco-friendly or whatever. Honestly I don’t know. You’re reusing plastic bags instead of throwing them away which seems good? But you’re also not sending them to be recycled. Although I’ve read that plastic bag recycling is complicated and most bags don’t actually get recycled anyway so maybe this is better.
I mostly did it because I had bags piling up and needed a project to do while watching Love Island, not really for environmental reasons. But it feels less wasteful than tossing them.
Troubleshooting Common Issues
If your plarn keeps breaking while you’re crocheting, your strips are probably too thin. Cut wider strips next time. Or you’re pulling way too tight.
If your project is coming out really stiff and hard, use a bigger hook or loosen your tension. Stiff can be good for some things like baskets but not great for bags you want to fold up.
If your project is too floppy and has no structure, go down a hook size or tighten your tension. Or add more rows to make it thicker.
The edges curling is normal with plastic, it just does that. You can block it kinda by wetting it and weighing down the edges while it dries but it might curl back up eventually anyway.
How Long Does This Take
Cutting and connecting the bags takes FOREVER. That’s the worst part honestly. For my tote it probably took 3-4 hours just to prep the plarn before I even started crocheting. The actual crocheting was maybe 5-6 hours spread over a few days.
So budget time for prep work. I did it while watching TV because it’s pretty mindless once you get the rhythm down. Some people prep a bunch of plarn all at once and then have it ready for multiple projects which seems smart.
Alternative Materials
You can also use plastic shopping bags that aren’t grocery bags, like retail bags from clothing stores. Those tend to be thicker and sometimes have better colors. The really thin produce bags don’t work well, they’re too flimsy.
I haven’t tried garbage bags but I’ve heard people use those for bigger projects since they’re already larger. You’d cut them in spirals instead of loops maybe? Not sure exactly how that works.
Bread bags could work too if you eat enough bread to collect them. They’re usually that plasticky material similar to grocery bags.
What Not to Make
Like I said, don’t make wearable stuff unless you hate yourself. It’s not comfortable. Also probably don’t make anything decorative that you want to look nice because plarn has that trashy aesthetic literally. It looks handmade in an obvious way.
Baby items seem like a bad idea because of the plastic and potential tearing. Pet beds maybe not either because claws could shred it easily.
Stick with practical functional stuff that benefits from being waterproof and durable. That’s where plarn actually makes sense.
Oh and gauge doesn’t really matter for most plarn projects since you’re not making fitted items. I never did a gauge swatch, just started crocheting and adjusted as I went. Made the bag as big as I wanted it and called it done.