
May
okay so camel stitch is basically this third loop thing
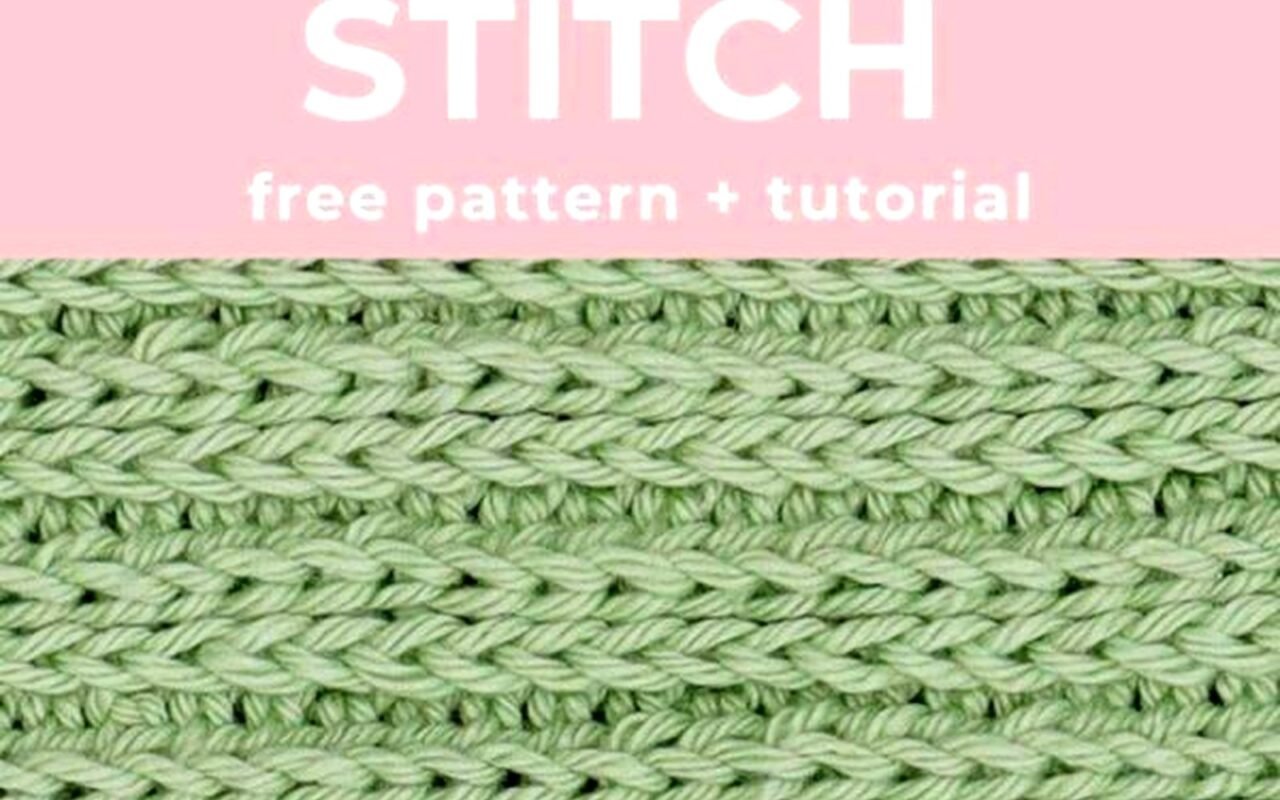
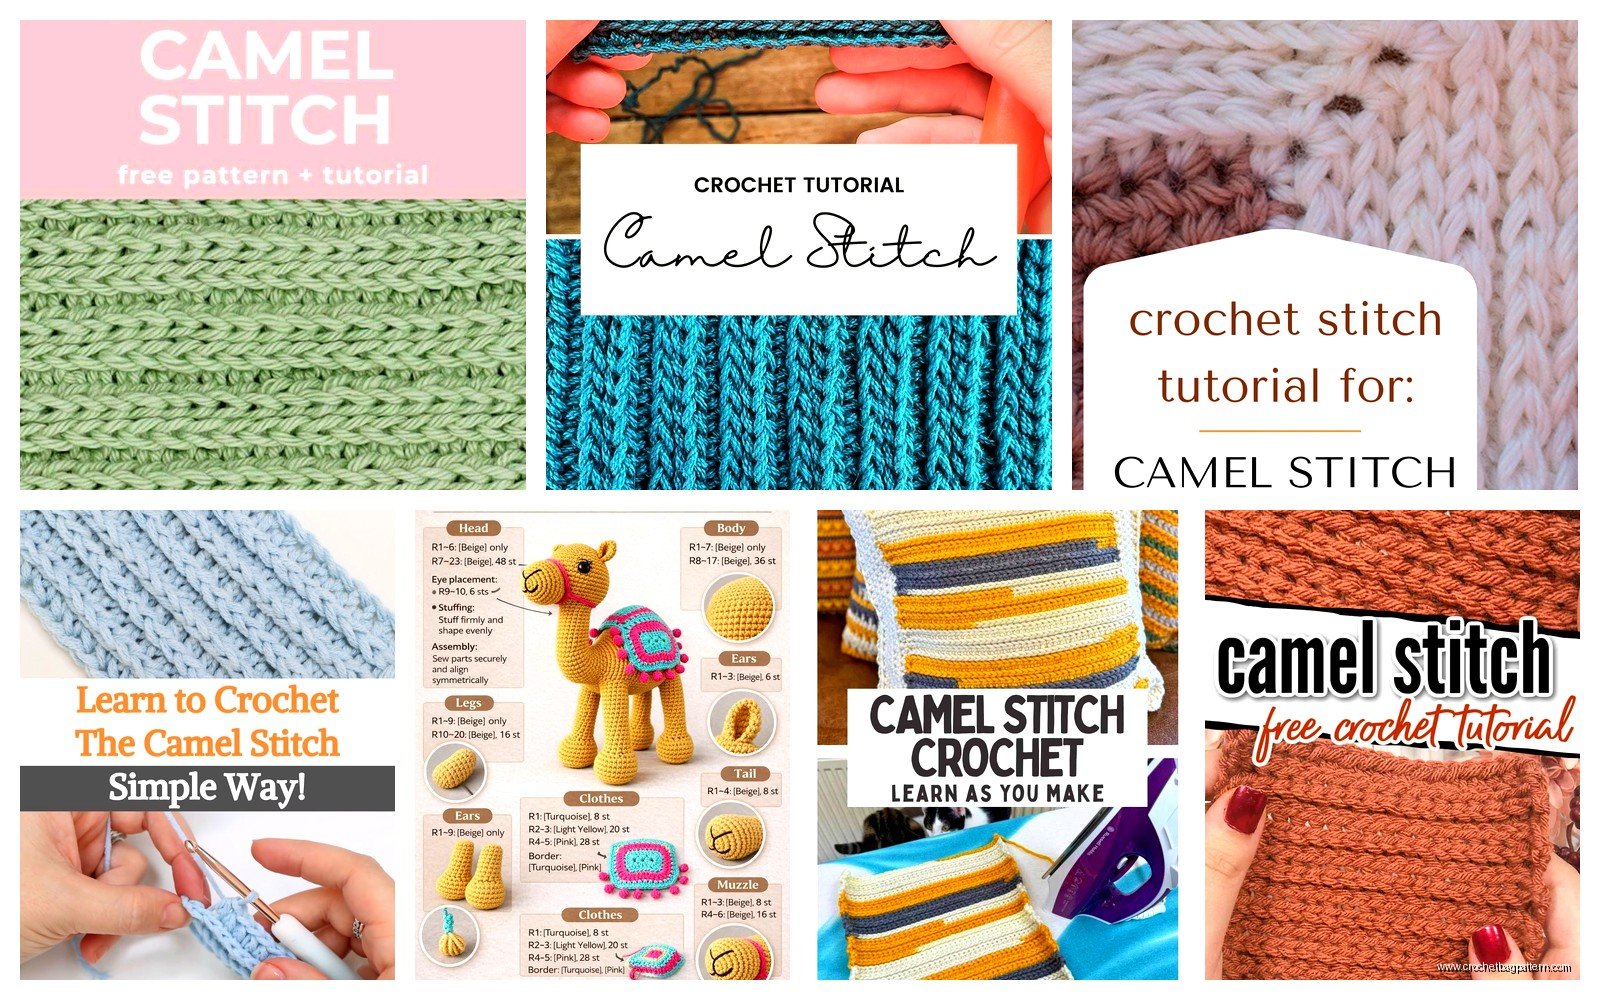
So you know how with regular single crochet you go under both loops at the top of the stitch? Camel stitch is when you work into that third loop that sits kind of in the back. It’s technically called the back bump or third loop and it creates this really cool ribbed texture that honestly looks more like knitting than crochet. I made a whole blanket with this back in spring 2022 and my hands were SO tired by the end but everyone kept asking if I knitted it which was kind of the point I guess.
The thing is you gotta actually understand where this loop even is first because I spent like twenty minutes squinting at my work the first time trying to figure out what people meant by third loop. When you make a normal stitch, there’s the two loops on top right – the front loop and back loop. But there’s also this horizontal bar that sits behind those loops, kind of tucked underneath. That’s your third loop. It looks like a little bump running along the back of your row.
setting up your foundation
You can start with a regular chain but honestly I usually do a foundation single crochet because I hate how chains get all twisty. If you’re gonna do a regular chain just make it loose because you need to work back across it. I used Red Heart Super Saver for that spring 2022 blanket – the grey heather color – because I needed like eight skeins and wasn’t about to spend a fortune. It worked fine for camel stitch actually, the texture shows up pretty clearly even with cheaper acrylic.
Chain however many you need for your project width. Then single crochet back across that chain. This first row is just regular single crochet, both loops, nothing fancy. You need this base row established before you can even start doing the camel stitch because you need those third loops to exist first.
actually doing the camel stitch part
Okay so row two is where it starts. Chain one and turn your work like normal. Now instead of going under both loops of the stitch below, you’re gonna stick your hook under ONLY that third loop – the horizontal bump in the back. Your hook goes under just that one strand.
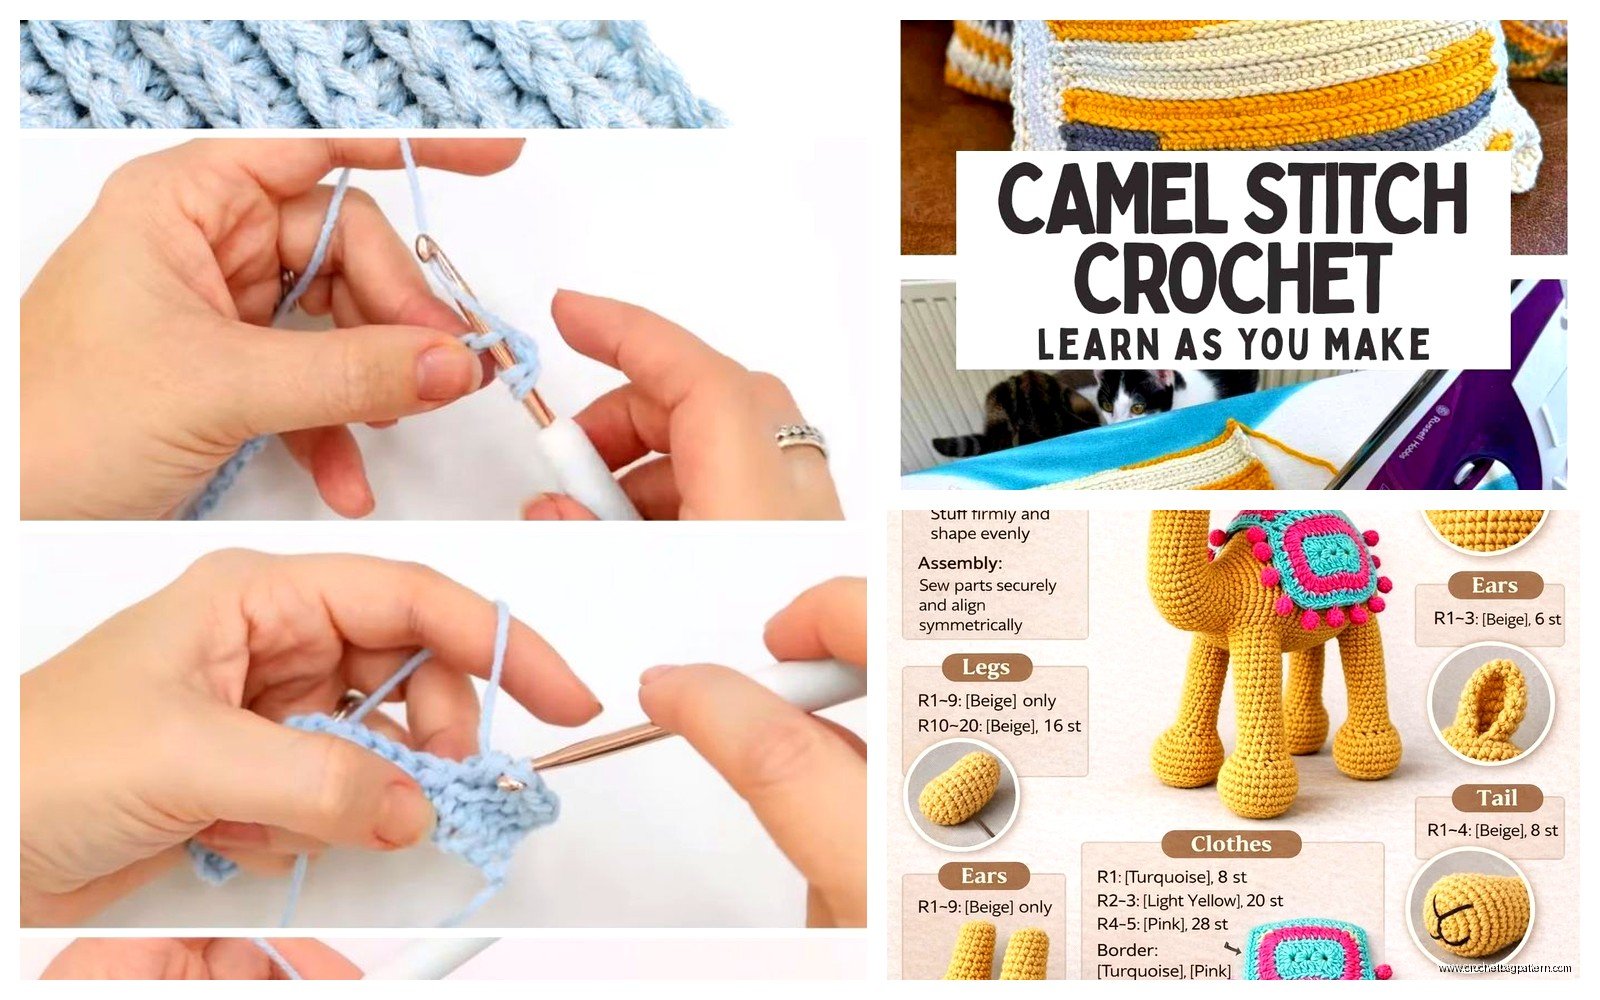
Yarn over, pull through (so now you have two loops on hook), yarn over again, pull through both loops. That’s it. That’s literally a camel stitch single crochet. You just keep doing that across the whole row, working into each third loop.
The annoying thing – and this drove me absolutely crazy – is that for the first like four or five rows you can’t really see the pattern developing. It looks kind of messy and you start thinking you’re doing it wrong or that the pattern is overhyped. You just have to trust the process I guess, which isn’t really my strong suit. I kept stopping to google “is my camel stitch wrong” and comparing photos. But around row six or seven it suddenly clicks into place and you can see that knit-look texture emerging.
tension and hand position stuff
Your tension matters more with camel stitch than regular crochet I think. If you crochet too tight, those third loops get really hard to find and even harder to get your hook into. I naturally crochet pretty tight so I had to consciously loosen up. My cat kept sitting on my lap while I was working on this which didn’t help because I’d tense up trying not to disturb her and then my stitches would get all tight again.
Some people hold their work differently for camel stitch. I started tilting my project slightly toward me so I could see those back bumps better. The lighting matters too – I could NOT do this at night with just my lamp, I needed actual daylight to see what I was doing.
which yarn actually works best
So I’ve tried camel stitch with a bunch of different yarns at this point. The Red Heart worked okay like I said. I also used Caron Simply Soft in like summer 2024 for a baby blanket and that showed the texture really nicely – I think it was the “ocean” colorway, that light teal blue. The slight sheen on that yarn actually highlighted the ridges.
Wool would probably be amazing for this but I haven’t tried it yet because expensive and also I’m lazy about hand washing. I did try it once with this chunky Bernat Blanket yarn and honestly it was too thick – the third loop was hard to distinguish from everything else. Stick with worsted weight or maybe DK weight. Fingering weight would work too but like… that’s gonna take forever and your eyes will hurt.
Cotton is interesting with camel stitch. I made a dishcloth with Lily Sugar’n Cream and the texture was really pronounced, almost stiff. Good for a dishcloth I guess, maybe not for a wearable.
counting and keeping track
This is where I always mess up with any crochet project but especially camel stitch because the stitches look kinda different. You need to count your stitches at the end of each row for the first bunch of rows to make sure you’re not accidentally increasing or decreasing.
It’s really easy to miss that last stitch at the end of the row because it doesn’t look as obvious as a regular single crochet. I use a stitch marker in my last stitch of each row – just move it up as I go. One of those little plastic ones, nothing fancy.
If you DO accidentally skip a stitch, you’ll notice your project getting narrower. If you accidentally work into the wrong spot and create an extra stitch, it’ll get wider. With the ribbed texture it’s harder to spot these mistakes until you’ve done several more rows, which is frustrating because then you have to decide if you’re gonna rip back or just live with it.
variations you can try
Once you get the basic camel stitch down you can mess around with it. Camel stitch half double crochet is a thing – same concept but you yarn over before you insert your hook, then work it like a hdc into that third loop. Creates a looser, drapier fabric with the same knit-look texture.
You can also alternate rows of camel stitch with rows of regular single crochet for a different effect. Or do camel stitch in stripes with different colors. I saw someone do camel stitch in the round for a hat and it looked cool but I haven’t tried that yet because working in the round already confuses me half the time.
There’s also something called the aligned camel stitch where you… actually I don’t totally remember how that works differently, I think it has to do with where you place your stitches to make them line up more? I tried it once and couldn’t see enough difference to bother with the extra mental effort.
common problems I had or saw people complain about
The edges can get wonky. Like the first and last stitch of each row sometimes don’t look as neat as the middle stitches. I just accepted this as part of the charm I guess, or you can add a border later to clean it up. A simple single crochet border around the whole thing works.
Your project might curl a bit, especially in the beginning. This is normal with ribbed textures because of the way the stitches pull. Blocking helps – I pinned out that baby blanket and sprayed it with water and let it dry and it laid flat after that. With the Red Heart blanket I just threw it in the washing machine on delicate and that relaxed it enough.
Sometimes you’ll accidentally work into the front loop or back loop instead of the third loop because your brain goes on autopilot. You’ll notice because that stitch will look different – flatter, not as raised. I usually just leave it unless it’s super obvious because life’s too short to frog back for one weird stitch.
Hand cramping is real with this stitch. Take breaks. I was binge watching The Bear while working on my spring 2022 blanket and I’d have to pause between episodes to stretch my hands. The repetitive motion of finding that third loop over and over is more strain than regular sc for some reason, maybe because you’re holding everything at a slightly different angle.
what to actually make with camel stitch
Blankets are the obvious choice because that knit look is cozy and the texture is nice. Scarves work great too – the ribbing gives it good drape and it’s reversible which is convenient. The texture looks identical on both sides.
I wouldn’t recommend camel stitch for amigurumi or anything that needs to be stuffed because the fabric has more stretch and gap than regular sc. But for flat projects or simple shaped things it’s perfect.
Cowls, headbands, washcloths, placemats, pillow covers – all good options. Someone told me they made a sweater with camel stitch but that sounds like a nightmare to me personally, all that counting and shaping while also trying to maintain the pattern.
hooks and other tools
I usually go up a hook size from what the yarn label recommends because camel stitch creates a denser fabric. Like if the yarn says use a H hook, I’ll use an I or J. This keeps it from getting too stiff and makes it easier to find those third loops.
A good hook with a smooth throat helps. I have these Clover Amour hooks that are ergonomic and they made a difference when I was working on bigger projects. The cheaper aluminum hooks work fine too though, I’m not gonna tell you to spend money on fancy hooks if you don’t want to.
Stitch markers like I mentioned. Maybe a row counter if you’re doing a project where that matters, though I usually just use a piece of paper and tally marks because I’m disorganized like that.
reading patterns that use camel stitch
Different patterns abbreviate it different ways. Some say “sc in third loop” or “sc in back bump” or just “camel stitch.” It’s all the same thing. Some patterns will specify “camel sc” vs “camel hdc” so pay attention to which stitch height they want.
If a pattern just says “camel stitch” with no other info, assume they mean single crochet version. That’s the most common.
Sometimes patterns will say “working in third loop throughout” at the beginning and then just say “sc across” for every row, meaning you should keep doing camel stitch for all those rows. Don’t switch back to regular sc unless they specifically tell you to.
combining with other stitches
You can mix camel stitch sections with other textured stitches for interesting effects. Like do a panel of camel stitch, then a panel of regular sc, then another camel stitch panel. The different textures create visual interest even in one color.
Or use camel stitch for the body of something and regular stitches for ribbing or borders. Though honestly camel stitch already looks like ribbing so that might be redundant, but whatever, your project your choice.
I tried doing stripes where I alternated one row regular sc and one row camel stitch and it created this subtle texture that was kind of cool. Not as dramatic as all camel stitch but faster to work up.
fixing mistakes without starting over
If you notice you worked into the wrong loop a few stitches back, you can sometimes just leave it. Seriously. Unless it’s super noticeable or affecting your stitch count, the overall texture usually camouflages small errors.
If you MUST fix it, you gotta frog back to that point. There’s no way to just redo one stitch in the middle without unraveling. This is true for all crochet but it’s extra annoying with camel stitch because you’ve been working so carefully to find those loops.
Take a picture of your work every few rows if you’re worried about losing your place or not being able to tell if it looks right. Then you can compare and see if the texture is developing consistently.
Sometimes what looks like a mistake is just the pattern settling in. Give it a few more rows before you panic and rip everything out. That’s advice I wish I’d followed more often instead of frogging back three times on that baby blanket because I thought it looked wrong but it was actually fine.