
Apr
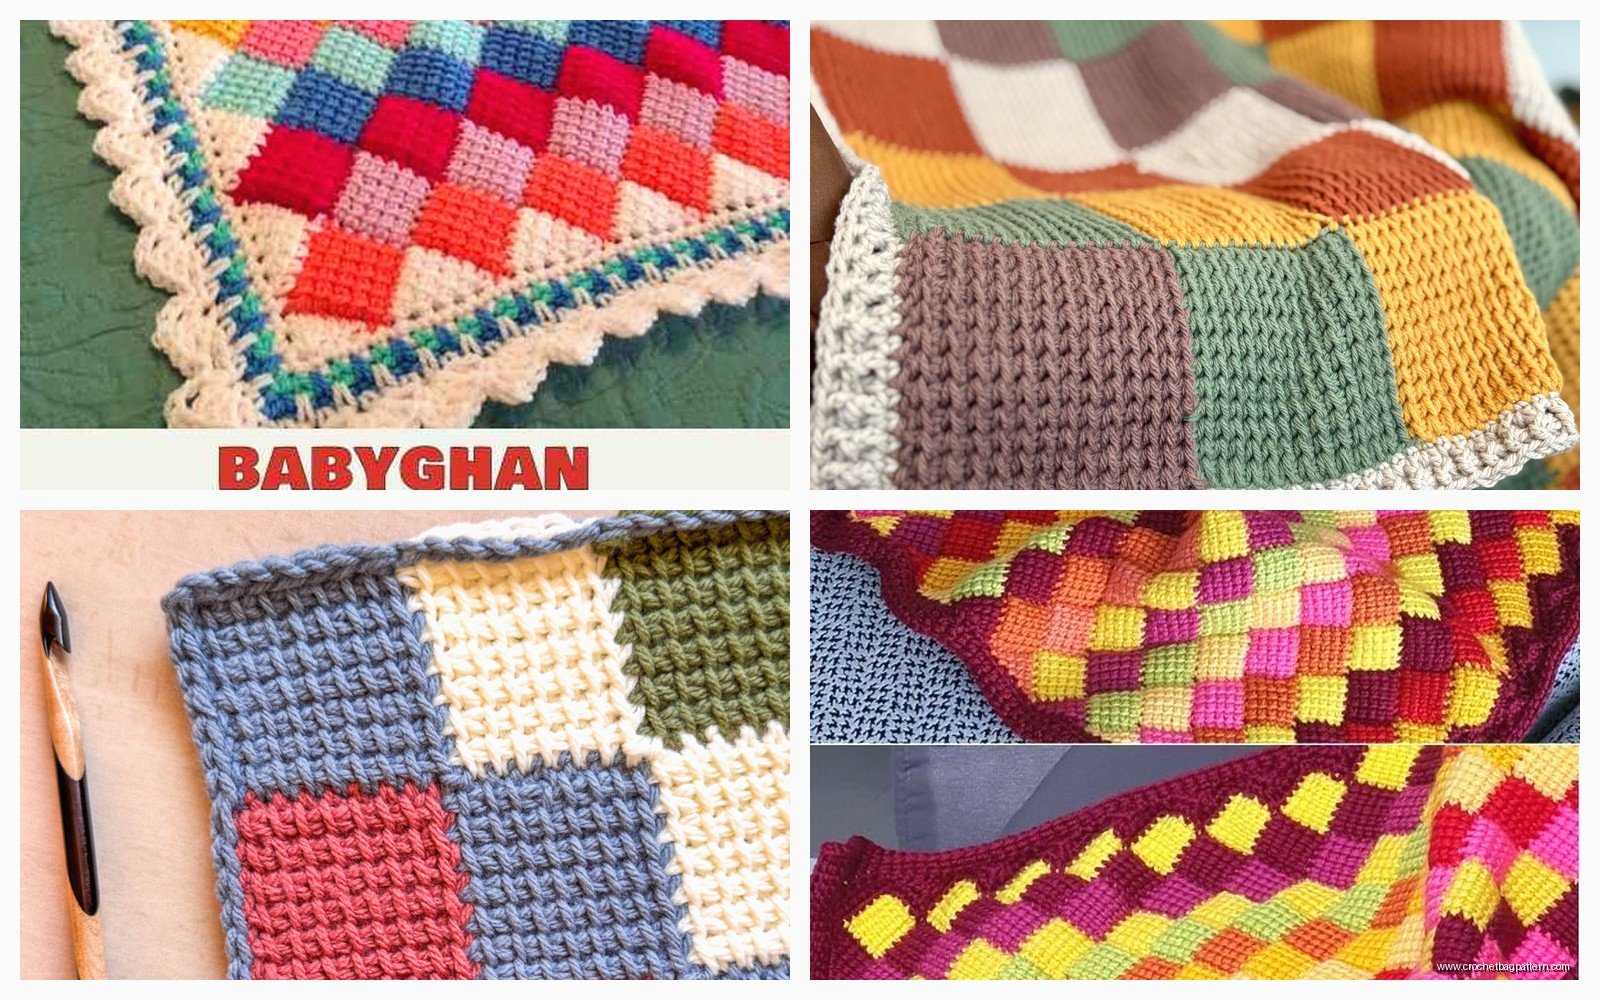
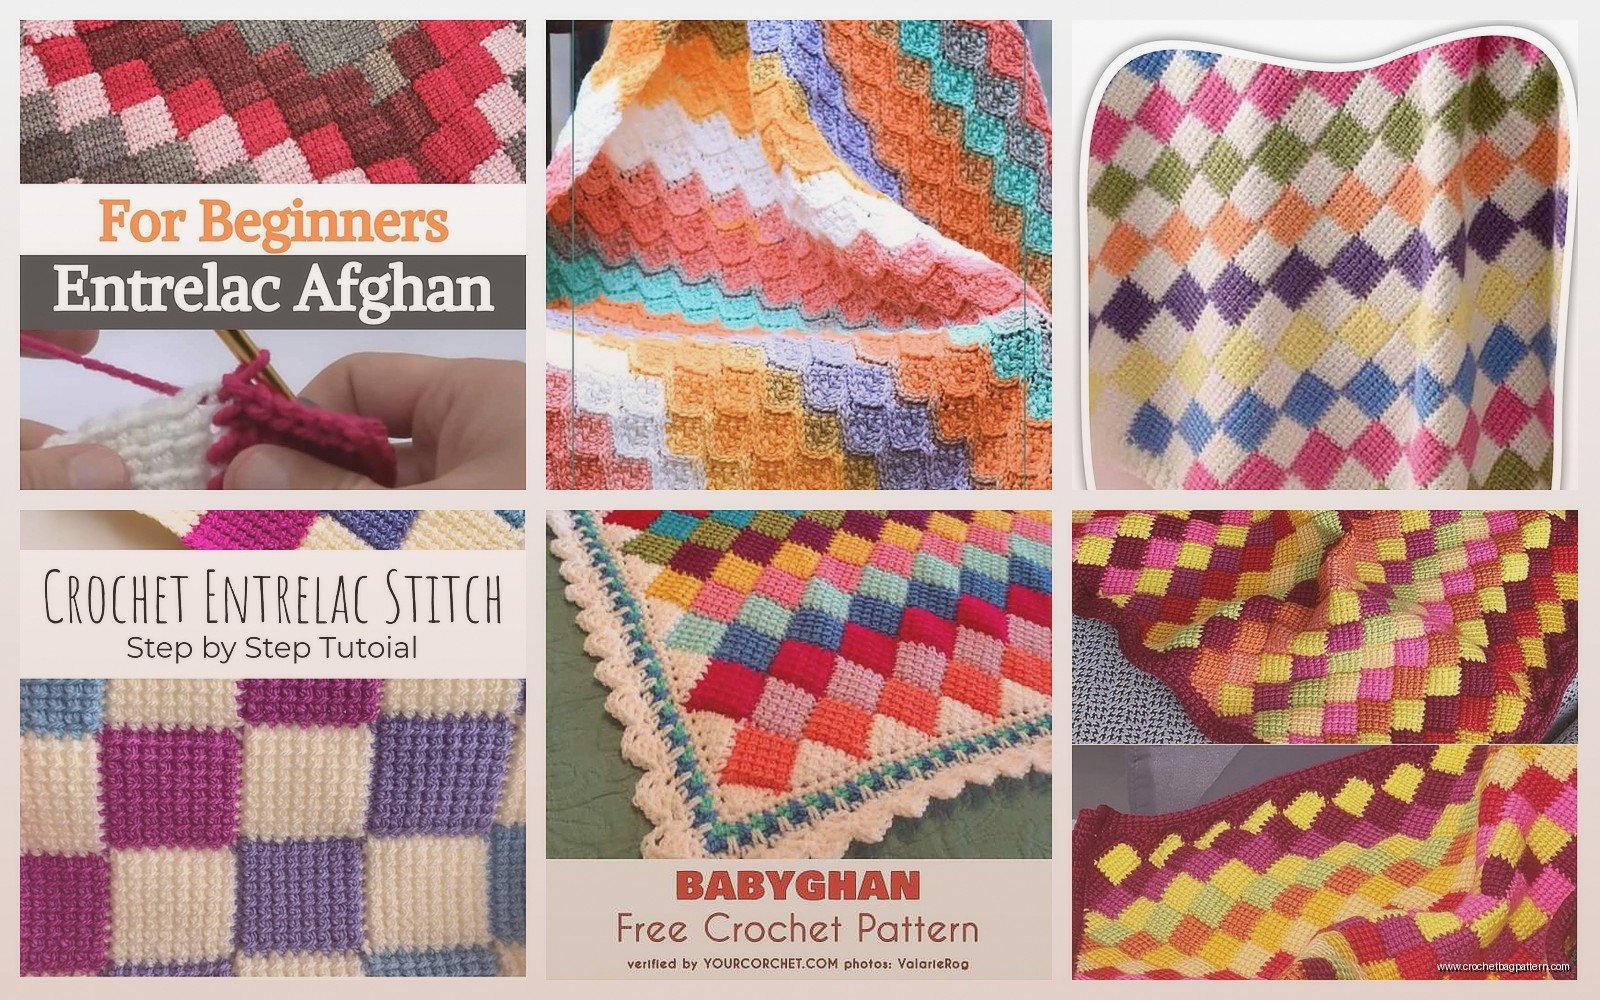
okay so entrelac crochet blankets
I made one of these during spring 2022 when I was stuck at home with a sprained ankle and honestly it kept me from losing my mind. The woven block pattern looks way more complicated than it actually is which is kind of the whole appeal tbh. People see it and think you’re some kind of crochet genius but really you’re just making a bunch of rectangles that stack on each other in a specific way.
So the basic idea is that entrelac creates this basketweave effect where it looks like strips are going over and under each other but you’re actually working in diagonal rows. Each block connects to the one before it as you go. It’s not like making granny squares where you do a million separate pieces and then sew them together which I absolutely hate doing because—anyway the blocks are already connected as you work which saves so much time.
what you actually need
For yarn I used Red Heart Super Saver in like four different colors because I’m basic and it was on sale at Michael’s. I think I had Soft White, Perfect Pink, Medium Purple and maybe Turqua? The nice thing about this pattern is you can use literally any weight yarn but you gotta adjust your hook size accordingly. I used a 5.5mm hook with the worsted weight.
You need:
- Yarn in however many colors you want (I’d say minimum 2 for the effect to show)
- Appropriate hook for your yarn weight
- Scissors
- Yarn needle for weaving in ends
- Patience because there’s gonna be a LOT of ends to weave in
That last point is actually what annoyed me most about the whole thing. Every single block means cutting your yarn and starting fresh with the next color if you’re doing a multicolor version. I had like 80+ ends to weave in at the end and I was watching The Crown just mindlessly weaving ends for what felt like hours. My cat kept trying to catch the yarn tail while I worked which didn’t help.
how the blocks actually work
Each block is basically a rectangle made with short rows. You’re building up one side while leaving the other side shorter so it creates this diagonal thing. The first row of blocks is the foundation and then every row after that picks up stitches from the previous row.
For the base triangles you start with like 2 stitches then increase until you hit your block width. I did 10 stitches wide for each block which gave me decent sized blocks without making the blanket take forever. You can do 8 or 12 or whatever just keep it consistent.
Here’s the basic process for one block after your foundation row:
- Pick up stitches along the edge of the previous block
- Work back and forth in rows decreasing as you go
- Each row you work one less stitch
- Join to the adjacent block as you work
The decreasing part is what creates that diagonal slant. You’re basically working a rectangle but at an angle if that makes sense.
starting the actual blanket
Okay so first you make base triangles across your starting chain. These are right-angle triangles that form the top edge of your blanket. Chain however many you need for your desired width. For a lap blanket I did 6 blocks across so that was like 60 chains plus a few extra for turning.
For each base triangle:
Row 1: Skip 2 chains, single crochet in next chain, turn
Row 2: Chain 1, single crochet in first stitch, single crochet in next chain of foundation, turn
Row 3: Chain 1, single crochet across (you now have 3 stitches), single crochet in next foundation chain, turn
Keep going like this adding one stitch each row until you reach your block width. So if you’re doing 10-stitch blocks you’ll have 10 rows for each triangle. Don’t cut yarn yet just slip stitch to move to the next triangle position.
the right-side blocks
After your base triangles you start the first full row of blocks. These are rectangles not triangles. You pick up stitches along the side of a base triangle then work back and forth while joining to the adjacent block.
This is where it gets a little brain-bendy but once you do one block you’ll get it. With right side facing pick up 10 stitches (or however many) evenly along the edge of the first triangle. Turn and chain 1.
Row 1: Single crochet across all stitches, turn
Row 2: Chain 1, single crochet in each stitch except last, single crochet 2 together using last stitch of your block and one stitch from the edge of the adjacent block, turn
Keep repeating row 2 until you’ve worked all the way down the side of that adjacent block. You’re essentially eating up the stitches from the side as you go which is how the blocks connect.
The thing nobody tells you is that keeping even tension while doing those decrease joins is actually kinda tricky. My first few blocks were too tight and puckered weird until I figured out I needed to keep it looser than felt natural.
left-side blocks and the pattern repeat
At the end of each row you need a left-side block which is basically the same as right-side but mirrored. You’re still picking up stitches and working rectangles but the decreases happen on the opposite side. This keeps your blanket from getting all wonky and lopsided.
Then you just keep alternating. Row of right-side blocks, row of left-side blocks, over and over. Each new row picks up from the previous row and the whole thing grows diagonally downward. It’s actually pretty satisfying once you get into the rhythm of it.
color changes and planning
For colors I didn’t really plan much tbh. I just grabbed whatever color felt right for the next block which gave it this random scrappy look. Some people do like planned gradients or specific patterns but I think the randomness makes it more interesting? Plus less brain power required.
If you DO want a pattern though sketch it out first on graph paper where each square is one block. Color it in how you want then follow your map as you work. I tried this for like five minutes before giving up because I’m impatient.
When you change colors just fasten off the old color and join the new color where you need to start the next block. Like I said earlier this creates SO many ends but there’s not really a way around it unless you do the whole thing in one color which kinda defeats the purpose of the woven look.
finishing the edges
The top and bottom edges are automatically finished because of how the triangles work but the sides can look a little stepped or jagged. You can either leave them as-is for a modern geometric look or add a simple single crochet border around the whole thing to even it out.
I did like 2 rounds of single crochet in a neutral color just to clean up the edges and it made a big difference. Work 3 single crochets in each corner to keep it from puckering.
size considerations
A lap blanket works great with 6 blocks wide by however many rows you want. I did mine until it was roughly 50 inches long which took maybe 12 rows of blocks? Didn’t measure exactly just kept going until it looked right.
For a bigger blanket like throw size you’d want 8-10 blocks wide. Just remember each additional block adds significant time because you’re multiplying the number of blocks exponentially basically. Going from 6 to 8 blocks wide doesn’t just add 2 blocks it adds that many for every single row.
common problems I ran into
The tension thing I mentioned earlier is real. If you crochet tight normally you’re gonna have issues with the blocks puckering where they join. Go up a hook size or consciously keep it looser.
Also counting stitches is important even though it’s boring. If your blocks aren’t all the same number of stitches wide the whole pattern gets thrown off and things don’t line up right. I had to rip out like 3 blocks at one point because I somehow ended up with 12 stitches instead of 10 and didn’t notice until the next row.
Running out of yarn mid-block is annoying. Try to start each block with a fresh amount of yarn so you don’t have to join in the middle. I learned this the hard way when I ran out halfway through a block and had to add in more yarn which created extra ends and looked messy.
time commitment real talk
This is not a quick project. My lap blanket took probably 30-35 hours total? Maybe more. Each block is quick individually like 10-15 minutes but when you need 70+ blocks it adds up fast. Good for mindless TV watching though. I got through like an entire season of something while working on mine I don’t even remember what.
The weaving ends part took almost 4 hours by itself which was soul-crushing. If I made another one I’d probably weave ends as I go instead of saving them all for the end but hindsight and all that.
yarn alternatives
Red Heart Super Saver is cheap and durable but not the softest. For something cozier you could use Caron Simply Soft or Lion Brand Vanna’s Choice. Both are acrylic but way softer than Red Heart. If you want natural fibers Wool-Ease is a nice wool blend that’s not too expensive.
I’ve seen people use cotton yarn like Lily Sugar’n Cream for summer-weight blankets which would be cool. The pattern would work up stiffer with cotton though so keep that in mind. Maybe better for a wall hanging than an actual blanket you wanna snuggle with.
modifications you can do
Instead of rectangles you can do squares for each block which creates a different look more like actual tiles. Just don’t decrease just work even rows until your block is square. Personally I like the rectangle version better because the diagonal lines are more obvious but it’s your blanket.
You can also do this in double crochet instead of single crochet which works up faster and creates a lacier look with more drape. The technique is exactly the same just use double crochet stitches throughout. Might be good for a lighter weight blanket.
Some people add a border between each block in a contrasting color which emphasizes the woven effect even more. You’d basically do a round of single crochet around each block before starting the next one. Sounds like a lot of extra work to me but could look really cool with the right color combo.
is it worth it though
Honestly yeah I think so even with all the ends to weave in. The blanket I made gets used constantly and people always comment on it asking how I did the weaving. It’s a good intermediate pattern because it teaches you about construction and how blocks connect without being so complicated you want to quit.
Just go into it knowing it’s a time investment and you’re gonna be weaving in ends forever. Also maybe don’t do it during a heatwave like I did because having a growing blanket on your lap in spring humidity is not ideal. But my ankle was propped up on the couch anyway so I didn’t have much choice about the lap situation.
The pattern is pretty forgiving too like if you mess up one block it doesn’t ruin the whole thing. You can just rip out that block and redo it without affecting anything else. Way less stressful than patterns where one mistake early on throws off everything that comes after.