
Mar
Making Crochet Eggs Without Losing Your Mind
So I made like fifteen of these things back in March 2022 because my sister wanted them for her Easter brunch and honestly once you get the hang of it they’re pretty straightforward but that first one took me forever because I kept making it lopsided. The pattern itself is basically just working in a continuous spiral which sounds fancy but really you’re just going in circles and increasing and decreasing at specific points.
You’re gonna need some yarn first obviously. I used Red Heart Super Saver in white and then some pastel colors they had on sale at Michaels because I wasn’t about to spend serious money on decorative eggs. The white was actually “Soft White” I think, not the stark white because that looks weird for eggs. I also grabbed some Caturra Cotton Yarn in mint green which worked really well because it had a nice matte finish instead of that shiny acrylic look. But honestly any worsted weight yarn works fine, just make sure it’s tight enough that the stuffing won’t show through.
What You Actually Need
A 4mm or G hook is what I used. Some people say use smaller for tighter stitches but my tension is already pretty tight naturally so the G hook worked. You need polyfil stuffing or honestly I used old fabric scraps from a t-shirt I was gonna throw out anyway for some of them and you literally cannot tell the difference. Scissors, a yarn needle for weaving in ends, and maybe some stitch markers but I just used a piece of contrasting yarn.
Oh and if you want them to stand up you need those plastic egg inserts or you can use dried beans or rice inside but then they get heavy and one of mine fell off the mantle and beans went everywhere while I was watching Succession so maybe don’t do that.
The Actual Pattern Part
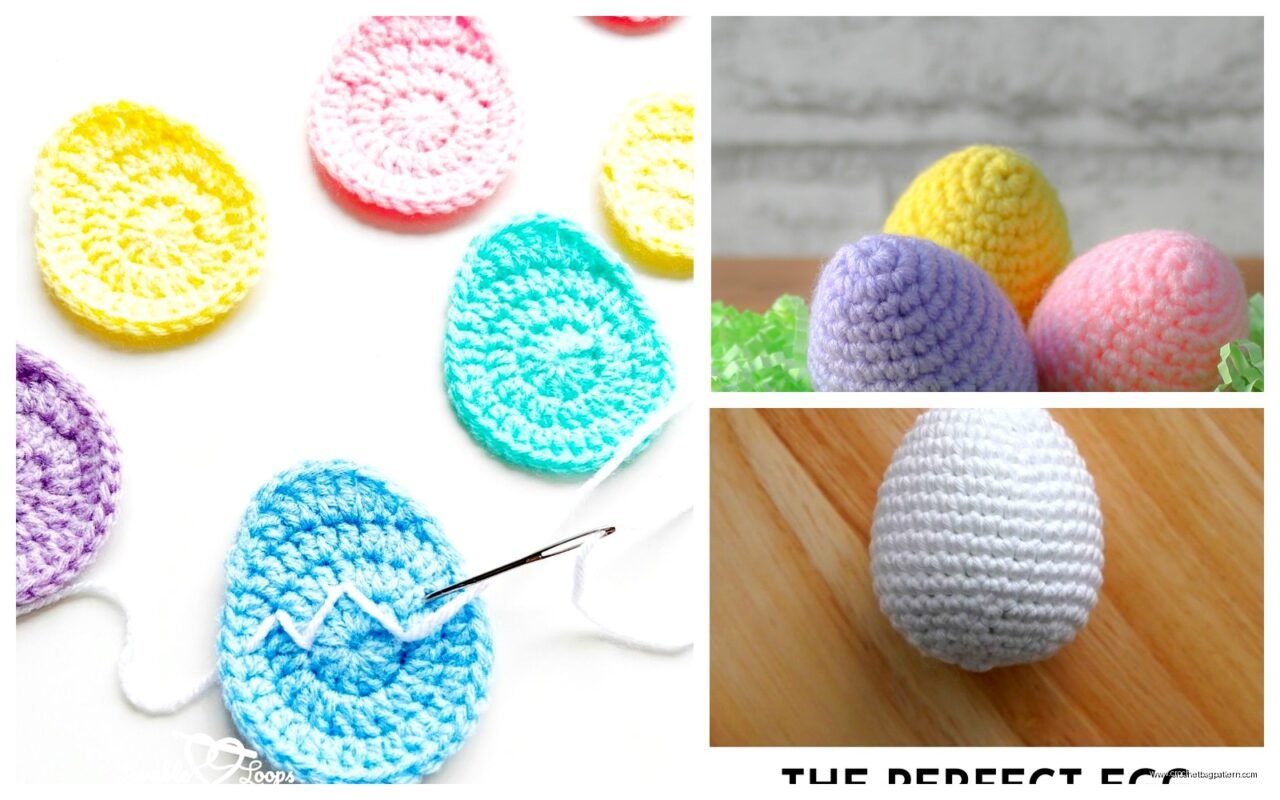
Start with a magic ring. If you don’t know how to do a magic ring just chain 2 and work into the first chain, it’s not gonna ruin anything. Work 6 single crochets into the ring and pull it tight.
Round 2 is where you increase in every stitch so you end up with 12 stitches total. Round 3 you do the standard increase pattern which is single crochet in first stitch then 2 single crochets in next stitch, repeat that around so you get 18 stitches.
Round 4 continues the pattern with sc in first 2 stitches then increase in the next one, repeat around for 24 stitches. Round 5 is sc in 3 stitches then increase, which gives you 30 stitches. For round 6 you do sc in 4 then increase for 36 stitches total.
Here’s the thing that really annoyed me though, counting these rounds when you’re working in a continuous spiral is absolutely terrible because you lose track of where you started. I ended up just eyeballing it after a while because the egg shape is pretty forgiving and if you’re off by one or two stitches nobody’s gonna notice unless they’re like measuring your decorative egg with calipers or something.
The Middle Section
After you get to 36 stitches you just work even for like 8-10 rounds with no increases or decreases. This creates the main body of the egg. I usually did 9 rounds because that looked right to me but if you want a longer egg do more, shorter egg do less. My cat kept trying to steal the yarn ball during this part which made everything take twice as long.
The middle section is honestly the easiest part because you’re just going around and around with single crochets and you can zone out and watch TV or whatever. Just make sure you’re keeping your tension consistent because if you suddenly get tighter or looser the egg will look lumpy.
Shaping The Bottom
This is where it gets slightly more involved but not really. You basically reverse what you did at the top but you’re decreasing instead of increasing. Start with sc in 4 stitches then decrease, repeat around. Then sc in 3 and decrease, then sc in 2 and decrease, you get the pattern.
The decrease I use is just the invisible decrease where you insert your hook through the front loops of the next 2 stitches, yarn over and pull through both loops, then yarn over and pull through both loops on your hook. Some patterns call it sc2tog but it’s the same thing basically.
Here’s where you gotta start stuffing. Don’t wait until the hole is too small because then you’re trying to shove stuffing through this tiny opening and it’s frustrating. When you get down to like 18 stitches start adding the polyfil or whatever you’re using. Pack it pretty firmly but not so tight that it stretches the stitches out and you can see the stuffing through the gaps.
Closing It Up
Keep decreasing until you have like 6 stitches left. At this point the hole should be pretty small. Add any last bits of stuffing you need, then either decrease all the way to nothing or just cut your yarn leaving a long tail and thread it through the remaining stitches, pull tight, and weave it in.
I usually leave like an 8 inch tail because I’m paranoid about it coming undone but you probably don’t need that much. Just weave the end through a few stitches in different directions so it’s secure and then trim it close.
Making Them Look Less Basic
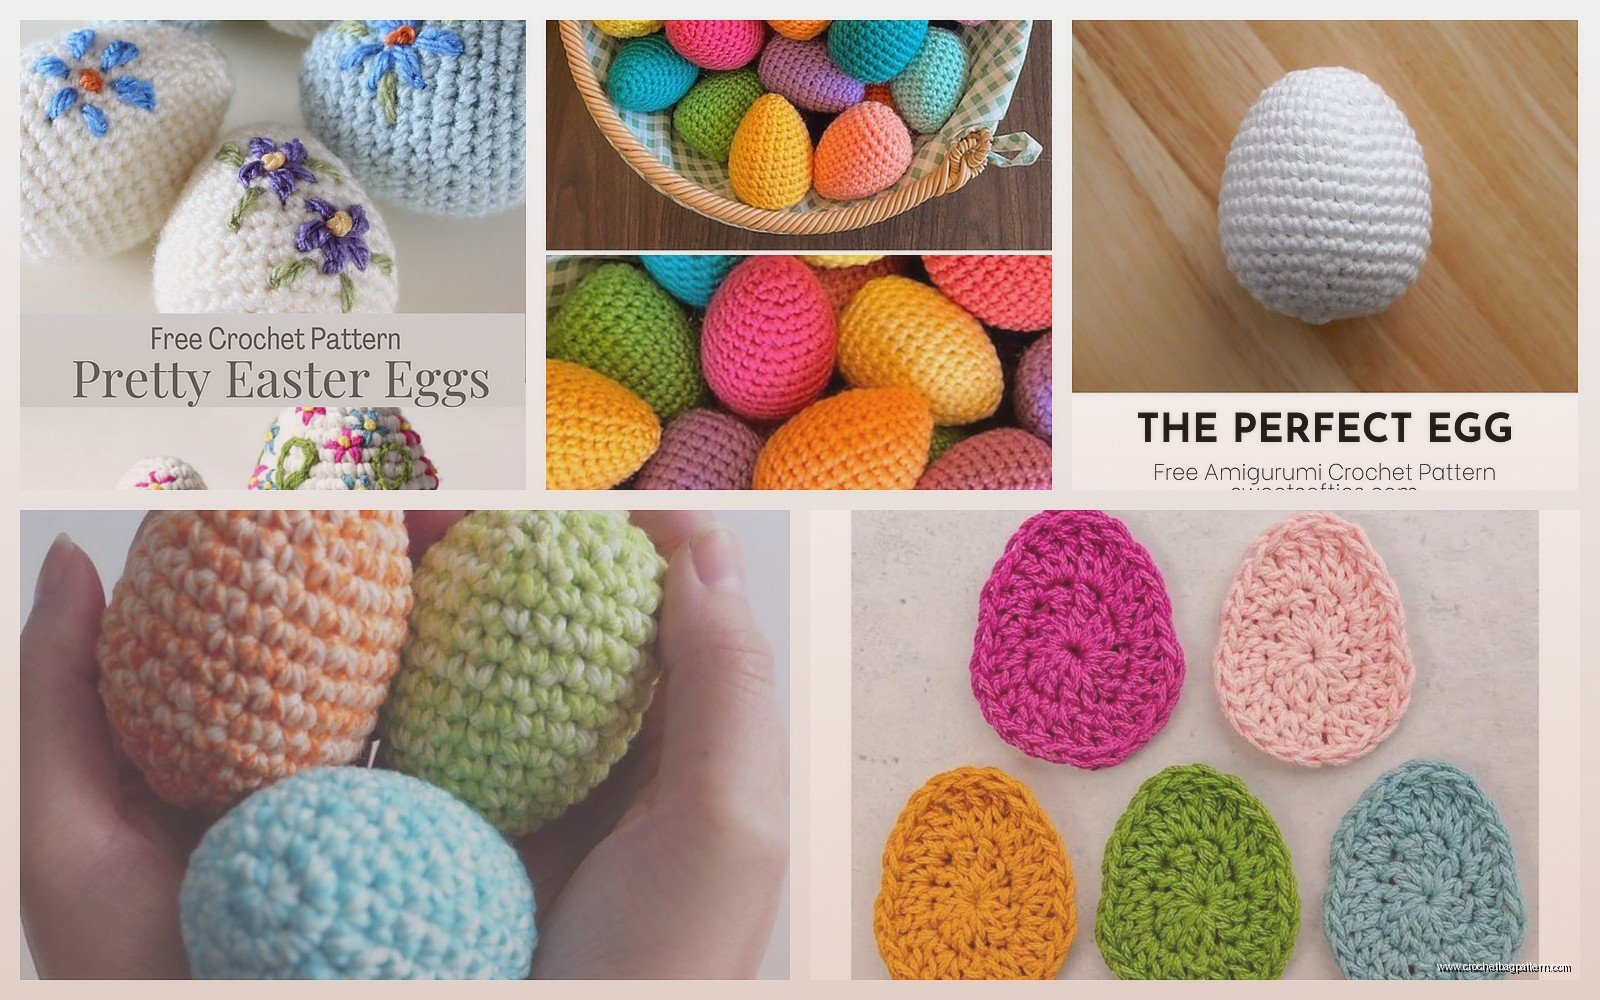
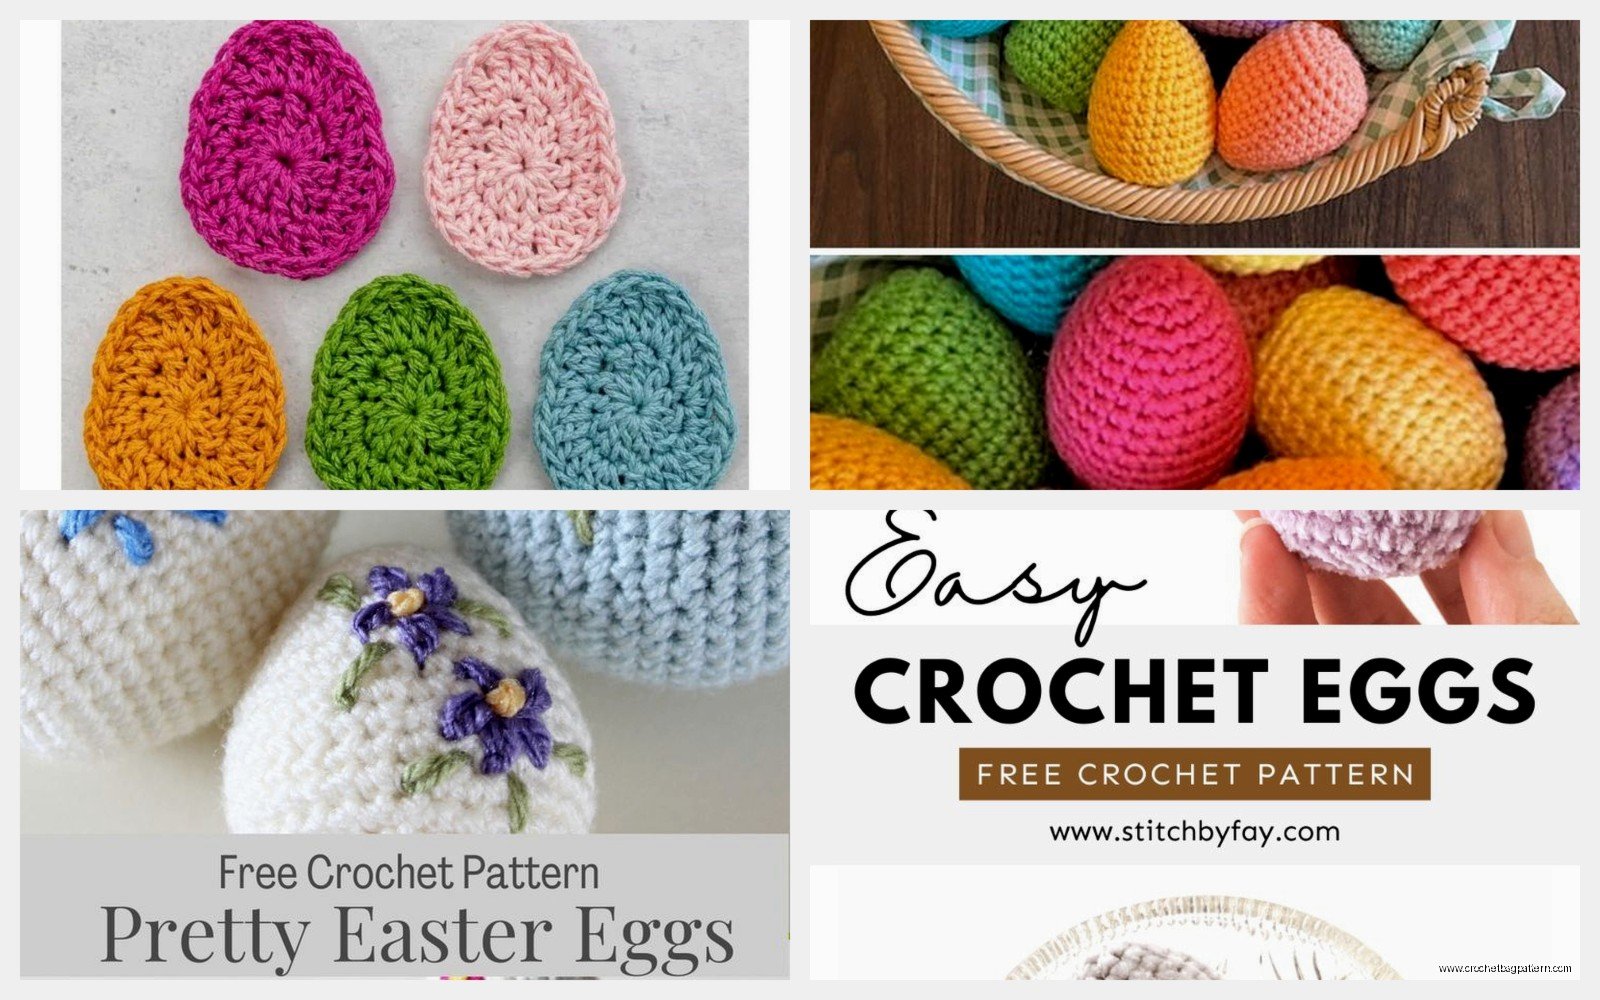
Plain single color eggs are fine but kinda boring so here’s what I did for the ones my sister actually liked. You can switch colors every few rounds to make stripes. I did some with white on top, then a few rounds of pastel pink, then back to white on the bottom. Just drop the old color and pick up the new one, carry the old color inside if you’re coming back to it or cut it and weave in the ends.
Another thing that looks cool is working in the back loops only for one round which creates a ridge line around the egg. I did this around the widest part of some eggs and it gave them a nice detail without being too fussy.
You can also add little decorations after. I embroidered some simple flowers on a few using the yarn needle and leftover yarn scraps. Just do lazy daisy stitches for petals and french knots for centers if you know how to do those, or just make up whatever looks flowery to you. Nobody’s grading these.
Some people crochet little leaves or bows and sew them on but that seemed like too much work to me. I did make one with ears and a little nose to turn it into a bunny egg which was actually pretty cute, just added two small oval shapes for ears and sewed them to the top, then embroidered a simple face.
Size Variations
The pattern I described makes an egg that’s roughly 3 inches tall which is a decent medium size. If you want smaller eggs just start with fewer stitches in your initial ring like maybe 5 instead of 6 and don’t increase as many rounds. For bigger eggs start with more stitches or add extra increase rounds at the beginning.
I made some tiny ones using fingering weight yarn and a smaller hook that were maybe inch and a half tall and those were actually really cute in a bowl all together. Used some Patons Grace yarn I had leftover from a failed sweater project. They work up super fast when they’re that small, probably 15 minutes each once you get in a rhythm.
What Went Wrong For Me
The first few eggs I made were weirdly pointy on one end because I was decreasing too fast. You want the decreases to be gradual so the egg has a nice rounded oval shape not like a cone shape. If yours is coming out pointy just work a few more even rounds before you start decreasing or decrease more slowly.
Also tension really matters with these even though I said the shape is forgiving. If your tension is all over the place the egg will be lumpy and weird looking. I had to restart one like four times because I kept switching between crocheting while sitting normally and crocheting while laying on the couch and apparently I crochet differently in those positions because the tension was completely different.
The stuffing showing through the stitches was annoying too. This happens if your stitches are too loose or if you’re using really dark stuffing with light yarn or whatever. Fix it by using a smaller hook, working tighter, or using stuffing that matches your yarn color. I actually dyed some polyfil with fabric dye once for a darker colored egg which sounds excessive but it worked.
How Long Does This Actually Take
Once you’ve made a few and you’re not constantly recounting stitches or ripping back, each egg takes maybe 30-45 minutes depending on size. The tiny ones are faster obviously, bigger ones might take an hour. If you’re adding decorations or embroidery add whatever time that takes.
I made those fifteen eggs for my sister over like three days just working on them while watching TV in the evenings. Could’ve done it faster but I wasn’t in a rush and also I kept getting distracted or running out of one color and having to dig through my yarn stash to find something else.
Yarn Suggestions That Actually Worked
Red Heart Super Saver is cheap and comes in a million colors so that’s always a safe bet. It’s acrylic so it’s easy to wash if your eggs get dusty sitting on a shelf for a year. The texture is a little squeaky but for eggs you’re not wearing it so who cares.
Lily Sugar n Cream if you want cotton, comes in good solid colors and some nice pastels. It’s less stretchy than acrylic which I actually liked for this project because the eggs held their shape better and felt more substantial.
I tried some I Love This Yarn from Hobby Lobby in their pastel colors and that worked fine too, basically the same as Red Heart just different color selection. Stay away from really fuzzy or textured yarns though because you want to be able to see your stitches clearly and fuzzy yarn makes that impossible.
Storage and Display Ideas
I keep mine in a cardboard box with some tissue paper between layers so they don’t get squished. They’re pretty sturdy once they’re stuffed but if you stack them they can get a little misshapen over time.
For displaying them you can put them in a bowl or basket, arrange them on a shelf, or my sister actually hung some of hers on her Easter tree which is apparently a thing people do. You’d need to add a loop at the top before you close up the egg if you want to hang them.
They also work as bowl fillers or you could scatter them on a table as part of a centerpiece or… I don’t know people use them for all kinds of things. Some people make them as stress balls which seems weird to me but whatever works.
Random Tips That Might Help
Mark your first stitch of each round with a stitch marker or scrap yarn even though you’re working in a spiral. It helps you keep track of where you are even if you’re not counting precisely.
Pull your magic ring really tight at the beginning so you don’t have a hole at the top of your egg. I’ve seen some where the starting hole is visible and it looks unfinished.
If you want your eggs to be washable use acrylic yarn and polyfil stuffing, not fabric scraps or rice or beans or anything weird. Then you can toss them in a lingerie bag and wash them on gentle if they get dirty.
Make a few practice eggs before you make ones you’re planning to give as gifts or use for something important. The first couple might be wonky while you figure out your tension and get the shape right.
You don’t have to follow the exact stitch counts I gave, those are just what worked for me. If your egg looks good with different numbers then do that instead. Crochet isn’t like baking where precise measurements matter that much for something like this.