
Mar
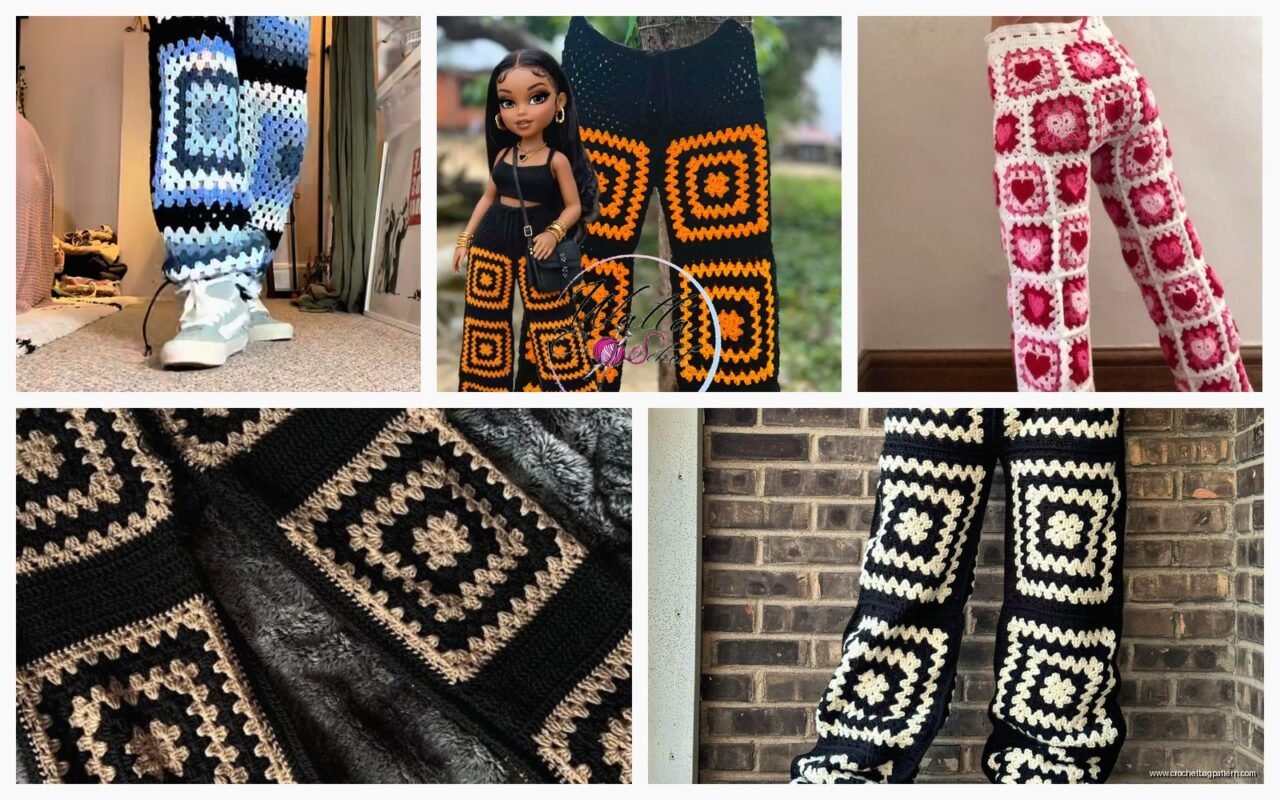
okay so granny square pants are basically what they sound like but actually making them wearable is trickier than you’d think. I made my first pair in spring 2022 when I was stuck at home with nothing to do and figured why not turn those squares I’d been making into something other than another blanket
the basic concept is you’re making individual granny squares and then joining them together in a way that creates pant legs and a waistband. sounds simple right? but the fit is gonna be weird if you don’t plan it out
What You Actually Need
so for yarn I used Red Heart Super Saver because honestly it’s cheap and I wasn’t sure this would even work. the colorway was I think Cafe Latte or something neutral like that. you need probably 6-8 skeins depending on your size and how long you want the pants. some people use cotton yarn like Lily Sugar’n Cream but that gets heavy fast and the pants will stretch out weird
hook size matters more than you’d think. I used a 5mm hook with the Red Heart which gave me squares that were about 4 inches each. you want them consistent or the whole thing looks lumpy
Planning The Layout
this is where it gets annoying because you can’t just wing it. you need to actually measure yourself and do math which like… I didn’t sign up for math when I started crocheting but here we are
measure your waist, hips, and the length from waist to ankle. then measure one of your completed granny squares. divide your measurements by the square size to figure out how many squares you need. I needed about 8 squares around for the waist and 10 for the hips because obviously hips are wider
each pant leg is basically a tube that gets wider at the top. so you’re making two tubes and then joining them with a crotch gusset which sounds more complicated than it is
The Squares Themselves
I just did basic granny squares nothing fancy. start with a magic ring, chain 3 counts as first dc, then 2 dc, chain 2, and repeat that 3 more times so you have 4 corners. slip stitch to join
round 2 is slip stitch to the chain space, chain 3, then in that same space do 2 dc chain 2 and 3 dc. that’s your corner. then chain 1 and in the next chain space do the corner again. keep going around
round 3 and beyond you’re just adding more dc clusters between the corners. I did 5 rounds total for each square but you might need more or less depending on your gauge
the thing that annoyed me most was keeping tension consistent across like 50+ squares. some of mine ended up slightly different sizes and I had to fudge it later when joining which made some seams bulky
Joining The Squares
you can whipstitch them together or single crochet them or even slip stitch. I did single crochet because it’s sturdy. lay out your squares first before joining anything trust me on this
for each leg I made a layout that was basically rectangular but tapered. the ankle part was 6 squares around, mid-calf was 7 squares, knee area was 8 squares, and thigh/hip area was 10 squares around. the length was 8 squares long
join them in strips first like you’re making vertical columns then join the columns together to make a flat piece. then fold it and join the side seam to create the tube for each leg
The Crotch Situation
okay so this is where it gets real. you can’t just sew two tubes together at the top and call it pants because that’s not how pants work anatomically. you need a crotch seam and probably a gusset
I made two small granny squares for the gusset or you could do one diamond shaped piece. basically you’re filling in that space between the legs. join one edge of the gusset to the inseam of one leg and the other edge to the inseam of the other leg
then join the back seam and front seam from waist to where the gusset starts. this was fiddly and I had to redo it twice because the first time the crotch was way too low and it looked like MC Hammer pants which wasn’t the vibe I was going for although honestly might work for some people
Waistband Options
you need something to keep these pants up. I did a simple elastic waistband by folding over the top row of squares and single crocheting through both layers to create a casing then threading 1 inch elastic through
measure the elastic to your actual waist not your hip measurement and sew the ends together before you close up the casing completely
some people do drawstring waistbands which would probably work better honestly because elastic can roll and bunch up with the bulkiness of the granny squares. if I made another pair I’d do a drawstring with those cord end things you can buy at craft stores
Fitting Problems You’ll Run Into
the hips are gonna be the issue. granny squares don’t stretch much especially if you used acrylic yarn. I had to add an extra column of squares on each side after trying them on because I couldn’t get them over my hips even though the waist fit fine
also the crotch depth is hard to get right. too shallow and it’s uncomfortable and you can’t sit down. too deep and you get saggy weird fabric between your legs. I ended up with mine slightly too deep but whatever it works
the length is easier to adjust. you can just add or remove a row of squares from the bottom. I made mine cropped because full length looked too heavy and also my cat kept attacking the yarn while I was working on the ankles which was distracting
Actually Wearing Them
these are not everyday pants let’s be real. they’re heavy, they don’t breathe well if you used acrylic, and they’re kind of stiff. I wear mine around the house or like to the grocery store if I’m feeling bold
they work better as a statement piece or for festivals or whatever. I saw someone on instagram wearing granny square pants to a music festival with a crop top and it actually looked cool
washing is a whole thing. I hand wash mine in cold water and lay flat to dry because I’m scared they’ll fall apart in the machine even though Red Heart can technically handle it. they take forever to dry because there’s so much fabric
Yarn Weight Considerations
I mentioned this before but it matters. worsted weight acrylic like Red Heart or Caron Simply Soft is probably your best bet. cotton gets too heavy and stretches out. I tried making a pair with some Bernat Blanket yarn once which was a mistake because they were so thick and stiff I couldn’t even bend my knees properly
fingering weight would take forever and you’d need tiny squares. sport weight might work but you’d need a lot more squares. honestly just stick with worsted
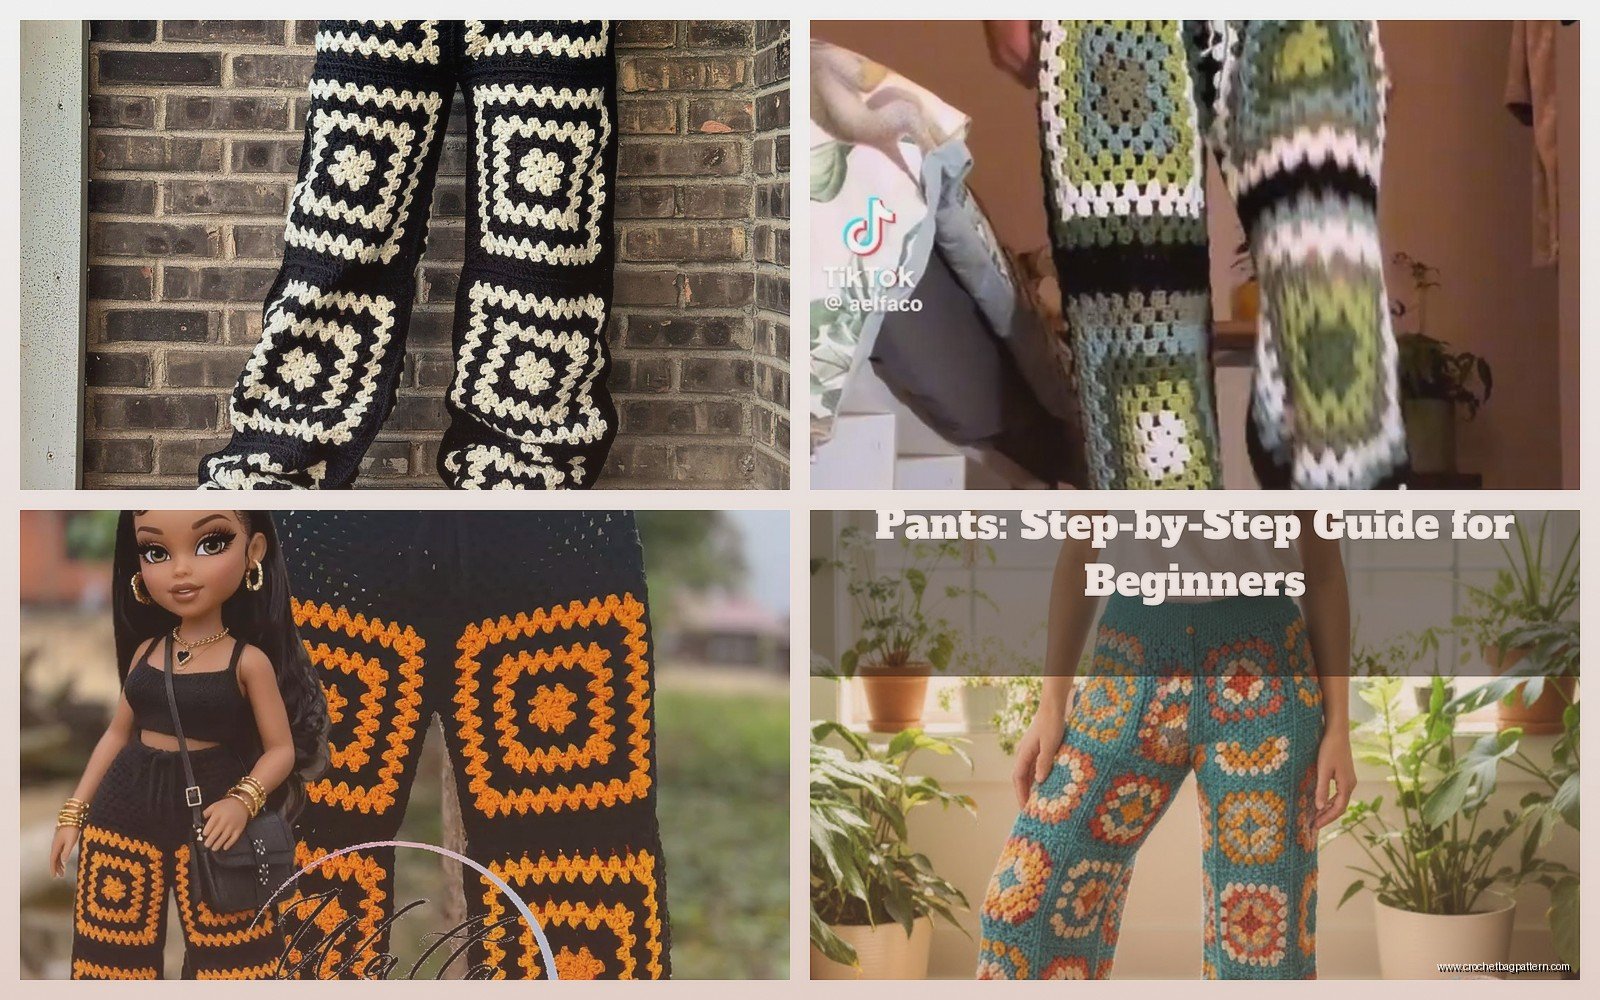
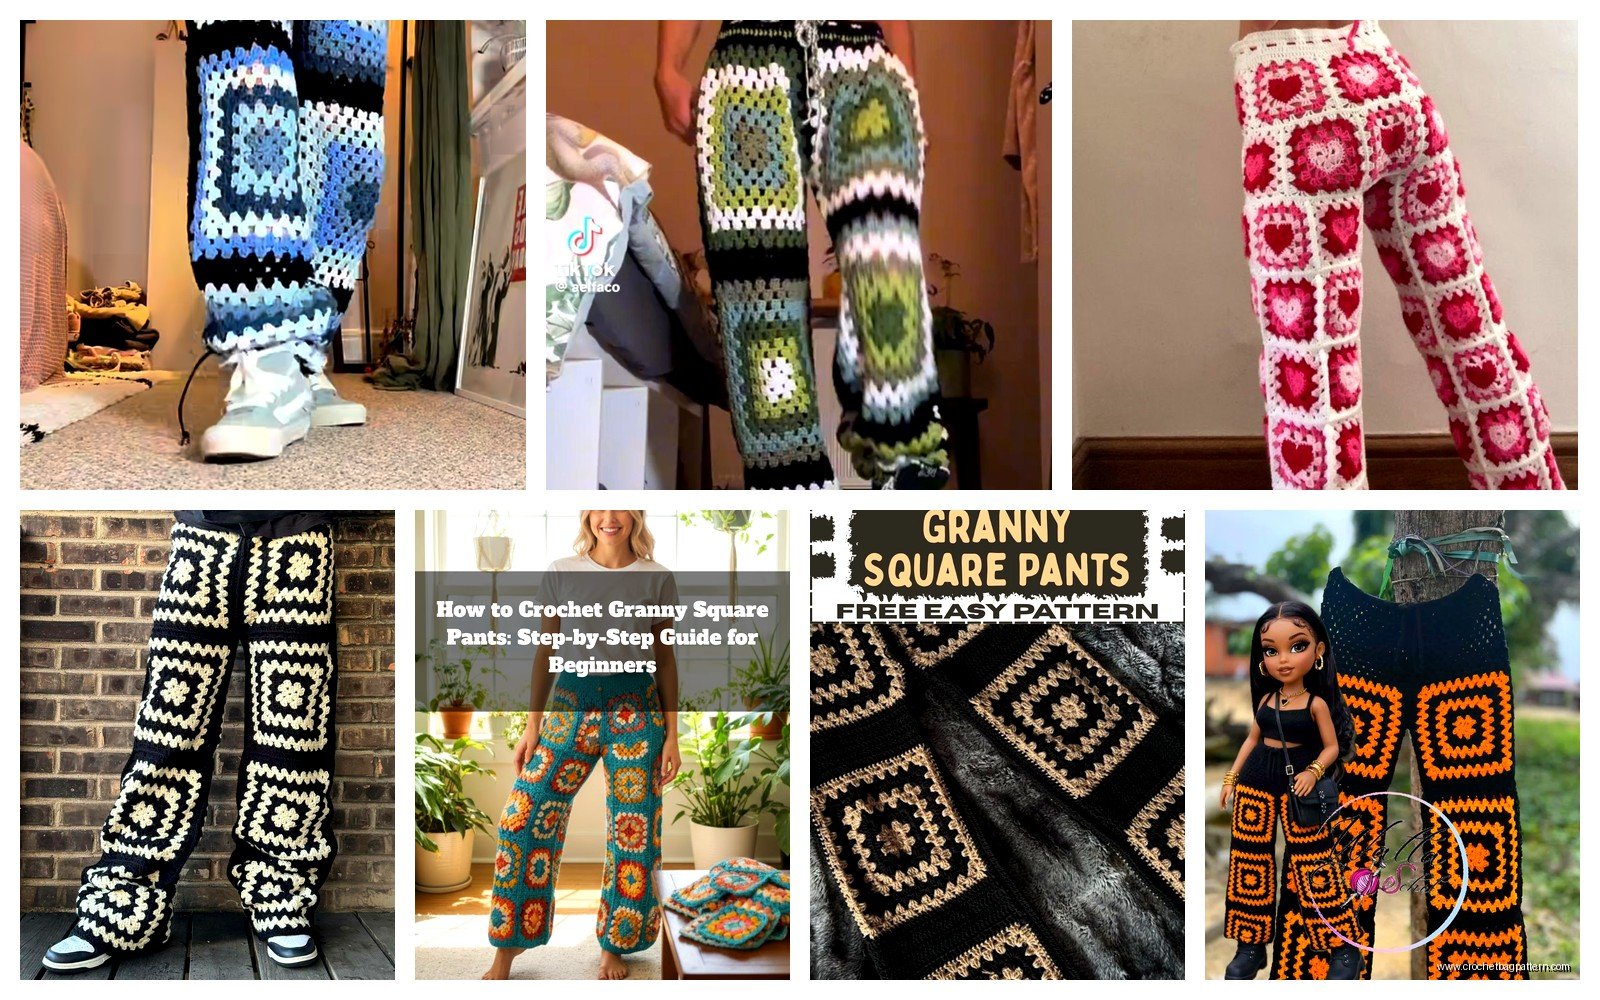
Color Planning
you can do all one color which is easiest or you can get wild with it. I did mine in three colors kind of randomly scattered which looked okay but not as planned as I thought it would. if you want a pattern like stripes or color blocking you gotta plan that out on paper first
ombre effect could be cool where the ankles are one color and it gradually changes as you go up. or you could do each leg a different color. or checkboard pattern. whatever
just make sure all your yarn is the same weight and brand ideally because different yarns have different gauges even if they’re labeled the same weight
Seaming Tips
use the same yarn you made the squares with for seaming so it blends in. I ran out of my main color halfway through joining and had to use a slightly different dye lot and you can tell if you look close
don’t pull your seaming stitches too tight or the fabric won’t have any give at all and the seams will be super bulky. but also don’t make them too loose or you’ll have gaps. it’s a balance
I was watching Stranger Things while I did all the seaming which took like three entire evenings because there are so many seams and it’s boring work
Variations On The Basic Pattern
you could do different square patterns not just basic granny squares. solid squares would be warmer and less holey. or you could do different motifs entirely like hexagons though that would be harder to fit together
some people do the waistband and cuffs in ribbing instead of more squares which would be more fitted and stretchy. you’d just single crochet in the back loops only to create fake ribbing or actually learn how to do proper crochet ribbing
you could add pockets by leaving an opening in the hip seam and crocheting a pocket bag behind it. I didn’t do this because it seemed like too much work but it would make them more functional
wide leg version would use more squares around the ankle so they’re flowy. or you could taper them really narrow for like a skinny jean look though that might be hard to get on and off
Time Investment
just so you know this takes forever. each square took me maybe 15 minutes and I needed like 60 squares total so that’s 15 hours just for the squares. then joining took another 6-8 hours. then the waistband and fixing mistakes and adjusting the fit was a few more hours
so you’re looking at probably 25-30 hours total for a pair of pants which is why I haven’t made a second pair even though I keep saying I will
but I guess if you’re making squares while watching TV or whatever it doesn’t feel as long. I just worked on it bit by bit over a few weeks in 2022 when I had more free time than I do now
Sizing For Different Bodies
this pattern concept works for any size really you just adjust the number of squares. bigger sizes need more squares around and possibly longer legs. smaller sizes need fewer squares
the nice thing about granny squares is you can customize exactly. like if you have a big difference between your waist and hip measurements you can grade the number of squares more gradually. or if you have long legs you just add more rows of squares
petite people could do smaller squares with a smaller hook and thinner yarn. plus size folks might want to add extra width in the hip and thigh area and maybe make the waist more adjustable with a longer drawstring
I’m pretty average size and my measurements worked out to needing that 8-10 square range but everyone’s different so you gotta do your own math unfortunately
the pattern is more like a concept than a specific set of instructions which is honestly how I approach most crochet anyway. I never follow patterns exactly I just use them as a starting point and figure it out as I go which sometimes works and sometimes means I have to redo stuff but that’s part of it I guess