
Mar
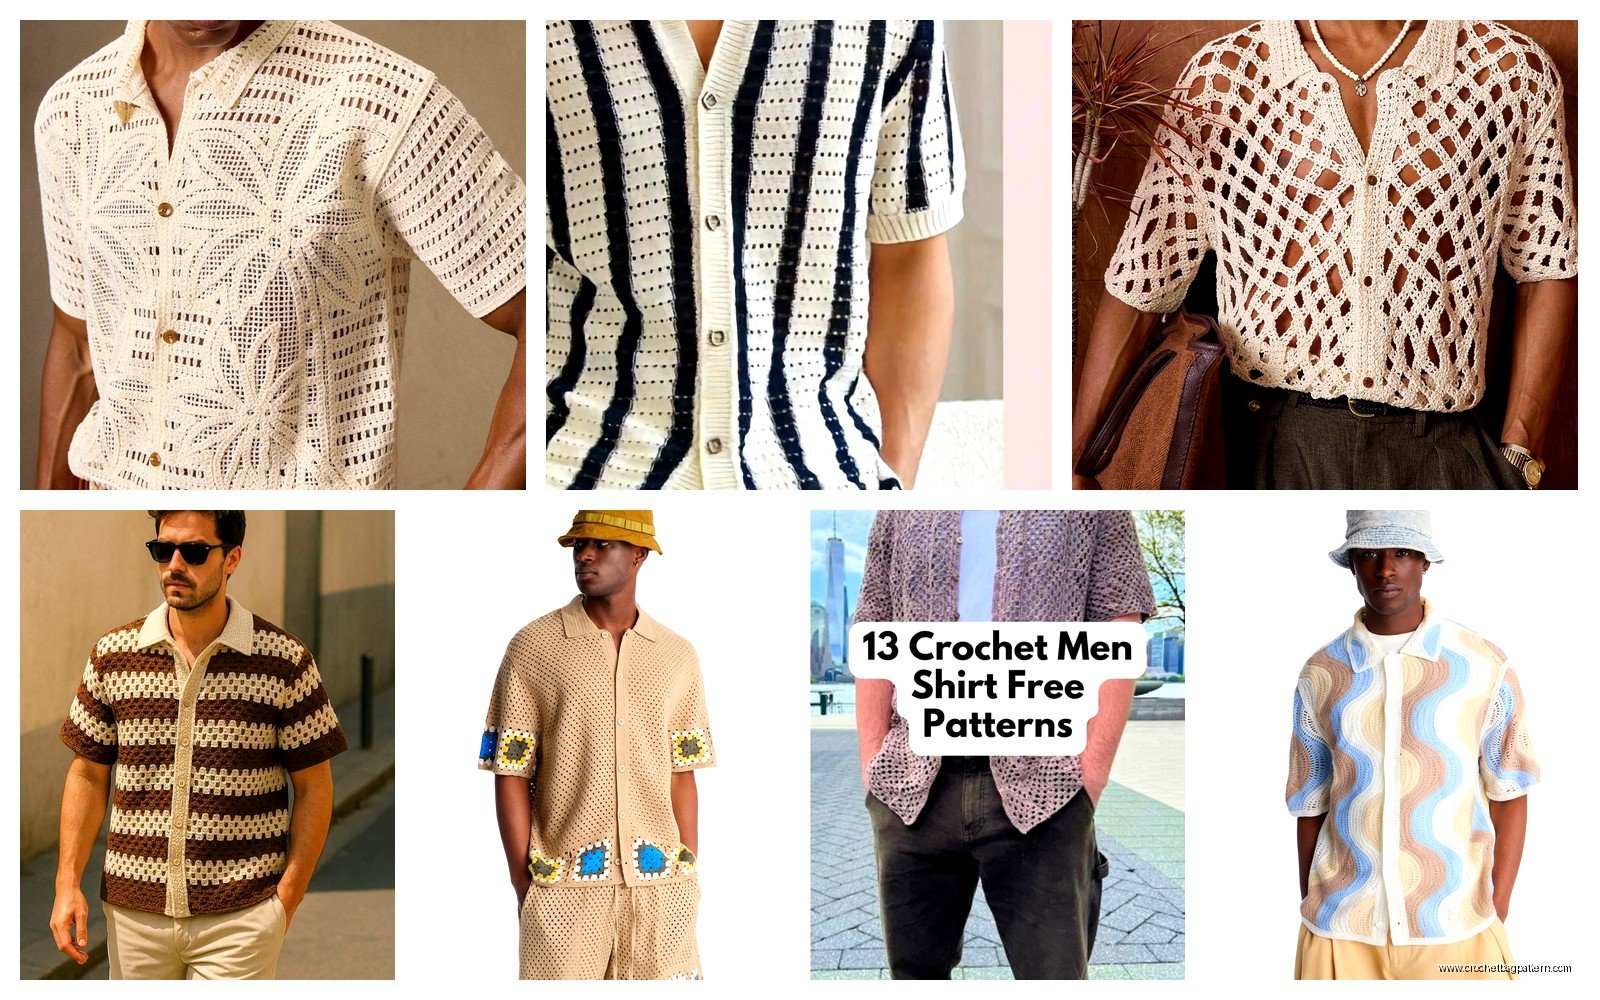
Making Men’s Crochet Shirts That Actually Look Good
So I made my first actual wearable men’s crochet shirt in spring 2022 and honestly it turned out way better than I expected but the sleeves were a nightmare. I was using this Red Heart Super Saver in like a grey heather color because I had a ton of it leftover from making blankets and I figured why not, it’s durable and guys actually wear their clothes hard you know?
The main thing with men’s shirts is you gotta think about the fit completely differently than women’s patterns. Most crochet garments naturally have this flowey thing going on which is fine for some styles but guys generally want something that looks more structured. Not tight exactly but like it has a shape that makes sense.
Picking Your Base Pattern Style
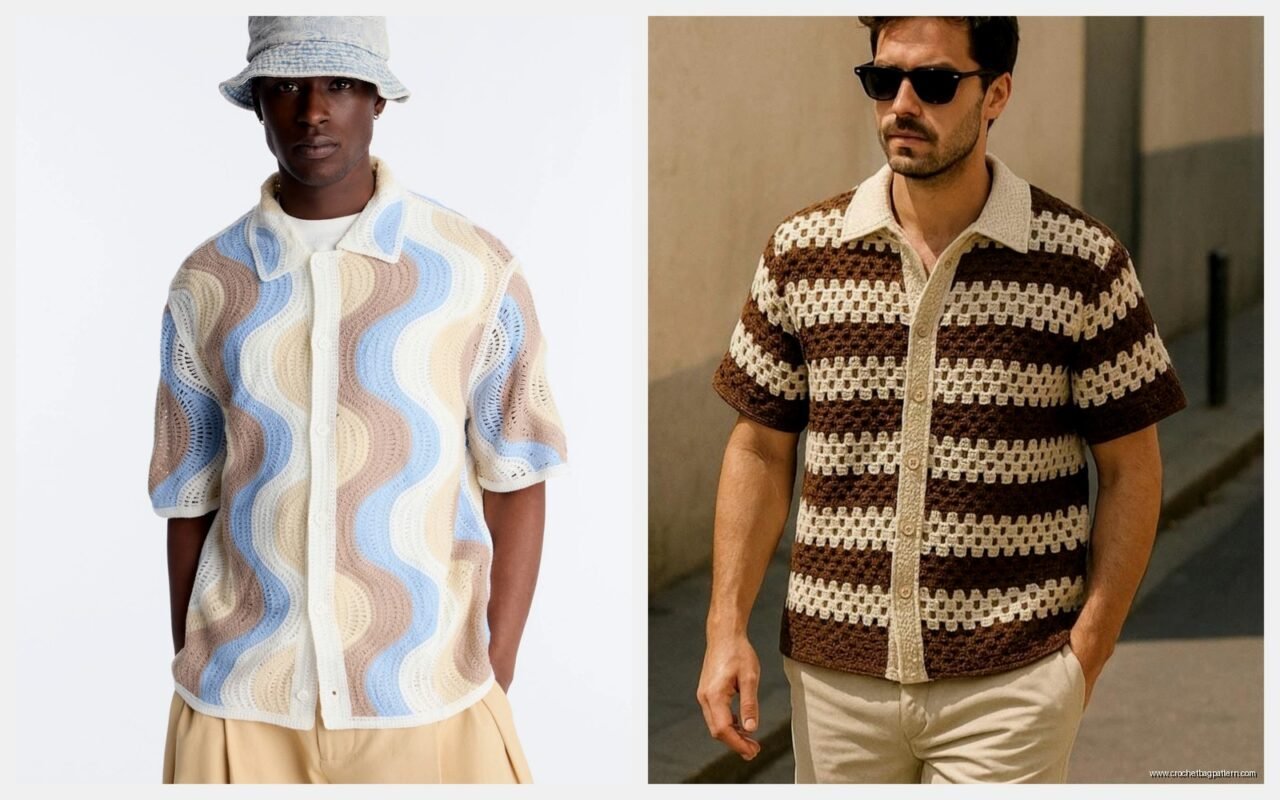
There’s basically three types that actually work for modern men’s shirts. The camp collar short sleeve which is having a moment right now, the basic crew neck pullover, and the button-up vest situation. I’ve made all three and the camp collar is honestly the most forgiving if you’re not super experienced with garment construction.
For the camp collar style I used a modified granny square approach but made the squares really tight. Like way tighter than you’d normally do. Used a 4mm hook with worsted weight Caron Simply Soft in that “Bone” color. The drape was perfect, not too stiff but definitely not floppy. My cat kept trying to lay on it while I was blocking it which was super annoying.
The pullover style needs more planning because you’re dealing with a continuous piece and the neckline has to actually fit over someone’s head without stretching out. I learned this the hard way. Made one in summer 2024 for my brother and had to literally rip out the entire neck ribbing three times because it kept being either too tight or so loose it looked ridiculous.
Gauge Is Actually Important Here Sorry
I know everyone says gauge doesn’t matter for blankets and stuff but for men’s shirts it really does. Guys are way more particular about fit than they admit. If the armholes are even half an inch too small it’s gonna be uncomfortable and they just won’t wear it.
What I do is make a gauge swatch that’s at least 6 inches square. Yeah it’s boring but you need it. Then I actually wash it the same way the shirt will get washed because yarn behaves differently after water hits it. Red Heart especially gets softer but also grows a bit.
For a medium men’s size you’re usually looking at about 40-44 inches around the chest. Large is more like 46-50 inches. But measure the actual person if you can because sizing is all over the place depending on body type.
Stitch Patterns That Don’t Look Grandma-ish
This is the thing that annoyed me the most about finding patterns online. Everything was either super basic single crochet which takes forever and is kinda boring, or it had all these lacy feminine details. Like no, guys don’t want pineapple motifs on their chest.
The moss stitch is your friend here. It’s just alternating single crochet and chain stitches but it creates this really nice texture that looks almost woven. Works great for the body of a shirt and it’s not too dense so it’s actually wearable in warm weather.
Half double crochet in the back loop only is another good one. Creates these horizontal ridges that look kinda like ribbing but way easier to work up. I used this for a vest in fall 2023 with Lion Brand Wool-Ease in “Fisherman” and it looked legit professional.
The lemon peel stitch also works if you want something with more visual interest. It’s single crochet and double crochet alternated and staggered on each row. Creates a really cool bumpy texture that reads as masculine somehow? Hard to explain but it just works.
Construction Methods
You can either work in pieces and seam them together or work it in the round. I usually do pieces because I like being able to adjust as I go and also seaming gives you more structure which helps with the fit looking intentional.
For a basic pullover I make the back panel first. Start at the bottom with ribbing, usually just back loop half double crochet for like 2-3 inches. Then switch to your main stitch pattern and work straight up until you hit the armhole depth. This is usually around 14-16 inches from the bottom depending on the size.
Armhole shaping is where it gets tricky. You gotta decrease on both sides to create that curve but not so much that it’s tight. I usually slip stitch across the first 3-4 stitches, then work across leaving the last 3-4 unworked. Then decrease one stitch on each end every other row for like 3-4 rows. Then work straight to the shoulder.
The front panel is the same as the back until you get to the neck opening. I typically start the neck shaping about 3-4 inches before the shoulder. Work across to the center, then work each side separately. This part always feels weird because you’re basically making two narrow columns but it works out.
Sleeves Are The Worst Part
Okay so sleeves. This is what I was saying earlier about spring 2022. The sleeves on that first shirt were so frustrating because I couldn’t get them to hang right. They kept twisting or bunching at the shoulder seam.
The trick I finally figured out is you gotta make them wider at the top than you think. Like way wider. The cap of the sleeve needs to have ease built in so it drapes over the shoulder naturally. I usually make the sleeve cap about 2 inches wider than the armhole measurement.
For short sleeves which are easier, start at the shoulder with like 60-70 stitches for a medium depending on your gauge. Work straight for about an inch, then start decreasing evenly on both ends. You want to lose maybe 20 stitches total by the time you get to the cuff which is usually 7-8 inches down for a short sleeve.
Long sleeves are the same concept but you decrease more gradually over like 16-18 inches. And you gotta add ribbing at the cuff which means switching to a smaller hook usually. I go down one hook size for cuffs and neckbands.
The Camp Collar Shirt Thing
This style is actually way more forgiving and honestly looks more modern. You make it basically like a cardigan but with a specific collar shape. I watched a lot of That 70s Show while making one of these which is funny because it’s totally that era’s vibe.
Work the back panel same as before but the front is split from the beginning. Make two front panels that mirror each other, each one about half the width of the back plus an inch or two for the button band overlap.
The collar is just a wide band that folds over. I usually make it about 4 inches wide before folding. Start at one front edge, work across the neck opening, down the other front edge. Then fold it in half and tack it down at the shoulder seams so it lays flat.
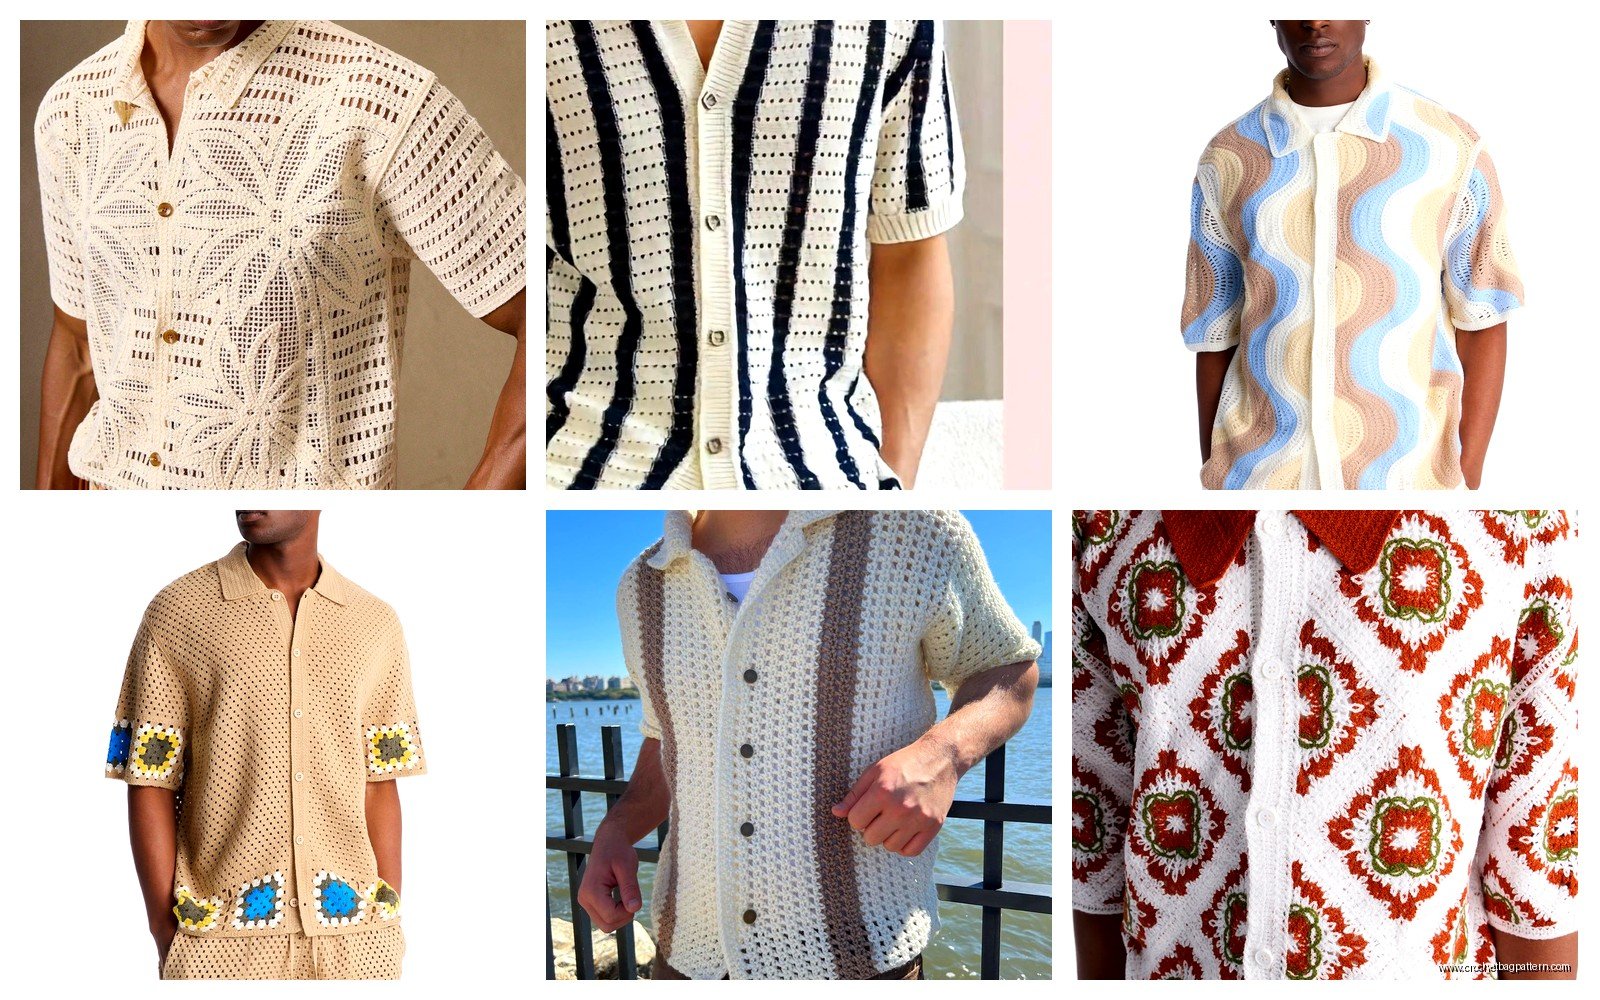
For this style I really like Paintbox Yarns Cotton Aran. It’s got this really nice crisp hand that works perfect for collars and button bands. Comes in a million colors too. I made one in this deep rust color that looked amazing.
Buttonholes And Finishing
If you’re doing buttons you need to plan the buttonholes while you’re making the button band. I space them about 3-4 inches apart usually. For the buttonhole itself just chain 2 or 3 depending on button size, skip the same number of stitches, then continue across. On the next row work into the chain space to reinforce it.
Buttons are important for the whole look. Don’t use those cheap craft store buttons. Get wooden ones or horn buttons or even vintage ones from a thrift store. Makes such a difference in the finished look.
Seaming I do with a yarn needle using mattress stitch for the side seams and shoulders. Takes forever but it’s invisible which matters for something someone’s gonna wear. For sleeves I pin them in first then whip stitch them because the curved cap is annoying to mattress stitch.
Sizing Adjustments
If you need to make something bigger just add stitches in multiples of your stitch pattern repeat. Like if you’re using moss stitch which is a 2-stitch repeat, add stitches in multiples of 2. Same with making it longer, just work more rows before starting the armhole shaping.
One thing about men’s sizing is the shoulders are usually broader proportionally than women’s patterns account for. So even if the chest measurement is right, check the shoulder width. Should be around 18-20 inches across the back for a medium, measured from shoulder seam to shoulder seam.
Yarn Choices That Work
Cotton is great for summer shirts obviously. I’ve used Lily Sugar’n Cream which is super cheap and works fine but it’s kinda stiff. Better for structured pieces. For something with more drape try We Are Knitters The Cotton or that Paintbox one I mentioned.
Acrylic gets a bad rap but Red Heart With Love is actually really nice for shirts. Softer than Super Saver and has good stitch definition. Plus it’s machine washable which matters for guys who aren’t gonna handwash stuff.
Wool blends work for fall/winter shirts. The Wool-Ease I used before is good. Also Caron Simply Soft has a heathered line that looks really nice and masculine. Stay away from anything too shiny or splitty though.
Common Problems
If the neckline is stretching out over time you probably need to add elastic thread to the ribbing or make it with a tighter gauge. I learned to carry a thin elastic thread along with the yarn for neck and cuff ribbing and it helps so much with keeping shape.
Armholes that gap or pull usually mean they’re too deep or the sleeves are set in wrong or… actually it could be a bunch of things. Try making the armhole shaping more gradual or adding an extra inch to the body length before starting the armholes.
If the whole thing is twisting it’s because your tension is uneven or you’re accidentally working in a spiral instead of joined rows. Make sure you’re turning your work at the end of each row and keeping track of which side is the right side.
Making It Look Professional
Blocking is non-negotiable. Pin the pieces out to the right measurements, spray with water or use a steamer, let them dry completely. This evens out the stitches and sets the shape. Especially important for cotton which can look really wonky before blocking.
Weave in ends as you go if possible because going back and doing like 30 ends at once is torture. I usually weave them in every few rows while watching TV or whatever.
Steam blocking works better than wet blocking for acrylic in my experience. Just hover the iron over it, don’t actually touch the fabric, and let the steam do the work. Acrylic can melt if you’re not careful.
Adding details like pockets or a chest pocket can make it look more intentional. Just make a small square or rectangle in your stitch pattern and sew it on before seaming the body together. Put it slightly off-center on the left chest for that shirt pocket look.
Specific Modern Design Ideas
The color block thing is really in right now. Make the body in one color and the sleeves in another. Or do horizontal stripes but keep them thick like 4-6 inches wide not tiny stripes. Looks way more contemporary.
Oversized fits are also having a moment. Make everything about 2 sizes bigger than normal with dropped shoulders. The sleeves should hit below the elbow for short sleeves. Gives it that streetwear look without being sloppy.
Cropped length is another option for younger guys or anyone fashion-forward. End the body at the natural waist or slightly above. Looks good with high-waisted pants. I made one like this in summer 2024 in black Bernat Handicrafter Cotton and it actually got worn to a concert.
The mesh or net shirts are also popular but those are honestly harder than they look because you need the structure to be right or it just looks like a bag. If you want to try it use a larger hook and a stitch pattern with lots of chain spaces. But make the ribbing really snug so it holds shape at the edges.