
Feb
Getting Your Granny Squares Started
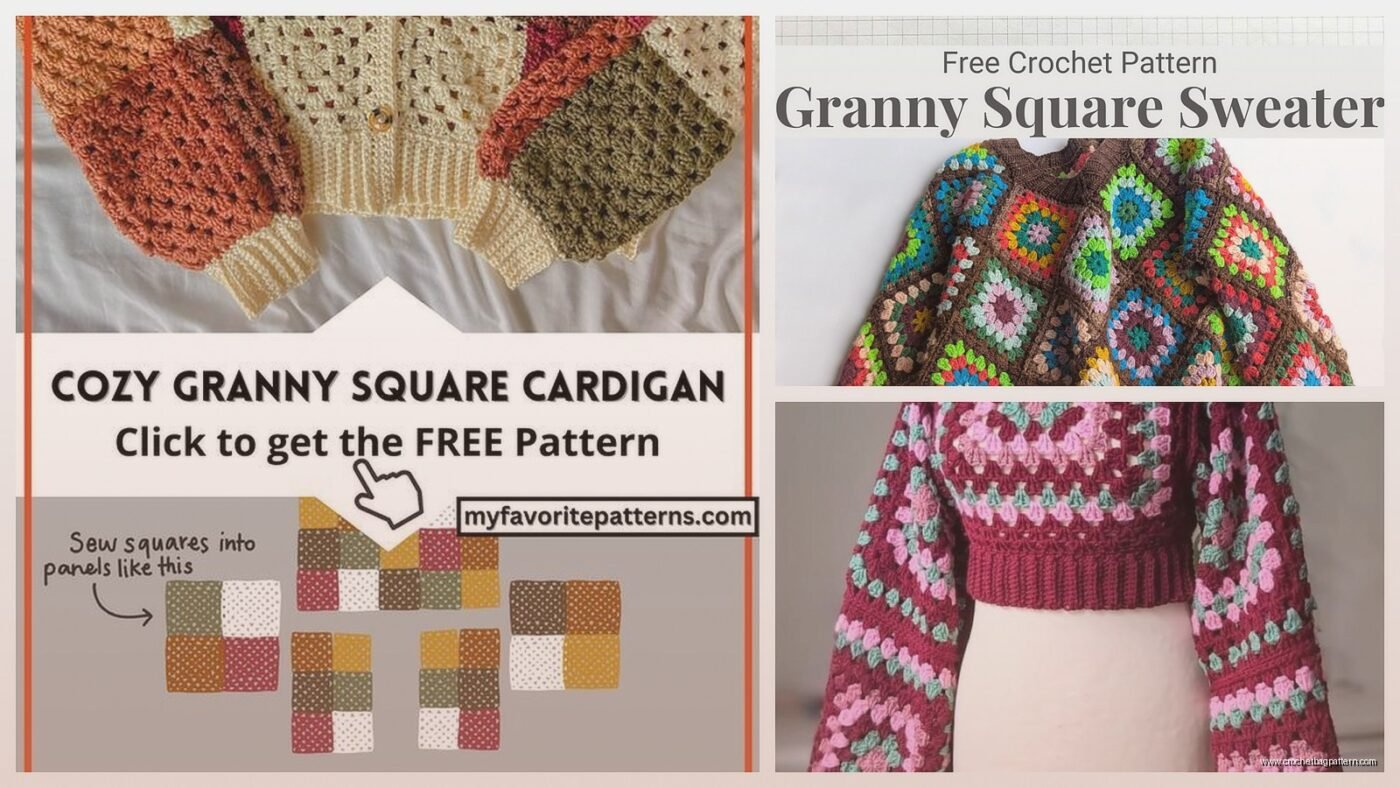
So I made this granny square sweater back in spring 2023 when I was basically living on my couch binge-watching The Bear and I just needed something to do with my hands. The whole thing took me like three weeks because I kept messing up the sizing but whatever, it worked out.
First thing you gotta do is pick your squares. I used the classic granny square pattern because honestly that’s the only one I really know how to do without looking stuff up constantly. You’re gonna need to decide how big you want each square—I did mine at about 6 inches each which seemed reasonable at the time but actually made the whole thing kinda heavy once it was done.
Yarn Choices That Actually Matter
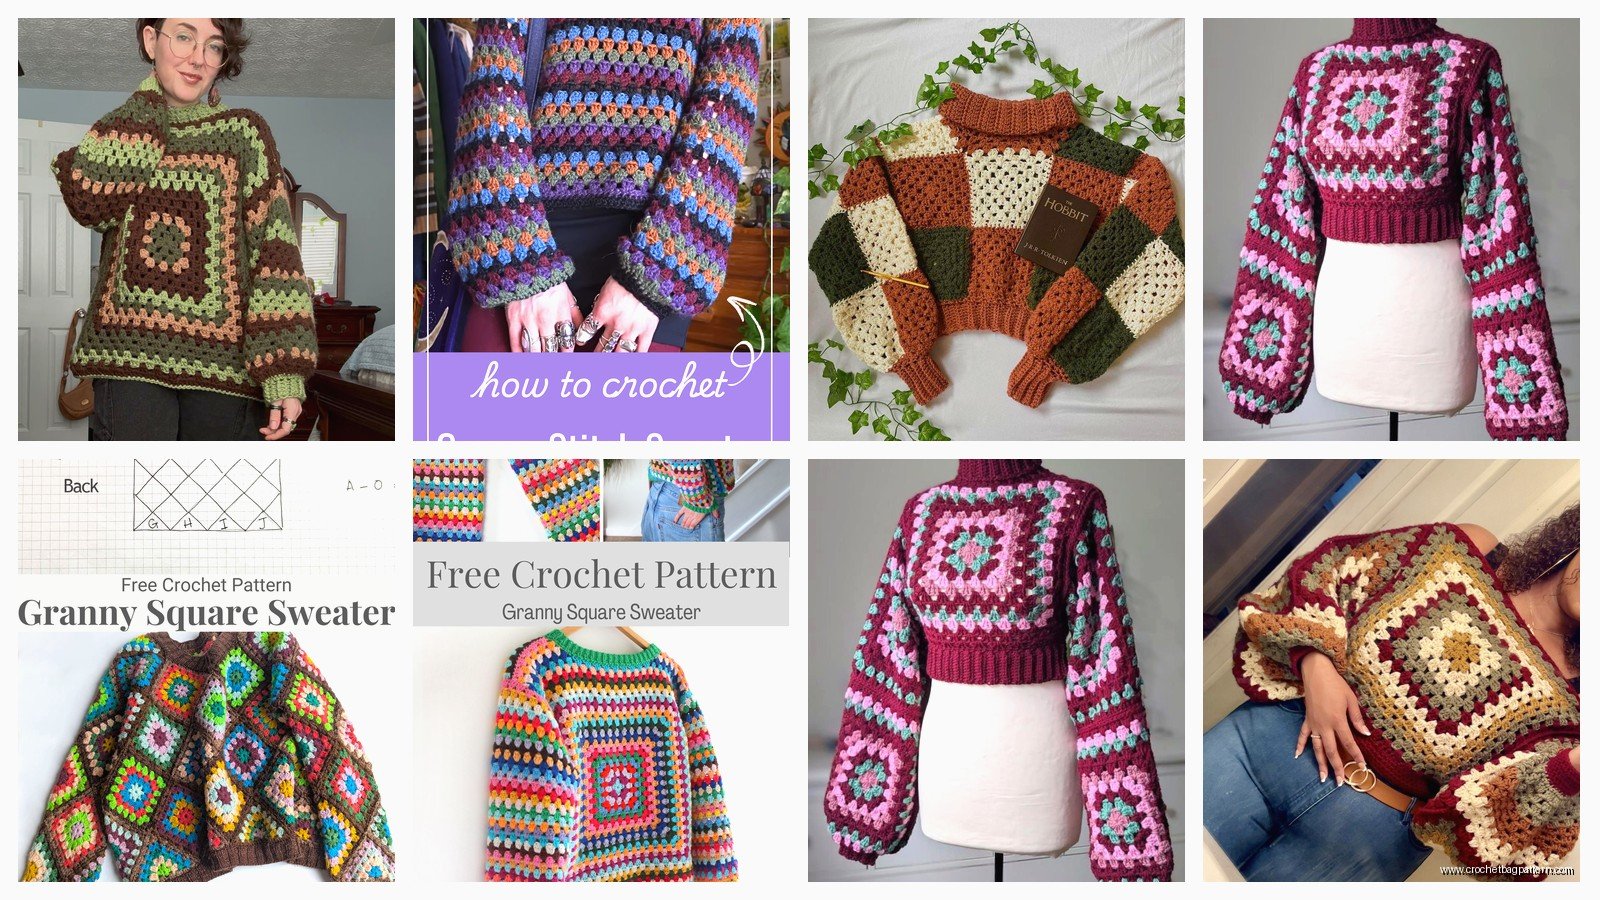
I used Lion Brand Wool-Ease for most of mine in this burgundy color that I thought would look sophisticated but really just made me look like a wine aunt. Got it from Michaels when they had that sale. You’ll need probably 8-10 skeins depending on your size, maybe more if you’re doing a bigger sweater or you crochet loose like I do.
Some people swear by acrylic but I dunno, it gets kind of squeaky when you work with it? The Wool-Ease is nice because it’s a blend so it’s not gonna break your bank but it still feels decent. I also had some Caron Simply Soft lying around that I used for a few accent squares in cream and it blended fine even though the weight was slightly different.
Making All Those Damn Squares
Okay so here’s what annoyed me the MOST about this whole project—you need like 40-50 squares depending on the size you’re making. Maybe more. I lost count honestly. And each square takes maybe 20 minutes if you’re going at a normal pace, which means you’re looking at hours and hours of just making the same thing over and over.
The basic granny square is chain 4, slip stitch to form a ring. Then chain 3 (counts as first double crochet), do 2 more double crochets in the ring, chain 2, then repeat that three more times so you have four clusters with chain spaces between them. Slip stitch to the top of your starting chain 3.
Round 2 is where you start building it out—slip stitch into the chain-2 space, chain 3, do 2 double crochets in same space, chain 1, then in the same space do 3 double crochets, chain 2, 3 double crochets to make the corner. Keep going around making corners in each chain-2 space and single chain-1 spaces along the sides.
I usually did about 4-5 rounds per square to get to 6 inches but you need to measure because everyone’s tension is different and—oh yeah my cat kept sitting on my yarn basket during this whole thing so half my squares have little fur bits woven into them permanently.
Laying Out Your Sweater Plan
This part is actually kinda fun in a puzzle way. You need to figure out how many squares wide and how many tall for the front, back, and sleeves. I did mine with 5 squares across for the front and back (so 10 total width when you think about it going around your body) and 7 squares down for length because I wanted it oversized.
For sleeves I did 4 squares around and 5 squares long but honestly I should’ve done 6 long because they ended up being three-quarter length when I wanted full length sleeves. Measure yourself or measure a sweater you already like—don’t just guess like I did.
Lay all your squares out on the floor in the shape before you start joining them. Take a picture with your phone so you remember the layout because I’m telling you right now you WILL forget and mix them up.
Joining Everything Together
There’s like seventeen different ways to join granny squares and everyone has opinions about which is best. I used the join-as-you-go method for most of it where you crochet them together during the last round of each square, but then I got impatient and just whip stitched some of them together with a yarn needle.
For the join-as-you-go: when you’re doing the last round of a square that will connect to another square, instead of doing your chain-1 or chain-2 for corners, you slip stitch into the corresponding space on the square you’re joining to, then continue your stitches. It’s faster than sewing later but you gotta be more organized about the order you make your squares in.
The whip stitch method is just taking a yarn needle and sewing through the loops on the edges of two squares, going back and forth. It’s meditative I guess if you’re into that but mostly it’s just tedious.
Constructing The Actual Sweater Shape
So once you have all your squares joined into rectangles—two big ones for front and back, two smaller ones for sleeves—you need to actually make it into a sweater shape. This part honestly confused me more than it should have.
Fold the front and back pieces so the shoulders meet and join about 2 squares worth on each side, leaving the middle open for your neck. I didn’t leave enough neck room the first time and had to undo it because I literally couldn’t get my head through, so make sure you’re leaving like 3 squares width open in the center.
Then you’re gonna attach the sleeves to the armholes. The sleeve rectangle gets sewn along the edges where the front and back panels aren’t joined—this forms the shoulder and underarm area. I always get confused about which edge goes where but basically the long edge of the sleeve rectangle should run from your shoulder down to your underarm.
After the sleeves are attached to the body, you need to sew up the side seams of the body and the underarm seams of the sleeves. Turn it inside out (well, granny squares don’t really have a wrong side but you know what I mean) and sew from the bottom hem up to the armpit, then continue down the sleeve from armpit to cuff. Do this on both sides.

Finishing Touches and Borders
The edges on mine were looking kind of floppy and unfinished so I added a border around the bottom hem, cuffs, and neckline. Just single crochet around each opening—for the neck I did two rounds of single crochet to make it lay flatter and not stretch out weird when I wear it.
You could add ribbing if you want it to look more professional but I didn’t bother because… I mean it’s already a granny square sweater, it’s not trying to be subtle or polished looking. That’s kinda the whole vibe.
Things I’d Do Differently
I would’ve used a lighter weight yarn honestly. The Wool-Ease is worsted weight and with 40-something squares it got heavy fast. Maybe a DK weight would’ve been better or even—actually I saw someone use Bernat Softee Baby yarn for one and it looked way more drapey and less bulky.
Also I would’ve planned my color distribution better because I tried to do a random scattered pattern with my cream accent squares but they ended up all clustered on one side somehow and it looks lopsided. Either commit to a pattern or truly randomize it by pulling squares from a bag without looking.
The sleeve length thing I mentioned already but seriously measure that twice because unpicking all those seams to add another row of squares was not fun at all.
Actual Wear and Care
I’ve worn this thing probably a dozen times since I made it and it’s holding up fine. It’s not like, a going-out sweater unless you’re going somewhere casual. More of a farmers market, running errands, hanging out at home kind of thing. It’s warm but all those little holes between the stitches mean it’s breathable too so it’s actually good for that weird spring weather.
I wash it in a garment bag on delicate and lay it flat to dry. It stretched out a tiny bit after the first wash but not too bad. The squares themselves stay pretty intact because of how granny squares are constructed—they’re sturdier than they look.
One thing nobody tells you is that your phone and keys and stuff will catch on the open stitches if you shove them in your pockets while wearing it, so just be aware of that I guess.