
Feb
The Squares Themselves
So last February I was making one of these while binge-watching that weird cooking competition show, and honestly the granny squares are the easy part but also the part where you can mess up your whole sweater if you’re not paying attention to size. I used Red Heart Super Saver for most of mine because I’m not spending $30 per skein on something I’m gonna wear to the grocery store. The cream color and that burgundy shade they call… I think it was Claret? Yeah that one.
Each square starts with a magic circle or just chain 4 and slip stitch if you’re like me and forget how to do the magic circle half the time. Then you’re doing:
- Chain 3 (counts as first double crochet)
- 2 double crochet in the ring
- Chain 2 for the corner
- Repeat that whole 3-dc and chain-2 thing three more times
- Slip stitch to join
Round two is where people get weird about it but it’s just double crochets in the spaces and 3-dc, chain 2, 3-dc in each corner space. I made like 60 squares total and they were all supposed to be the same size but obviously they weren’t because tension is apparently something I can’t control consistently.
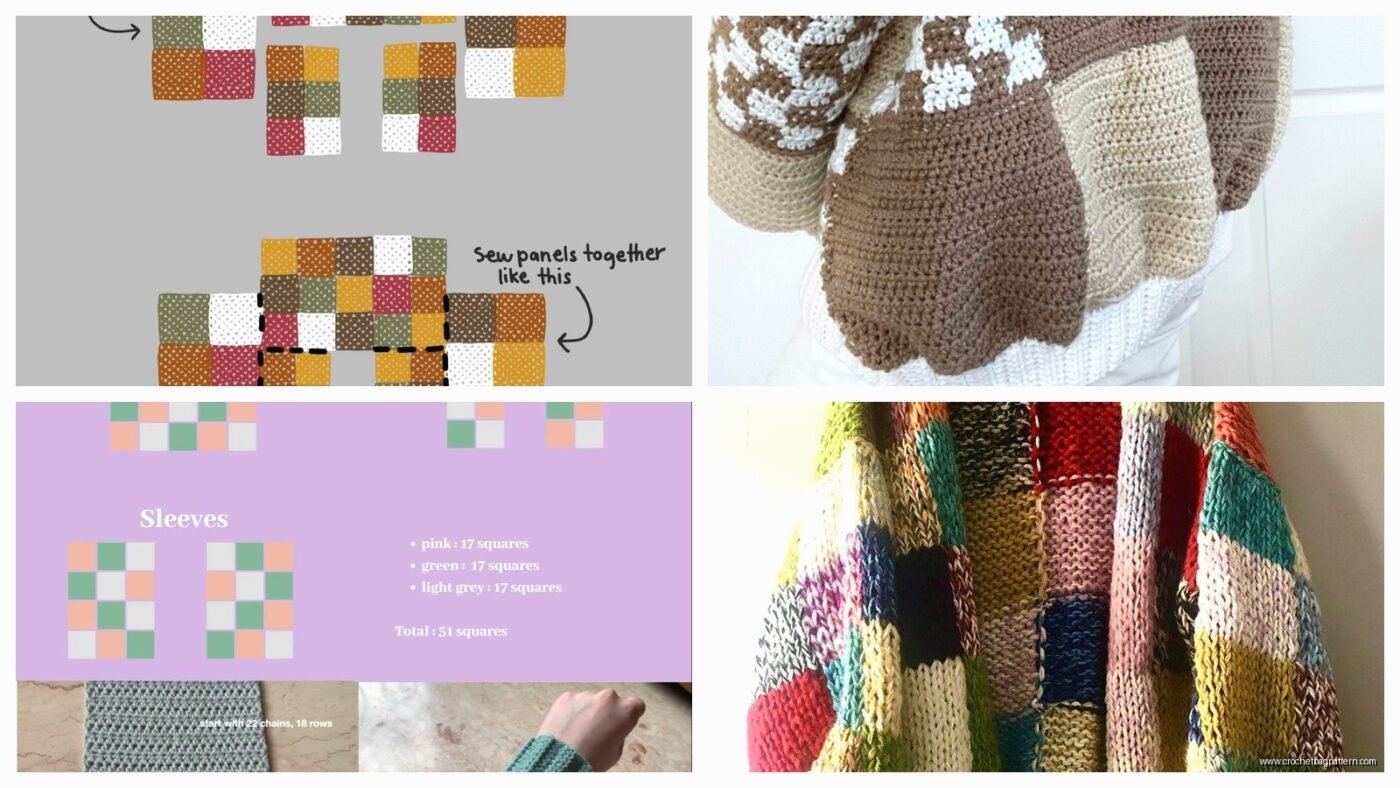
How Many Squares and What Size
This drove me insane by the way, figuring out how many I actually needed. I started with 5-inch squares which seemed reasonable but then realized I’d need like a million of them so I frogged about fifteen squares and started over with a chunkier yarn. Ended up using a 6mm hook with the Red Heart and some Lion Brand Vanna’s Choice I had lying around from another project.
For a medium-sized cardigan you’re looking at roughly:
- Back panel: 12 squares (3 wide, 4 long)
- Front panels: 6 squares each side (so 12 total)
- Sleeves: 8-10 squares per sleeve depending on how long you want them
But honestly I just kept making squares until it looked right when I laid them out on my bed. My cat kept sitting on them which didn’t help.

Color Planning Which I Didn’t Really Do
Some people make these elaborate color charts and patterns for how their squares should look. I had three colors going and just grabbed whatever was closest while I was working. The burgundy, cream, and then this gray color from Caron Simply Soft that I think they don’t make anymore? It turned out fine, kind of random but in a way that looks intentional if you don’t think about it too hard.
You can do all one color, you can do each square in different colors, you can do the rounds in different colors—whatever. The rounds-in-different-colors thing looks cool but you’re gonna have SO many ends to weave in and that was the most annoying part of this whole thing honestly. I was weaving in ends for what felt like days. Just sitting there with my yarn needle thinking about my life choices.
Joining The Squares
There’s like fifty methods for this and everyone swears their way is best. I used the join-as-you-go method for some of it and then got lazy and just whip-stitched a bunch together which probably isn’t what you’re supposed to do but it worked.
The join-as-you-go thing: when you’re doing the last round of your square, you slip stitch it to the square next to it in the corner spaces. It’s kind of fiddly but it means less sewing later. You lay the completed square next to your working square, and when you get to a corner, you yarn over, insert hook through the corner space of the other square, pull up a loop, and complete your slip stitch or single crochet or whatever you’re using to join.
For whip stitching I just lined up the squares and sewed through the back loops with the same yarn. Not pretty on close inspection but who’s inspecting that closely.
Constructing The Actual Cardigan Shape
Okay so once you have all your squares you gotta lay them out and figure out the construction. I did mine with the back panel as one solid piece, then two front panels that don’t meet in the middle because it’s an open cardigan. The sleeves are the tricky part because you need to—wait, first you need to leave armhole openings.
When you’re joining your squares for the body, you connect the back to the fronts at the shoulders but leave a gap on each side for the armholes. Mine was about 4 squares down from the shoulder on each side. Then the sleeves attach into those openings.
For sleeves I made rectangles of squares and then seamed them into tubes, but you could also make them flat and seam the whole underarm in one go. I did it the harder way probably because I wasn’t thinking ahead.
The Edges and Finishing
You’re gonna want to put some kind of border around the whole thing or it looks unfinished and floppy. I did two rounds of single crochet around all the edges—the front opening, the bottom hem, the sleeve cuffs, and the neckline. Used the burgundy color for all of it to tie it together or whatever.
For the front bands where a normal cardigan would button, I just did single crochet up one side, around the neck, and down the other side. Didn’t add buttons because I was planning to wear it open anyway and also I hate sewing on buttons.
The neckline was weird to figure out because of the square shapes making it all angular. I just kind of… worked extra stitches in the corners to make it lay flat and skipped stitches where it was pulling. Very technical, I know.
Sizing Issues and Adjustments
My first attempt was way too small because I didn’t account for the fact that granny squares don’t have much stretch. Had to add an extra column of squares down each front panel. Then it was too wide in the shoulders so I took out some stitches in the shoulder seams to bring the sleeve attachment points in closer.

If you’re making this for someone else definitely make more squares than you think you need because you can always leave some out but you can’t add them easily once you’ve joined everything. Unless you wanna take it all apart which, no thanks.
The length is easier to adjust—just add or remove a row of squares from the bottom. I made mine hip-length, like 4 squares long, but you could do it shorter like a cropped thing or longer like a coat situation.
Yarn Amounts
I used probably 8 or 9 skeins total? Maybe more, I wasn’t really counting. The Red Heart skeins are 7 oz each so that’s like 60-ish ounces of yarn. Get more than you think you need because running out of a color halfway through is the worst and dye lots are a thing that will mess you up.
If you’re using different weights of yarn for different squares you’re gonna have the sizing problem I mentioned earlier. Stick with one weight throughout or you’ll be there forever trying to make a worsted weight square match up with a chunky one.
Things I’d Do Different
Block the squares before joining them. I didn’t do this and some of them were wonky. Just pin them to shape while damp and let them dry, it makes the joining so much easier.
Weave in ends as you go instead of saving them all for the end like some kind of psychopath.
Maybe use a lighter color scheme because the dark colors show every single cat hair and piece of lint.
Actually count my squares and plan the layout instead of just vibing it, but that’s probably not gonna happen even next time.
The whole thing took me maybe three weeks of on-and-off crocheting? Could’ve done it faster but I kept getting distracted and also I frogged those squares that one time. It’s a good TV-watching project once you get the rhythm down and you’re not thinking about each stitch anymore. Just zone out and make squares until you have a sweater.