
Feb
Basic Cup Cozy That Actually Works
So I made my first one in January 2023 when I was basically living at this coffee shop trying to avoid my roommate’s new boyfriend who never left our apartment. The paper sleeves kept falling off and I had this random skein of Lion Brand Wool-Ease in like mustard yellow that I needed to use up.
You’re gonna need worsted weight yarn, whatever you have honestly. I’ve used Red Heart Super Saver, Caron Simply Soft, that Bernat stuff from Michaels. Hook size depends on how tight you crochet but I use a H/5.0mm or I/5.5mm usually. The whole point is making something thick enough that you don’t burn your hand but not so thick it’s weird and bulky.
Measuring Your Actual Cup
This is the part that annoyed me SO much because every pattern online assumes you have a medium Starbucks cup but like… I was making this for my reusable cup from Target that’s shaped completely different? Measure around the widest part of your cup with a tape measure or just wrap your starting chain around it. You want it snug but not strangling the cup.
For a standard disposable coffee cup that medium size, you’re looking at about 10-11 inches around. The height is usually around 3-4 inches but I make mine shorter, maybe 2.5 inches, because who needs more than that.
The Actual Pattern I Use
Chain enough to wrap around your cup – usually around 30-35 chains with worsted weight. Join with a slip stitch to make a ring but don’t twist it, that’s so annoying to fix later.
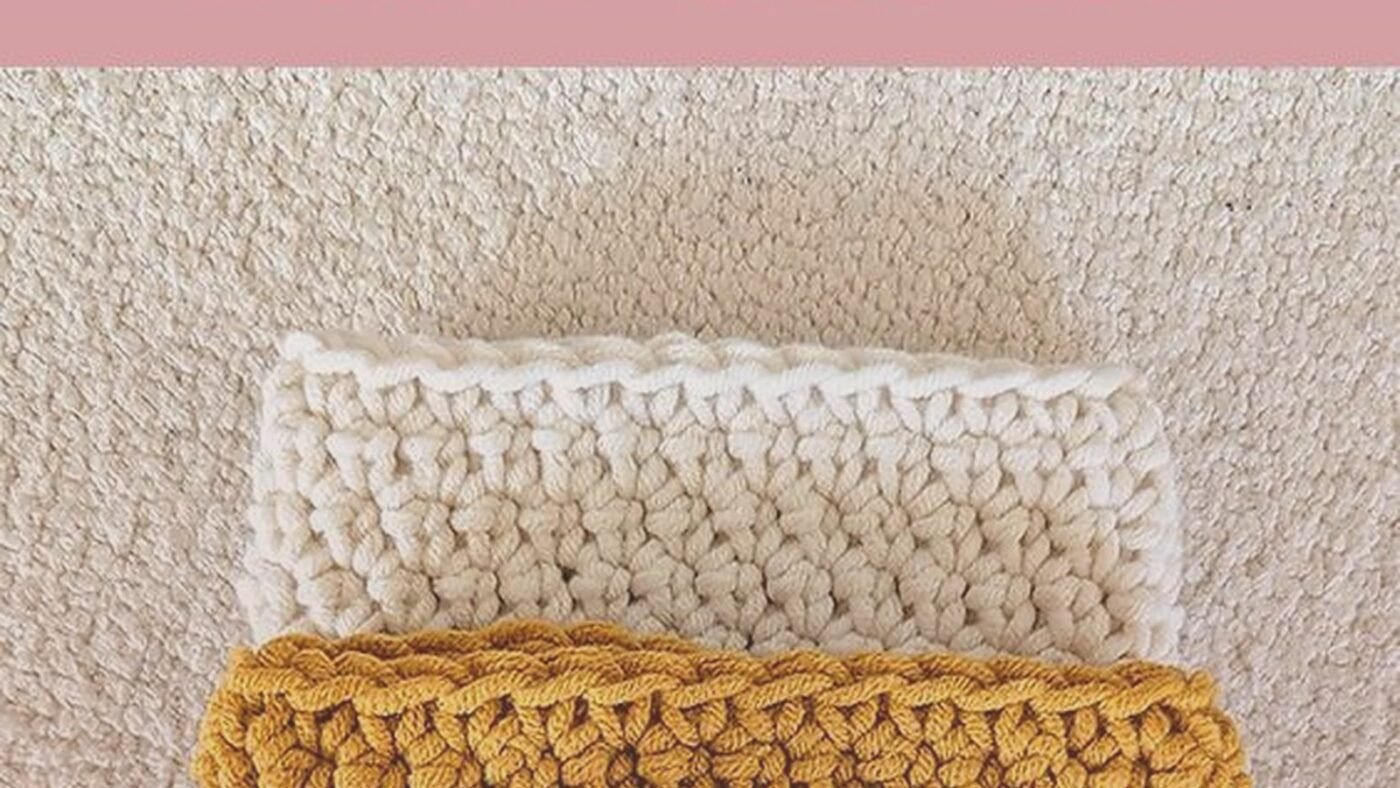
Round 1: Chain 2 (doesn’t count as stitch because I hate when it does), half double crochet in each chain around. Join with slip stitch to first hdc. You should have the same number of stitches as chains.
Round 2-6: Chain 2, hdc in each stitch around, join. Just keep going until it’s as tall as you want.
I use half double crochet because it works up faster than single crochet but isn’t as holey as double crochet. You don’t want your fingers touching the hot cup through gaps in your stitches – learned that the hard way.
The Button Closure Thing
Okay so instead of sewing the cozy into a permanent tube, I make mine flat with a button closure because then it actually fits different size cups and you can wash it easier. When I’m done with the rounds, I don’t join them into a circle – wait no, you do make it in a circle but then you… okay let me start over.

Make it as a flat rectangle instead: Chain your starting chain (same length as before), then just chain 2 and turn at the end of each row instead of joining in a circle. Work back and forth in rows of hdc until you have your height. This way you get a flat piece that wraps around.
Row 1: Chain 30-35, hdc in 3rd chain from hook and each chain across. Turn.
Row 2: Chain 2, hdc across. Turn.
Repeat Row 2 until you have 8-10 rows or whatever height you want.
Adding the Button Band
On one short end, work a row of single crochet along the edge. Make a buttonhole by chaining 2 and skipping 2 stitches in the middle of that edge. On the other short end, just do single crochet with no hole – that’s where you’ll sew your button.
I use those big wooden buttons from the craft store, the 1-inch ones. Sew it on with regular sewing thread, the yarn is too bulky and looks dumb.
Variations That Don’t Suck
The ribbed version looks more professional I guess. Instead of hdc, you work in the back loop only which creates vertical ridges. It stretches better too so it fits more cup sizes.
Chain your starting chain, then: hdc in back loop only for every row. That’s literally it. The texture is different and my mom thought I bought it from somewhere when I made her one which was cool.
Color Stripes
Change colors every 2 rows if you want stripes. I made one with Caron Cakes because everyone was obsessed with that yarn in like 2022 or whenever, and it did look pretty good with the color changes happening automatically. But honestly those cakes are expensive for what you get and you only need maybe 50 yards total for a cozy.
My cat kept attacking the ball of Caron Cake while I was working and got it tangled under the couch so that was a whole thing.
The Granny Square Version
This one’s cute if you have scraps. Make 2 granny squares big enough to cover the front and back of your cup – probably 4 or 5 rounds each with worsted weight. Then single crochet them together along three sides, leave one short side open. Add a button loop and button on the open side.
The squares end up being roughly 4×4 inches. Start with a magic ring or chain 4 and join:
Round 1: Chain 3, 2 dc in ring, chain 2, (3 dc, chain 2) three times, join to top of ch 3.
Round 2: Slip stitch to chain space, chain 3, (2 dc, chain 2, 3 dc) in same space for corner, *chain 1, (3 dc, chain 2, 3 dc) in next chain space for corner*, repeat around, chain 1, join.
Keep going with more rounds if you need bigger squares. Once you have 2 squares, hold them wrong sides together and single crochet through both layers along the sides and bottom.
Tension Problems
If you crochet really tight like I do sometimes when I’m watching something intense (was binging Breaking Bad for the second time during this), your cozy might not stretch enough to get on the cup. You gotta loosen up or use a bigger hook. Or if you’re loose, size down because a floppy cozy that slides around is pointless.
Test it on your cup after like 3 rows to see if it’s gonna fit. Way easier to frog it early than finish the whole thing and have it be wrong.
Finishing and Weaving Ends
Weave in your ends with a yarn needle, nothing special. I usually leave them kind of long, like 6 inches, before I trim them because I’m paranoid about them coming undone in the wash even though that basically never happens.
The first cozy I made (the mustard yellow breakup one) I didn’t weave in the ends properly and they started poking out after a few uses which looked trashy. Just take the extra minute to do it right, weave them through like 5-6 stitches back and forth.
Washing These Things
Throw them in a lingerie bag and wash on delicate with cold water. I’ve put Red Heart ones in the dryer on low and they were fine but the Wool-Ease one felted a tiny bit so be careful with anything that has actual wool in it. Caron Simply Soft air dries fast anyway.
They get coffee stains obviously. I’ve used Shout spray on them before washing and it helped but some discoloration is gonna happen. The darker colors hide it better.
Sizing for Different Cups
Small disposable cups need maybe 8-9 inches around and 2-3 inches tall. Large/venti situation needs 12-13 inches around and can go up to 4 inches tall. For those huge gas station travel mugs honestly you might need 2 skeins of yarn and a bigger hook, or just don’t bother because those usually come with their own insulation built in.
I made one for my friend’s Yeti rambler which has that tapered shape – wider at top than bottom. For that I increased stitches every other row by doing 2 hdc in a stitch every 5 stitches or so. It worked okay but wasn’t perfect, the taper is hard to match exactly.
Design Ideas I’ve Tried
Appliqués are cute if you’re into that. I crocheted a little flower and sewed it on one, used the same mustard yellow with a brown center. Looked autumn-ish I guess. You can also do surface crochet to add lines or patterns on top of the finished cozy but I haven’t really figured out how to make that not look messy.
Embroidery with yarn works too – just use a yarn needle and do some simple stitches like backstitch to write words or make shapes. I tried to embroider “coffee” on one and it looked like a kindergartener did it so maybe practice that first on something else.
The bobble stitch version is textured and fun but takes way longer. Instead of regular hdc, you make bobbles every few stitches. To make a bobble: yarn over, insert hook, pull up loop, yarn over pull through (4 loops on hook), yarn over insert in same stitch, pull up loop, yarn over pull through, do that like 3-4 times until you have a bunch of loops, then yarn over and pull through all of them. Creates a puffy bump.
That’s probably too complicated for a first cozy honestly, just stick with basic stitches until you get the construction figured out.