
Feb
Getting Your Materials Together
So the biggest thing with amigurumi is you really need a smaller hook than you think. Like I always used whatever hook the yarn label suggested but that’s gonna give you these weird gaps where the stuffing shows through. I usually go down two sizes at least. For most of my plushies I use a 3.5mm or 3.0mm hook even with yarn that says to use 5.0mm.
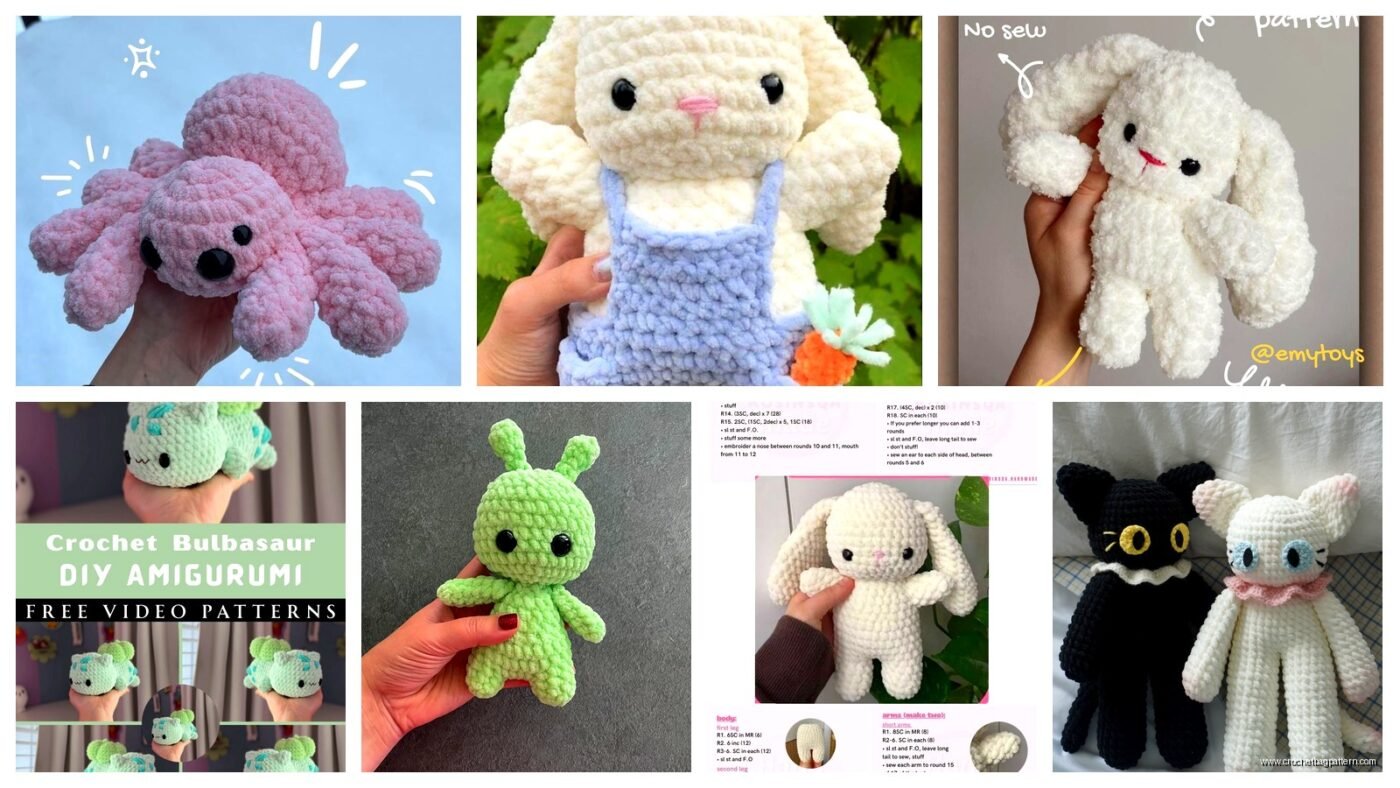
Yarn wise I’ve tried a bunch. Red Heart Super Saver works fine honestly and it’s cheap which matters when you’re starting out and might mess up. I made this little octopus last winter during that whole mess with my ex and I just grabbed whatever was at Michael’s which ended up being Bernat Softee Baby yarn in that pale yellow color. It actually worked out really well because it’s machine washable and if you’re giving these to kids that matters. Lily Sugar’n Cream is terrible for plushies though don’t use cotton yarn it doesn’t have the right stretch and your stitches will be all uneven.
The Magic Ring Thing Everyone Talks About
Okay so most patterns start with a magic ring and I avoided this for SO long because the tutorials made it look complicated. But you gotta learn it because starting with chain 2 and working into the first chain is annoying and leaves a little hole. The magic ring lets you cinch everything closed.
Here’s how I finally figured it out: wrap the yarn around your fingers twice, pull a loop through, chain one, then do your single crochets into the ring. Before you pull it tight make sure you know which tail to pull because I still sometimes pull the wrong one and nothing happens and I feel like an idiot. You want to pull the tail that’s coming from the center of the ring not the working yarn.
Reading Patterns vs Just Winging It
Most amigurumi patterns are written in this shorthand that looks confusing at first. Something like “Rnd 1: 6 sc in magic ring [6]” and “Rnd 2: inc around [12]” and then “Rnd 3: (sc, inc) around [18]”. The number in brackets is your stitch count which you should actually count even though it’s tedious because if you’re off by round 8 you’ll have no idea where you went wrong.
The abbreviations you’ll see constantly:
- sc = single crochet
- inc = increase (two single crochets in same stitch)
- dec = decrease (single crochet two stitches together)
- rnd = round
- rep = repeat
I learned without patterns though so for a long time I just made sphere shapes by increasing every round until it was wide enough then doing straight rounds then decreasing. You can make like 80% of animals this way if you think about it – ball head, oval body, little cylinders for arms and legs.
The Increasing and Decreasing Formula
There’s actually a pattern to how you increase to make a sphere shape. You start with 6 stitches usually, then:
- Increase in every stitch (12 total)
- Sc, inc repeated (18 total)
- Sc 2, inc repeated (24 total)
- Sc 3, inc repeated (30 total)
You keep going like that adding one more sc between increases each round. To decrease for the bottom of the head or whatever you do it in reverse. This makes a really smooth sphere without weird lumps.
What annoyed me SO much when I was learning is that patterns don’t always write it the same way. Some will write out (sc, inc) x 6 and some will write sc, inc around and some will write it other ways and you have to just… figure out they mean the same thing.
Stuffing Without Making It Lumpy
Use polyfil stuffing not like cotton balls or fabric scraps or whatever. I tried using fabric scraps once to be economical and it was lumpy and weird. Fairfield Poly-Fil is the brand I get usually. The key is to stuff as you go especially with narrow parts like necks or arms. If you crochet the whole arm then try to stuff it you can’t get the stuffing down to the bottom properly.
Add small bits at a time and use the back of your crochet hook or a chopstick to push it into the corners. Over-stuffing makes it too hard and under-stuffing makes it floppy. You want it firm but still squeezable. My cat keeps trying to steal the stuffing every time I open the bag which is actually so annoying because then there’s bits of polyfil all over the carpet.
Facial Features and Safety Eyes
Safety eyes are those plastic eyes with the washer back that snaps on. They come in different sizes usually 6mm to 15mm or bigger. You have to put them in BEFORE you finish stuffing and close up the head because the washer goes on the inside. I always measure with my fingers like how many stitches apart they should be because eyeballing it (no pun intended) leads to wonky faces.
The standard placement is usually around round 10 or 11 if you started with 6 stitches, and about 6-8 stitches apart depending on the size of the head. But honestly I still mess this up sometimes and have to really force the washer back off and try again which damages the yarn a bit.
For kids under 3 you’re not supposed to use safety eyes because they can still pull them out. In that case you embroider eyes with black yarn. I’m not great at embroidery so mine always look a little derpy but honestly that adds character.
Sewing Pieces Together
Leave a long tail when you finish each piece because you’ll use that to sew it onto the body. I use a yarn needle which is just a big blunt needle with a big eye. Whip stitch usually works fine – you just go back and forth through the stitches of both pieces.
The thing nobody tells you is that placement matters so much for the personality. Like if you put arms higher up it looks like the creature is shrugging, lower down looks more natural. I usually pin pieces with regular sewing pins first and walk away and look at it from across the room before I commit to sewing.
Easy First Project Ideas
Start with something that’s mostly spheres. A jellyfish is literally just a ball with chains hanging off it. An octopus is a ball with 8 stuffed tubes. I made that yellow octopus I mentioned in like 3 hours while watching Love is Blind (the episode where that guy brings his mom to… wait never mind different topic).
Bees are good too – yellow and black stripes on an oval body, small oval for head, little wings you don’t even have to stuff. Mushrooms are just a cone and a sphere. Once you can make a sphere and a cylinder you can basically make anything if you think about the shapes.
Stuff That’s Harder Than It Looks
Flat pieces like ears or wings seem easy but getting them symmetrical is annoying. I usually make one, then when I make the second one I keep holding them up together to compare.
Anything with color changes mid-round is fiddly because you get those little jogs where the color changes. There are techniques to minimize this but I usually just orient that part toward the back.
Really tiny pieces like fingers or little horns are so annoying to stuff and sew on that sometimes I just skip them or simplify.
Tension Stuff
Your tension is gonna be inconsistent at first and that’s fine. Amigurumi is actually more forgiving than like a sweater because small inconsistencies just look handmade in a good way. The main thing is keeping it tight enough that you don’t get gaps. If you can see through your stitches your tension is too loose.
My tension gets tighter when I’m stressed which I noticed during that winter period I mentioned – the octopus I made then is noticeably firmer than ones I made later when things were better. Same pattern, same yarn, different tension.
When Patterns Don’t Make Sense
Sometimes you’ll follow a pattern exactly and it still looks wrong. The stitch counts will be off or the shaping is weird. Free patterns especially can have errors because they’re not professionally edited. If something seems really wrong trust your gut and adjust. I’ve definitely modified patterns mid-project because the head was too small for the body or whatever.
Also some pattern writers use UK terms and some use US terms and the stitches are named differently. A US single crochet is a UK double crochet which is confusing. Most patterns will specify but not always.
Yarn Weight Actually Matters
I mostly use worsted weight (size 4) yarn because that’s what’s everywhere and makes a good medium-sized plushie. If you use bulky yarn with a bigger hook you’ll make bigger plushies faster but they eat up yarn quickly. If you use sport or DK weight (size 3) with a smaller hook you get smaller more detailed plushies but it takes forever.
That Bernat Softee Baby I mentioned earlier is size 3 and the octopus ended up smaller than I planned but it actually worked out fine. Caron Simply Soft is size 4 and I’ve used that a ton – it’s soft and comes in good colors and doesn’t split as much as Red Heart.
Dealing With Yarn Splitting
Some yarn splits when you’re working with it which means your hook catches individual plies instead of the whole strand. It’s so frustrating. Usually cheaper acrylic yarn does this more. If your yarn is splitting a lot try a hook with a smoother head or switch yarn brands. Ergonomic hooks with the rubber grip are easier on your hands too if you’re making multiple plushies.
Keeping Track of Rounds
Use a stitch marker to mark the beginning of each round. I use those little plastic locking ones or even just a piece of scrap yarn in a different color. Move it up as you complete each round. Otherwise you’ll lose track of where you are especially on rounds with no increases or decreases where every round looks the same.
I still sometimes forget to move my marker and then I’m like wait is this round 14 or 15 and I have to count back from the beginning which is annoying.